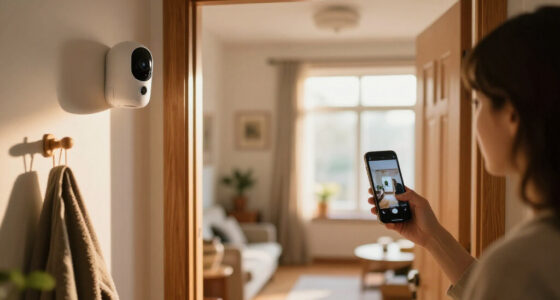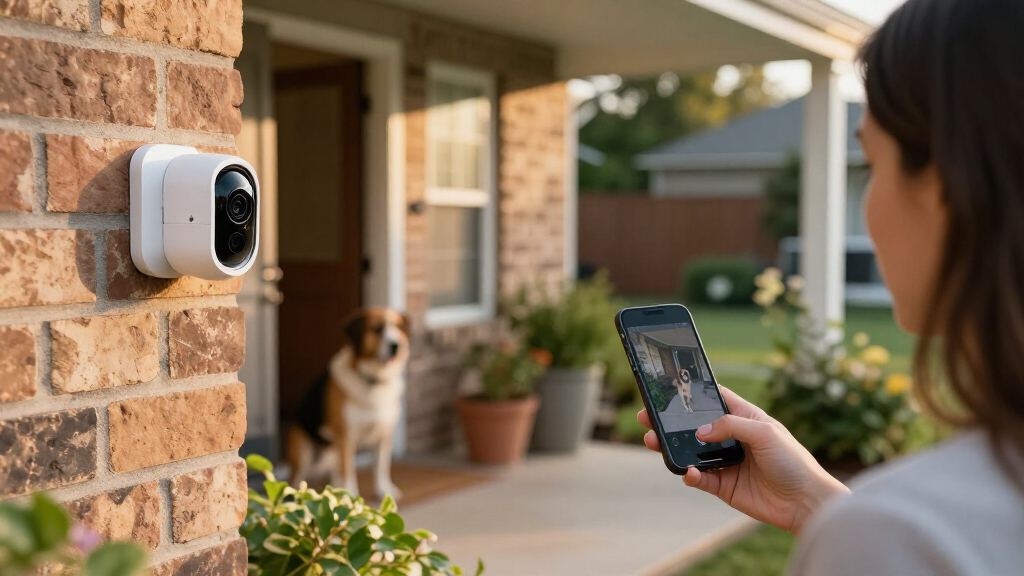

Set up smart home security cameras by choosing suitable locations, mounting and connecting each camera, configuring secure access and alerts, then testing recordings and notifications. This guide is for beginners installing indoor or outdoor cameras in a home; basic smartphone and Wi-Fi use is enough. Allow about 1-3 hours, with extra time if you need to run power cables or adjust your network.

Get home appliances delivered free with Prime
- Fast, free delivery on millions of items
- Prime Video, Amazon Music and more included
- Member-only deals all year

Blink Outdoor 4 Wireless Smart Security Camera System (5 Cameras)
- ✔ Camera count: 5
- ✔ Camera resolution: 1080p HD
- ✔ Field of view: 143° diagonal
Blink Outdoor 4 Wireless Smart Security Camera System, 3 Cameras, 2-Year Battery Life
- ✔ Camera count: 3
- ✔ Video resolution: 1080p HD
- ✔ Battery life: Up to 2 years (claimed)
Blink Outdoor 4 Wireless Smart Security Camera System (2 Cameras, Sync Module Core)
- ✔ Camera count: 2
- ✔ Video resolution: 1080p HD
- ✔ Battery life: Up to 2 years (claimed)
Difficulty: Beginner | Time: 1-3 hours, depending on camera count and wiring
What You’ll Need
Tools & Materials:
- Smartphone or tablet with the camera maker’s app
- Smart home cameras and included power adapters, batteries, or mounting hardware
- Home Wi-Fi network name and password
- Drill and screwdriver if the camera requires fixed mounting
- Ladder for high mounting points, if needed
- Measuring tape and pencil
- MicroSD card or subscription plan if required for recording storage
Knowledge:
- Basic smartphone and app use
- How to connect a device to your home Wi-Fi
- How to use a drill safely if installing fixed mounts
Check each camera’s Wi-Fi band, power requirements, weather rating, storage options, and app requirements before opening the box. Many cameras use 2.4 GHz Wi-Fi even when your router also has 5 GHz. Confirm that your router offers the required band. Ask a landlord or property manager before drilling or mounting cameras on shared or rented property. Avoid pointing cameras into neighbors’ windows or other private areas.
Blink Outdoor 4 Wireless Smart Security Camera System (5 Cameras)
When we want to monitor several approaches to a home, this five-camera bundle is the most complete starting point in the lineup. It can cover more than the usual front door and driveway combination, leaving room to watch a side entrance, backyard, or detached area. Compared with the three-camera kit, it reduces the need to decide which priority location must go unmonitored; compared with the two-camera system, it is better suited to a property with multiple access points.The core camera experience is consistent across all three options: 1080p live view, infrared night vision, two-way audio, and Alexa compatibility. Wireless installation makes placement more flexible than a wired system, and the stated battery life of up to two years can reduce routine battery changes. That figure should be read as a maximum claim, not a promise for every location or pattern of use. The cameras take two AA lithium batteries each, and those batteries are not rechargeable.The main cost of choosing more coverage is managing more devices and their power needs. More cameras also do not solve the system’s storage caveat: the included Sync Module Core has no local storage included, while cloud storage and person alerts can depend on a subscription. This is our top pick for coverage, not for buyers who want a fully self-contained recording system with no recurring plan or accessory purchase.
Pros:
- Five cameras provide the broadest bundled coverage of these options.
- 1080p live view, infrared night vision, and two-way audio support everyday monitoring.
- Wireless placement and Alexa compatibility make setup and voice control straightforward.
- Up to two years of claimed battery life can reduce frequent maintenance.
Cons:
- The included Sync Module Core does not provide local storage.
- Person alerts and cloud recording features may require a subscription.
- Each camera uses two non-rechargeable AA lithium batteries.
Best for: Households that want to monitor several outdoor entrances or zones from one wireless camera bundle.
Not ideal for: Buyers who only need one or two viewpoints, want rechargeable batteries, or require local recording without purchasing additional equipment.
Bottom line: We recommend this bundle when broad coverage matters more than minimizing device count or avoiding optional storage costs.
“We recommend this bundle when broad coverage matters more than minimizing device count or avoiding optional storage costs.”
Blink Outdoor 4 Wireless Smart Security Camera System, 3 Cameras, 2-Year Battery Life
The three-camera bundle is the sensible middle choice for homes that have more than two important viewpoints but do not need the five-camera system’s broader spread. We can assign cameras to a front entrance, a rear access point, and another high-priority area without filling every side of a smaller property with hardware. Compared with the two-camera option, it gives us another angle in the initial kit; compared with the five-camera bundle, it keeps the installation and device count more restrained.On core capabilities, it does not give up the basics: the package includes 1080p video, infrared night vision, two-way audio, enhanced motion detection, and Alexa integration. Battery-powered cameras can be mounted where wiring would be inconvenient, and the product claims up to two years of battery life. That can simplify upkeep, though actual longevity will depend on usage and conditions, and the included AA lithium batteries are not rechargeable.Its position in the middle is about scale, not a special feature advantage. The supplied details do not identify a different image or storage system from the other bundles. As with the two- and five-camera kits, the Sync Module Core lacks local storage, and person detection requires an optional subscription. Choose this option for a deliberately limited three-point plan; if you already know you need extensive perimeter coverage, the five-camera bundle is the more direct fit.
Pros:
- Three cameras suit a moderate coverage plan with several key outdoor locations.
- 1080p live view, infrared night vision, and two-way audio match the core features of the other bundles.
- Wireless setup offers flexibility where power wiring is inconvenient.
- Works with Alexa for compatible voice-control routines.
Cons:
- Local storage is not included with Sync Module Core.
- Person detection requires an optional subscription.
- AA lithium batteries are non-rechargeable, and stated battery life can vary with use.
Best for: Buyers with three priority monitoring locations who want more coverage than a starter kit without a five-camera setup.
Not ideal for: Large properties with many entrances, or buyers who need included local recording and subscription-free person alerts.
Bottom line: We would choose the three-camera kit for a few key outdoor viewpoints when the five-camera system would be more hardware than we need.
“We would choose the three-camera kit for a few key outdoor viewpoints when the five-camera system would be more hardware than we need.”
Blink Outdoor 4 Wireless Smart Security Camera System (2 Cameras, Sync Module Core)
For a first outdoor camera setup, the two-camera kit is the least complicated way into this lineup. It is suited to a simple plan—such as watching a front entry and a driveway—without asking us to install and manage cameras across the whole property. Compared with the three-camera system, it provides less flexibility if we have several entrances to cover, but that smaller footprint can be an advantage when we want to start with only the most important views.The cameras retain the same headline functions as their larger-bundle siblings: 1080p live view, infrared night vision, two-way audio, motion detection, and Alexa compatibility. Wireless mounting also helps avoid running power cables outdoors. The stated battery life is up to two years, but it is not a guarantee, and the four included AA batteries are a consumable rather than a rechargeable power solution.The smaller kit does not sidestep the ownership limitations of the more extensive bundles. The included Sync Module Core offers no local storage, and the description identifies person alerts as subscription-dependent. Optional accessories are needed for local storage options. If we expect to grow into three or more monitoring zones soon, the three-camera bundle is a more natural starting point; this kit makes the most sense when two views are likely to remain enough.
Pros:
- Two cameras keep an initial installation simple and focused.
- Provides 1080p video, infrared night vision, and two-way audio.
- Wireless design and Alexa compatibility support flexible placement and control.
- Up to two years of claimed battery life can limit how often batteries need attention.
Cons:
- Two cameras may leave important areas uncovered on larger properties.
- Local storage is not included with the Sync Module Core.
- Person alerts require a subscription, and local-storage accessories are separate.
Best for: First-time buyers and smaller households that need two straightforward outdoor camera views.
Not ideal for: Homes with three or more key entry points, or anyone who expects included local storage or rechargeable batteries.
Bottom line: We recommend this kit as a focused starter system, but households planning broader coverage should step up to the three-camera bundle.
“We recommend this kit as a focused starter system, but households planning broader coverage should step up to the three-camera bundle.”
As an Amazon Associate we earn from qualifying purchases.
Before You Start
Choose the camera locations before drilling. A camera needs a reliable power source and a strong Wi-Fi signal at its final position. Test the signal with a phone near the intended spot, while recognizing that the camera’s connection may differ. Review local rules about recording audio and video, especially in shared spaces. If a cable must pass through an exterior wall, check for pipes and wiring before drilling; use a qualified installer if you cannot verify what is behind the surface. Do not disable your existing alarm or rely on a camera as a replacement for emergency services.
Step-by-Step Instructions
Step 1: Plan coverage and camera locations
Sketch the areas you want to monitor, such as the main entry, driveway, or a hallway leading to a ground-floor entrance. Place cameras where faces and activity are likely to be visible, rather than aiming only at a broad area. Keep indoor cameras out of bedrooms, bathrooms, and other private spaces. For outdoor views, frame your own entrances and property while excluding neighbors’ windows and public areas where possible. Note each camera’s power source and the route its cable will take.
Tip:A camera pointed directly toward a bright window or sunset can produce washed-out footage. Choose an angle that avoids strong backlighting when possible.
Check: You have a written or sketched list of locations, the views each camera should cover, and a practical power plan for each one.
Step 2: Check the network and storage requirements
Read the camera’s setup instructions and confirm its Wi-Fi band, supported phone operating system, and power requirements. Check Wi-Fi strength at each planned location. Decide whether clips will be saved to a memory card, a local hub, or cloud storage, and buy or activate any required storage before installation. Confirm whether a subscription is needed for features you expect, such as continuous recording or longer clip history.
Tip:If the camera uses 2.4 GHz Wi-Fi, make sure that band is active. Some routers combine bands under one network name; follow the camera maker’s setup instructions if pairing fails on a combined network.
Check: You know how each camera will connect and where its recordings will be stored, and you have the required card, hub, or plan.
Step 3: Create and secure the camera account
Install the camera maker’s official app from your phone’s app store. Create an account with a unique password, then turn on two-factor authentication if available. Review the account recovery options and avoid sharing the login with other household members; invite them through the app’s user-sharing feature instead. Update the app and phone operating system if the setup instructions require it.
Tip:Do not reuse your email or Wi-Fi password for the camera account. A password manager can help you keep a unique password.
Check: You can sign in to the official app, and the account has a unique password with two-factor authentication enabled when supported.
Step 4: Pair each camera before mounting
Power on one camera at a time and add it in the app using the manufacturer’s pairing steps. Connect it to the intended Wi-Fi network, enter the password carefully, and apply any available firmware update before mounting. Name the camera for its location, such as “Front door” or “Garage.” Open its live view and confirm that the picture loads. Repeat for each camera.
Tip:Keep the camera close to the router during pairing if the app cannot find it. Move it to the planned location only after setup and updates finish.
Check: Each camera appears in the app with a clear location name, connects to Wi-Fi, and displays a live image.
Step 5: Mount the cameras and aim the views
Hold each camera at the planned position and check the live view before drilling. Confirm the frame includes the intended doorway or approach without capturing unnecessary private areas. Mark the mounting holes, check behind the surface for wiring or pipes, then attach the bracket using suitable hardware. Secure the camera to the bracket and route power cables so they cannot be pulled loose or create a trip hazard. For outdoor cameras, seal any wall opening with an appropriate exterior sealant and follow the maker’s weatherproofing instructions.
Tip:Mount high enough to reduce tampering, but not so high that faces become hard to recognize or the camera cannot be reached safely for maintenance.
Check: Each camera is firmly attached, its cable is secure, and its live view shows the intended area at a useful angle.
Step 6: Set recording, privacy, and alert controls
In the app, choose when each camera records and whether it records continuously or only when motion occurs. Set activity zones to focus detection on the parts of the frame that matter, and reduce sensitivity if routine movement causes frequent alerts. Turn off audio recording if you do not need it or if local rules restrict it. Set privacy zones or a camera-off schedule for areas and times that should not be recorded. Choose a recording retention period and check who can view shared feeds.
Tip:Start with conservative motion settings, then adjust after watching several days of alerts. Too many notifications can make important events easier to miss.
Check: Recording and alert settings match your needs, private areas are excluded where the app allows, and only intended household members have access.
Step 7: Test alerts, recordings, and access
Walk through each camera’s view at the distance where a person should be detected. Check whether the app sends a notification and whether the event appears in the recording timeline or storage view. Test playback and confirm the clip has usable detail, including at night if the camera will operate in darkness. Ask an invited household member to open the feed with their own account. Reposition the camera or tune its detection settings if the test misses activity or creates repeated false alerts.
Tip:Allow the app’s notification permission on each phone that should receive alerts. Check the phone’s Do Not Disturb settings if alerts do not appear.
Check: A test event produces a timely alert and a playable clip, the live view remains available, and shared users can access only the cameras you granted them.
Common Mistakes to Avoid
- Setting motion sensitivity too high and receiving constant alerts. — Use activity zones and begin with moderate sensitivity, then review and tune alerts after real use.
Troubleshooting
Problem: The camera will not pair with the app.
Solution: Move it near the router, confirm it is in pairing mode, check the Wi-Fi password, and verify the supported Wi-Fi band. Restart the camera and app, then follow the maker’s reset procedure if pairing still fails.
Problem: The camera connects but its live view freezes or drops.
Solution: Check signal strength at the camera, restart the router and camera, and reduce distance or obstacles between them. Move the router or add a compatible access point if the signal remains weak.
Problem: Motion alerts do not arrive.
Solution: Confirm motion detection and notifications are enabled in the camera app, allow notifications in the phone’s settings, and check that a schedule or activity zone is not excluding the test area.
Problem: The camera detects too many events or misses people.
Solution: Adjust the camera angle, activity zone, and sensitivity. Remove moving foliage or other unnecessary areas from the detection frame, then repeat a walk-through test.
What Success Looks Like
The setup is working when every camera stays connected at its installed location, shows a useful live view, records or saves events to the selected storage, and sends alerts during a test. Playback should be clear enough to identify activity in the intended area, including under the lighting conditions you expect. Privacy zones, account protections, and household sharing should match your choices.
Next Steps
Check camera status and storage after the first day, then review alerts over the next week and adjust zones or sensitivity to reduce missed events and nuisance notifications. Keep the app, camera firmware, and router software updated. Test playback and notifications monthly, clean outdoor lenses as needed, and replace or recharge batteries before they run low. Remove access for anyone who no longer needs it. Contact the camera maker or a qualified installer if a device repeatedly disconnects, the mounting surface is unsafe, or you cannot route power without risking damage.
Frequently Asked Questions
Do all smart home security cameras need Wi-Fi?
No. Many consumer cameras use Wi-Fi, while some systems record to a local hub or use wired network connections. Check the specific model’s connection and recording requirements before buying or installing it.
Can I install an outdoor camera without drilling?
Some models support compatible adhesive mounts, clamps, or freestanding placement, but these options may be less secure or unsuitable for weather exposure. Use only mounting methods approved by the manufacturer and follow property rules.
Do I need a subscription to save recordings?
It depends on the model. Some cameras support local memory cards or a hub, while others require a paid plan for cloud clips or extended history. Confirm which recording features are included before setup.
How many cameras should I install?
Start with the entrances and approaches you need to monitor, then check whether those views leave a meaningful gap. Add cameras only where they improve coverage; avoid recording spaces that do not need monitoring.
How can I reduce false alerts?
Re-aim the camera away from busy streets, moving branches, or reflective surfaces. Narrow the activity zone and lower sensitivity in small increments, then test detection by walking through the area.
NFL season / tailgating Picks
team gear
As an affiliate, we earn on qualifying purchases.