
To avoid shadows over your workbench, position multiple light sources at different angles and heights, focusing on overhead, side, and surface-mounted fixtures. Use adjustable fixtures to fine-tune light angles, ensuring overlapping beams for full coverage. Incorporate diffusers or reflectors to soften harsh shadows and aim lights slightly away from your work surface. Mixing natural and artificial light helps minimize shadows further. Keep experimenting with placement to achieve even illumination—continue exploring ways to perfect your workspace.
Key Takeaways
- Position lights directly above and slightly behind the workbench to minimize shadows cast by tools and hands.
- Use multiple light sources from different angles to ensure even coverage and reduce shadow areas.
- Incorporate adjustable fixtures to fine-tune angles and eliminate persistent shadows during tasks.
- Combine ambient, task, and side lighting to create a balanced, shadow-free workspace.
- Diffuse light sources to soften harsh shadows and improve overall visibility and safety.
adjustable workbench lighting fixtures
As an affiliate, we earn on qualifying purchases.
As an affiliate, we earn on qualifying purchases.
How Shadows Affect Your Workbench Safety and Precision
Shadows cast over your workbench can considerably compromise both safety and precision. Poor lighting can cause you to miss hazards or make mistakes, risking injury or damage. A well-designed lighting setup minimizes these shadows, which is crucial for effective storytelling that highlights the importance of proper illumination. The right color temperature guarantees that your workspace looks natural and details are clear, reducing eye strain. Light diffusion plays a key role in softening harsh shadows, creating a more even illumination that helps you see every detail. When shadows are pronounced, you might misjudge measurements or mishandle tools. This can lead to distorted perception and errors in your work. Proper lighting setup, with balanced color temperature and well-diffused light, is essential. It assures your work area is safe and that you can perform tasks accurately without the distraction of distracting shadows. Understanding light diffusion can help you achieve optimal illumination conditions, especially in a setting where lighting design is tailored to your specific needs.
LED task lights for workbench
As an affiliate, we earn on qualifying purchases.
As an affiliate, we earn on qualifying purchases.
How to Assess Your Workbench for Shadow Problems
Start by identifying areas where shadows fall on your workbench during typical tasks. Next, evaluate your current lighting setup to see if it creates unwanted shadows or uneven light. This assessment helps you pinpoint problem spots and plan effective lighting adjustments. Considering lighting integration, such as LED strips or spotlights, can also enhance overall illumination and reduce shadows. Additionally, understanding the contrast ratio of your lighting can help you achieve brighter, more balanced light for detailed work. Incorporating media literacy principles can help you choose the most effective lighting solutions based on accurate information about different lighting options. Being aware of lighting standards can further guide you in selecting appropriate brightness levels and fixtures for your workspace. Recognizing the benefits of hydrotherapy for physical recovery can also inspire you to incorporate water-based relaxation techniques to improve your focus and comfort during work sessions.
Identify Shadow-Casting Areas
To effectively identify shadow-casting areas on your workbench, you need to observe how light interacts with your workspace at different times of the day. Pay attention to where shadows fall during various lighting conditions to perform effective shadow mapping. Consider how multiple light sources create light layering, which can either minimize or exacerbate shadows. Incorporating landscaping elements or outdoor lighting techniques can also influence shadow patterns and help optimize your workspace lighting. You might notice: — Shadows cast by tools or objects on your bench during different parts of the day. — Areas consistently in shadow regardless of lighting angles. — How natural and artificial lights combine to produce unwanted shadow zones. Understanding dream symbolism related to time and shadows can provide insights into the patterns and significance of shadow behavior in your workspace. Additionally, experimenting with different lighting configurations can help you better understand and control shadow placement, especially when considering the use of luminaires or adjustable fixtures. Exploring shadow behavior can further enhance your ability to predict and manage how shadows will fall in various lighting setups.
Evaluate Existing Lighting Setup
Evaluating your existing lighting setup involves carefully observing how light interacts with your workbench from different angles and times of day. Check if the lighting color creates a comfortable, glare-free environment and highlights your work clearly. Notice if shadows are cast in areas where you need precision or if certain spots remain dim. Pay attention to energy efficiency—are your lights bright enough but still cost-effective? Consider how your current lights affect visibility during various tasks and whether they produce a harsh or soft illumination. This assessment helps identify problematic shadow areas and determines if your lighting color needs adjusting for better clarity. Additionally, reviewing your lighting equipment can reveal if upgrading to more efficient or better-positioned lights could further improve your workspace. Recognizing optimal lighting placement and its impact on shadow reduction can guide you in making effective adjustments. Making these observations guarantees you can improve your setup by adding or repositioning lights to eliminate shadows and optimize your workspace.
diffuser for workbench lighting
As an affiliate, we earn on qualifying purchases.
As an affiliate, we earn on qualifying purchases.
Which Lighting Types Work Best for Your Workbench?

Choosing the right type of lighting is essential for illuminating your workbench effectively and minimizing shadows. LED options are popular because they provide bright, energy-efficient light that can be easily directed where needed. They also produce minimal heat, making them safer for close-up work. Halogen benefits include offering a warm, natural light that enhances color accuracy, which is helpful for detailed tasks. Consider these options:
- Bright, focused LED task lights that can be positioned precisely.
- Halogen lights that deliver warm, consistent illumination.
- Adjustable fixtures that let you customize light angles and intensities.
- Being aware of security measures in lighting equipment can prevent theft or damage in your workspace. Additionally, using appropriate lighting techniques can further reduce shadows and improve overall visibility. Properly managing lighting placement ensures the light source minimizes shadows and provides even coverage across your work area. Maintaining consistent light quality across your workspace can help prevent eye strain and ensure accurate color perception during detailed tasks. Incorporating diffusers or reflectors can also help distribute light more evenly and reduce harsh shadows. Both LED options and halogen benefits help create a well-lit workspace, reducing shadows and improving visibility for detailed work. Choose the type that best suits your workspace and task requirements.
workbench LED strip lighting
As an affiliate, we earn on qualifying purchases.
As an affiliate, we earn on qualifying purchases.
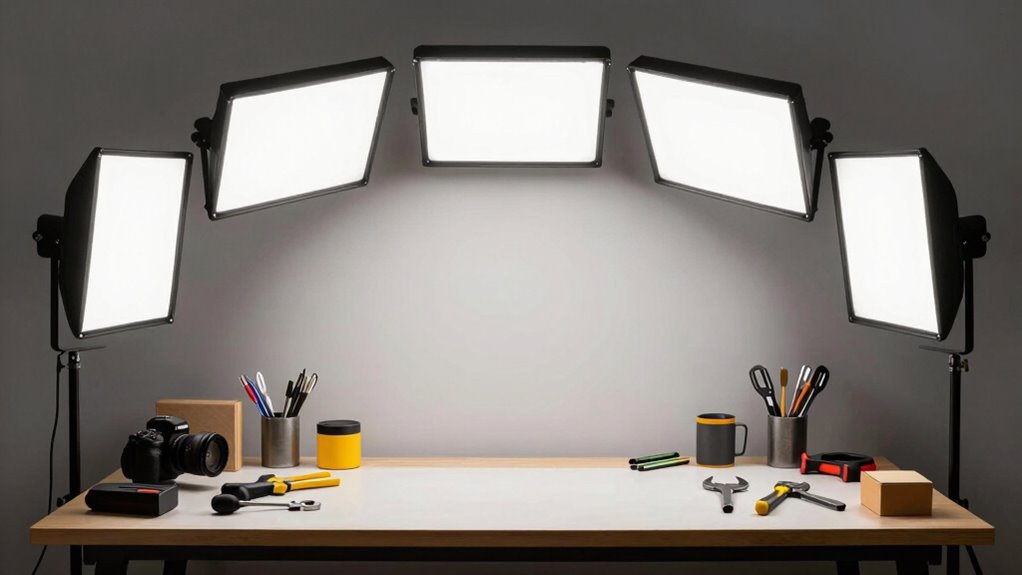
How to Place Overhead Lights to Minimize Shadows
To reduce shadows on your workbench, position overhead lights for ideal coverage and even illumination. Use multiple light sources from different angles to eliminate dark spots, and adjust their angles until shadows are minimized. Proper placement and flexibility in light positioning make a noticeable difference in visibility and precision. Additionally, selecting the right lighting equipment can enhance overall brightness and reduce glare. Incorporating visual cues can also help identify shadowed areas more effectively. Ensuring proper light placement is essential for comprehensive coverage and optimal working conditions, especially when considering effective illumination techniques that maximize clarity and safety.
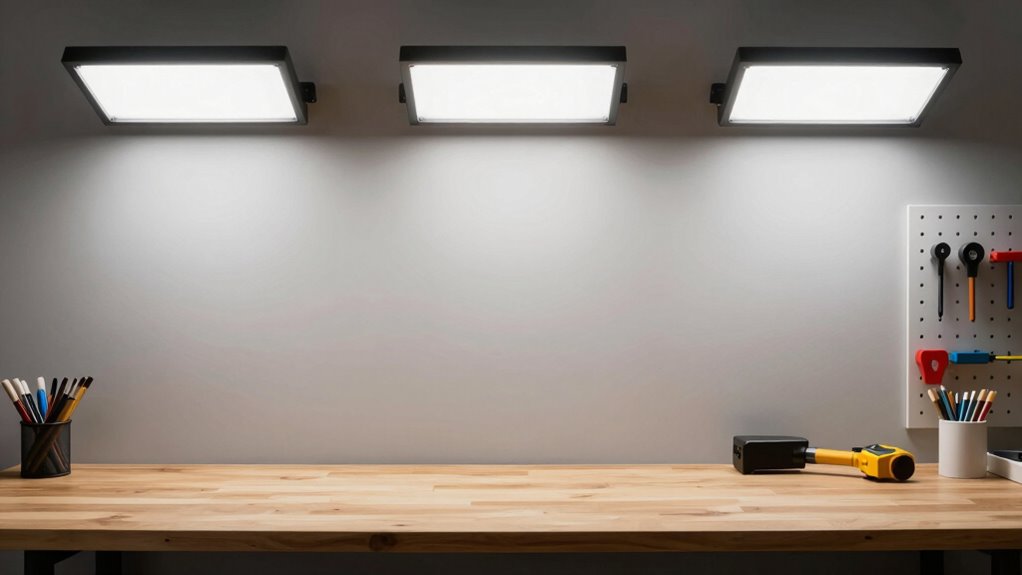
Optimal Light Placement
Positioning overhead lights correctly can make a significant difference in reducing shadows over your workbench. To achieve ideal light placement, focus on even ambient illumination that minimizes harsh shadows. Ensure your lights are angled to cast light downward and outward, avoiding direct glare. Use a warm color temperature between 2700K and 3500K for natural, comfortable lighting that reduces eye strain. Consider placing fixtures slightly behind or above your work area, so shadows fall away from your workspace. Adjusting the height and angle of your lights helps distribute light evenly. Keep in mind that proper placement creates a balanced environment, making detailed tasks easier and safer. With thoughtful positioning, your workbench will be well-lit, shadow-free, and more efficient.
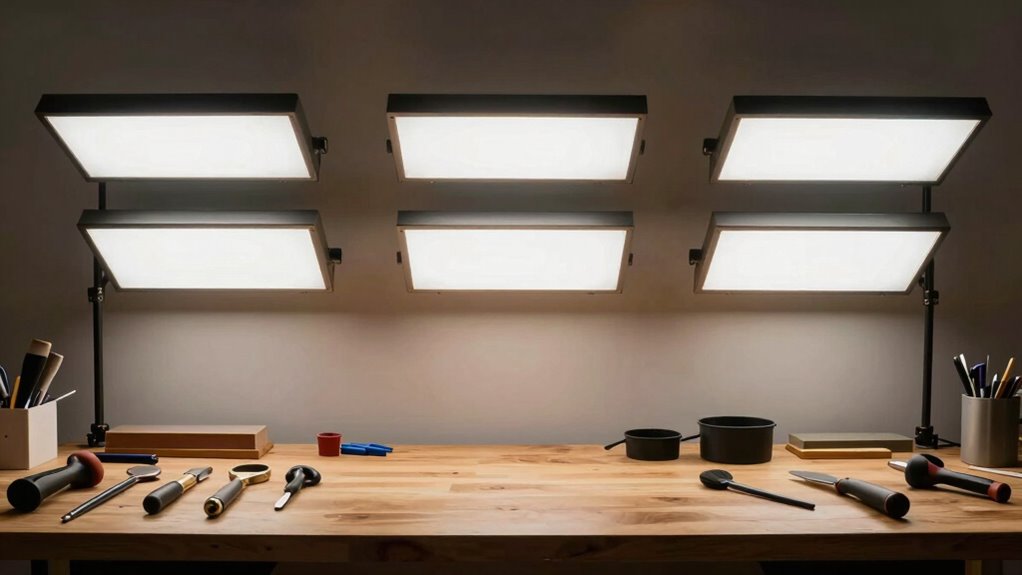
Use Multiple Light Sources
Using multiple light sources is one of the most effective ways to eliminate shadows on your workbench. By combining different lights, you create balanced illumination that minimizes harsh shadows and enhances visibility. Incorporate ambient lighting to fill in dark areas and guarantee even coverage. Adjusting the color temperature of each light helps match the overall ambiance, reducing eye strain and improving color accuracy. Position lights at different angles and heights to cover all angles of your workspace. Here’s a quick guide:
| Light Type | Purpose |
|---|---|
| Overhead lights | General ambient lighting |
| Task lights | Focused illumination on work area |
| Side lights | Reduce side shadows |
| Adjustable lights | Flexibility for precise tasks |
This setup ensures thorough lighting, reducing shadows and creating a safer, more efficient workspace.
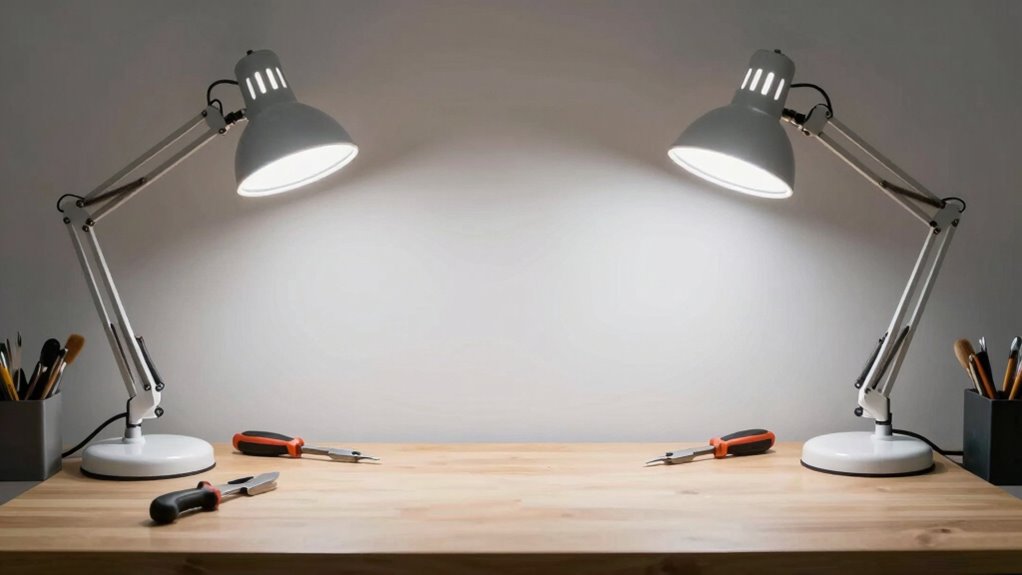
Adjust Light Angles
Adjusting the angles of your overhead lights is essential for minimizing shadows on your workbench. Proper light direction and angle adjustment ensure even illumination, reducing harsh shadows that hinder your work. To achieve this, aim your lights slightly away from the work surface, directing light downward and outward. This prevents the light from casting shadows directly beneath your hands or tools. Carefully tilt the fixtures to find the ideal angle where shadows are minimized across your entire workspace.
- Imagine the light hitting your workbench from multiple angles, eliminating dark spots
- Adjust light fixtures so they cast light evenly across the surface
- Keep light sources slightly angled to avoid direct shadows from your hands or objects
Adding Extra Lights to Fill in Shadowy Areas
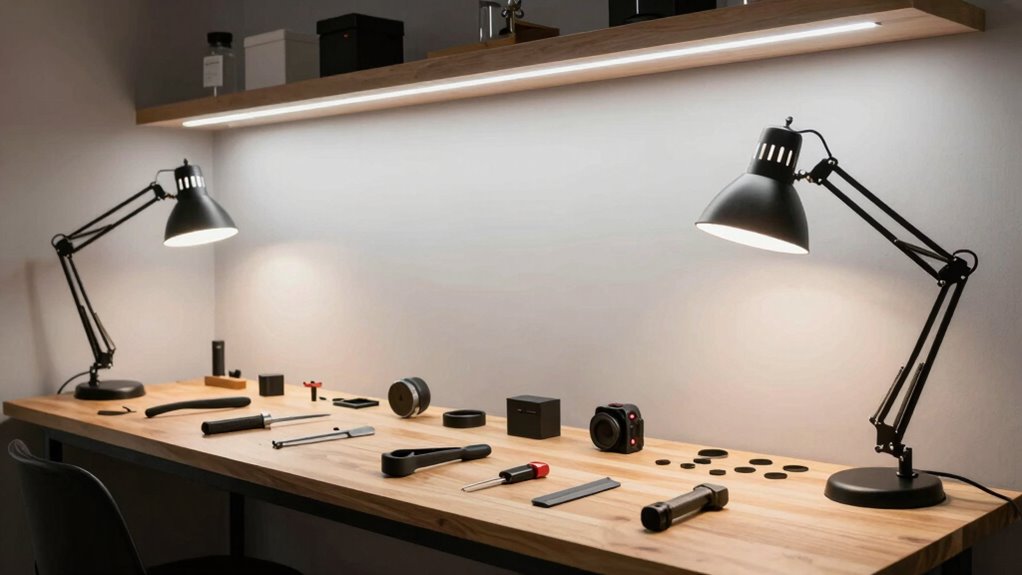
Sometimes, despite your best efforts, shadows still linger over your workbench, making it hard to see fine details. Adding extra lights can help fill in these shadowy areas. Use small, adjustable fixtures to target spots where shadows are most prominent. Opt for bulbs with a warm or neutral color temperature to create an ambient glow that reduces harsh contrasts. Placing lights at different heights and angles ensures even coverage without creating new shadows. Here’s a quick guide:
| Light Position | Purpose | Effect |
|---|---|---|
| Overhead | General illumination | Reduces deep shadows |
| Side-mounted | Fill shadow gaps | Adds balanced light |
| Adjustable | Focus on details | Enhances clarity |
| Near work surface | Minimize glare | Improves visibility |
| Diffused bulbs | Softens light | Creates uniform glow |
How to Adjust Light Angles for Full Coverage
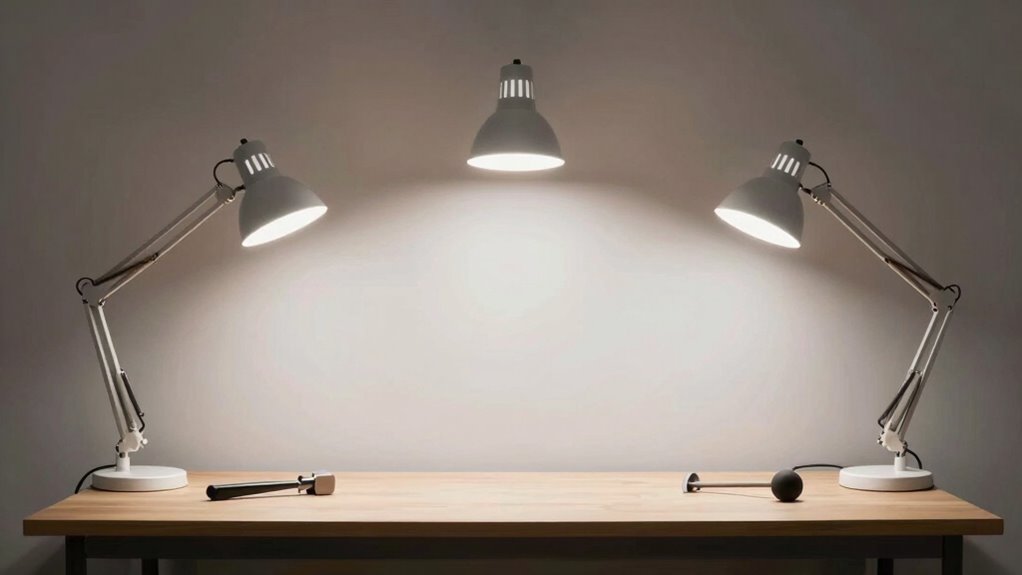
Positioning your lights at the right angles is key to achieving full coverage of your workbench. Proper angle adjustment ensures your task lighting illuminates every corner without creating shadows. To do this effectively, consider these tips:
Adjust lights slightly above and angled downward for optimal, shadow-free workbench illumination.
- Position lights slightly above and angled downward to minimize glare and shadows.
- Adjust each light’s angle so overlapping beams cover the entire surface seamlessly.
- Use adjustable fixtures to fine-tune the direction as you work, guaranteeing consistent task lighting.
How to Keep Your Workbench Lighting Consistent While You Work
| Light Source | Color Temperature | Diffusion Method |
|---|---|---|
| Overhead LED | 4000K-5000K | Frosted cover |
| Task Light | 4500K-5500K | Diffuser shield |
| Ambient Lamp | 3500K-4000K | Lampshade |
| Portable Light | 5000K-6500K | Adjustable arm |
Consistent lighting reduces eye strain and boosts precision in your work.
Common Mistakes to Avoid When Lighting Your Workbench

One common mistake to avoid is placing lights too close to your workbench, which can cause harsh shadows and uneven illumination. Poor lighting design can make it difficult to see fine details and increase eye strain. To prevent this, confirm lights are positioned at an appropriate distance and angle for balanced shadow prevention. Avoid relying on a single light source, as this creates uneven lighting. Instead, incorporate multiple light sources to distribute light evenly. Be cautious about directly facing bright lights toward your work surface, which can cause glare. Proper placement improves shadow control and enhances visibility. Keep these points in mind to achieve ideal lighting design, eliminate harsh shadows, and maintain a well-lit work environment.
Frequently Asked Questions
What Are the Best Color Temperatures for Workbench Lighting?
You should choose a color temperature between 5000K and 6500K for your workbench lighting. This range offers excellent color accuracy, helping you see details clearly and accurately. It also enhances focus and mood, keeping you alert and engaged during your tasks. Cooler temperatures in this range mimic natural daylight, making your workspace feel brighter and more inviting, which is essential for precise work and reducing eye strain.
How Can I Prevent Glare on Shiny Work Surfaces?
Did you know that glare can reduce your work accuracy by up to 50%? To prevent glare on shiny surfaces, use ambient lighting that diffuses light evenly, minimizing harsh reflections. Position your task lighting at an angle rather than directly overhead, and avoid reflective angles that bounce light into your eyes. Proper task positioning and diffuse ambient lighting create a comfortable workspace, reducing glare and improving visibility.
Are LED Lights Better Than Fluorescent for Workbench Illumination?
LED lights are better than fluorescent for workbench illumination because they offer several advantages, like energy efficiency, longer lifespan, and better color rendering. Fluorescent drawbacks include flickering, warmer color temperatures, and shorter lifespans. LEDs provide a consistent, bright light that reduces eye strain and shadows, helping you see details clearly. Switching to LED lights guarantees safer, more effective lighting for your workspace, especially when working on intricate or detailed projects.
How Often Should I Replace or Upgrade My Workbench Lighting?
You should replace or upgrade your workbench lighting every 2 to 3 years, or when you notice reduced brightness or flickering. Regularly check your lighting’s placement for maximum shadow elimination—adjust fixtures to guarantee even coverage. As technology advances, upgrading to brighter, energy-efficient LEDs can improve visibility and reduce eye strain. Maintaining properly positioned lighting ensures your workspace stays well-lit, safe, and free from distracting shadows that hinder your work.
Can Portable or Rechargeable Lights Improve Shadow Coverage?
Like a lighthouse guiding ships, portable lighting and rechargeable options can considerably improve shadow coverage on your workbench. These lights are flexible, allowing you to position them precisely where shadows fall, ensuring clear visibility. With rechargeable options, you gain the convenience of cordless use, making it easier to adjust lighting as your projects evolve. They’re a practical solution that enhances safety and precision without the hassle of wired fixtures.
Conclusion
Proper lighting transforms your workbench from a shadowy, dangerous jungle into a fortress of safety and precision. When you master the art of placement, shadows vanish like magic, revealing every detail and ensuring flawless work. Don’t settle for dim corners or blinding glare—aim for perfect illumination that turns your workspace into a sanctuary of productivity. With the right lights, you’ll conquer every project, making mistakes impossible and success inevitable. Illuminate wisely, and watch your craftsmanship soar!