
To patch small drywall holes, start by cleaning the area and applying spackle with a putty knife, making sure you smooth it out and feather the edges. Once it dries, lightly sand for a seamless finish and match the paint color for a perfect blend. Use primer if needed for better adhesion. By following these steps carefully, you’ll achieve smooth, repair-free walls. For detailed tips and techniques, keep exploring to guarantee your repair holds up beautifully.
Key Takeaways
- Clean and sand the area around the hole for smooth patching.
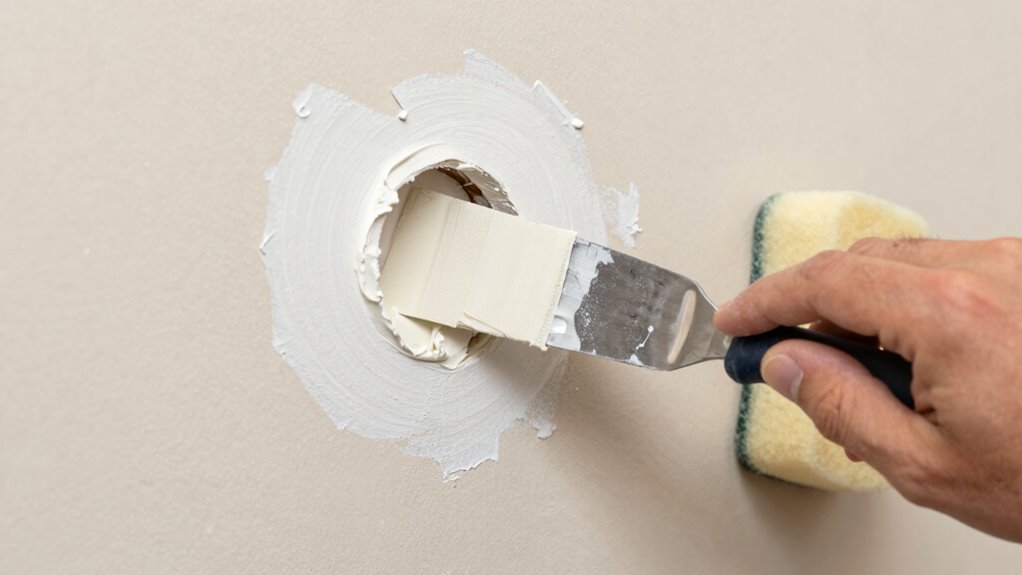
- Apply a suitable patch or spackle with a putty knife, then let it dry.
- Sand the dried patch to achieve a flush, smooth surface.
- Match and blend paint, applying primer if needed for seamless repair.
- Finish by feathering edges and touching up for a uniform wall appearance.
As an affiliate, we earn on qualifying purchases.
What Causes Small Holes in Drywall and When to Fix Them
Small holes in drywall often happen unexpectedly, usually from everyday activities like hanging pictures or accidentally nailing into the wall. Common causes include nail or screw holes, accidental punches, or impact from furniture. Sometimes, children or pets can also cause small punctures. To prevent damage, use proper tools and techniques when hanging or removing items, and avoid over-tightening nails or screws. Inspect walls regularly and patch small holes promptly to prevent them from worsening. Addressing these minor damages early helps maintain your wall’s appearance and structural integrity. Proper damage prevention tips can help you avoid future small holes and keep your walls smooth and damage-free. Additionally, understanding sound vibrations and their effects can inspire more mindful handling of your walls to minimize unintended damage, especially in environments where AI technologies are used and sensitive equipment is present. Recognizing the importance of water-resistant drywall in certain areas can also help protect walls from accidental water damage that might cause small holes or deterioration over time.
As an affiliate, we earn on qualifying purchases.
Tools and Supplies You Need for Small Drywall Repairs
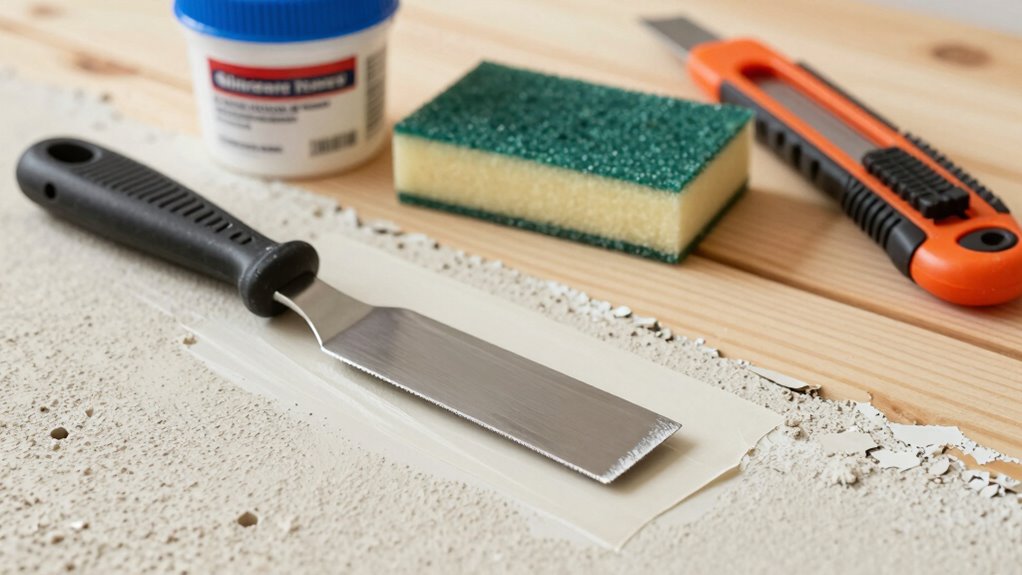
To successfully patch small drywall holes, you’ll need a few essential tools and supplies on hand. Make sure you have a putty knife, sandpaper, joint compound, and a utility knife ready for the job. Don’t forget safety equipment like gloves and a dust mask to protect yourself during the repair process. Incorporating attention to detail into your work ensures a smooth and professional finish. Additionally, being mindful of eco-friendly disposal options for leftover materials helps minimize environmental impact. Using the proper DIY tools and safety tips can make your repair safer and more efficient. Understanding the importance of measurement accuracy can also help you achieve better results in your drywall repairs. Being aware of long-term structure considerations can ensure your repair holds up over time.
Essential Repair Tools
Having the right tools on hand makes repairing drywall holes much easier and more efficient. You’ll need basic tools like a putty knife, sandpaper, and a utility knife to prep and smooth the patch. A drywall joint compound helps fill the hole seamlessly, while a drywall saw can enlarge or shape the repair area if needed. To match your wall’s appearance, have a paint color that closely matches your existing wall, and consider tools like a paintbrush or roller for finishing touches. If your wall has a specific texture, you may need tools such as a sponge or textured spray to replicate the original pattern. These essential tools help guarantee your repair blends perfectly with the rest of the wall, making the patch virtually invisible. Understanding wall textures can help you choose the best tools and techniques to achieve a seamless repair. Additionally, familiarizing yourself with common drywall finishes can help you better replicate the existing wall surface for a more professional look. Knowing how to properly prepare the surface ensures a smoother and more durable repair.
Key Supplies Needed
Gathering the right tools and supplies before starting your drywall repair guarantees a smooth and efficient process. You’ll need drywall compound, a putty knife, and sanding tools to fill and smooth small holes. A utility knife helps clean edges, while a damp cloth maintains a clean surface. For blending repairs seamlessly, consider matching your existing decorative wall finishes or drywall texture techniques. If your wall has a specific texture, like knock-down or swirl, having the right tools or spray supplies will help replicate it. Primer and paint are essential for finishing the repair and blending it into the surrounding wall. Having all these supplies ready ensures you can work efficiently and achieve a professional-looking result.
Safety Equipment Tips
When working on small drywall repairs, prioritizing safety is essential to prevent injuries and guarantee a smooth process. Always wear protective gloves to shield your hands from sharp drywall edges, dust, and potential irritants. Dust masks are equally important, as they protect you from inhaling fine drywall dust that can cause respiratory issues. Make certain your workspace is well-ventilated, and handle tools carefully to avoid accidents. Keep your safety gear within easy reach so you can quickly put it on before starting. Wearing the right equipment not only keeps you safe but also helps you work more efficiently. Remember, taking simple precautions makes your drywall repair safer and more successful. Additionally, ensuring your tools are properly configured and maintained can improve safety and efficiency during your repair. Incorporating appropriate safety gear similar to what is used for handling delicate or potentially hazardous materials can further enhance your safety practices. Being aware of essential oils for respiratory health and maintaining good air quality can also help reduce respiratory discomfort during dust-intensive tasks. Staying informed about common safety procedures can help you respond effectively in case of an accident, especially considering the importance of effective filtration in vacuums for dust removal.
As an affiliate, we earn on qualifying purchases.
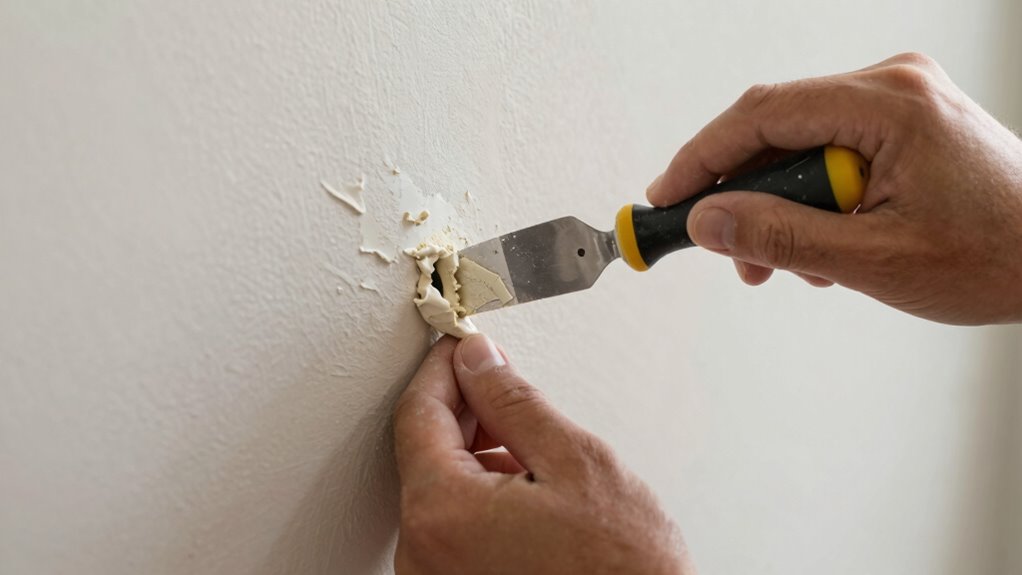
How to Patch Small Holes in Drywall: Step-by-Step
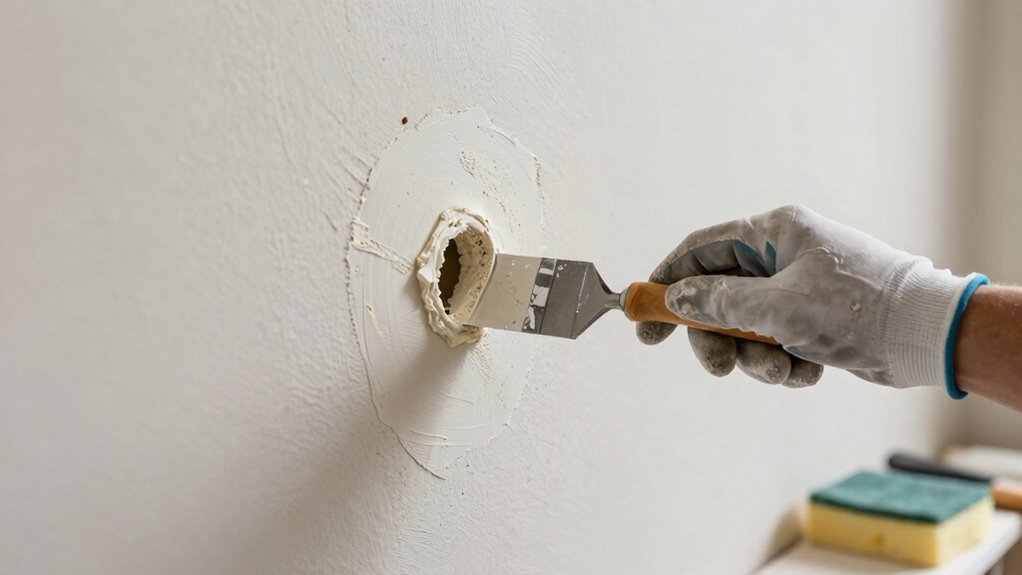
Fixing small drywall holes is a straightforward process that you can complete with just a few basic tools and materials. Start by cleaning the hole to remove dust and loose debris. Apply a patch or spackle directly over the hole, smoothing it with a putty knife. Once it’s dry, lightly sand the area to guarantee a smooth surface. To achieve a seamless repair, focus on texture matching and paint blending. Use a textured patch if your wall has a pattern, or feather the edges of the paint for a natural look. Carefully match the paint color and blend it into the surrounding wall, feathering out the edges. This step guarantees your repair is invisible and blends seamlessly with the original wall finish. For an even better result, consider understanding the underlying wall material and texture to create a truly invisible repair. Additionally, paying attention to small imperfections can help ensure a flawless finish. Knowing how to match wall textures can further enhance the seamlessness of your repair.
As an affiliate, we earn on qualifying purchases.
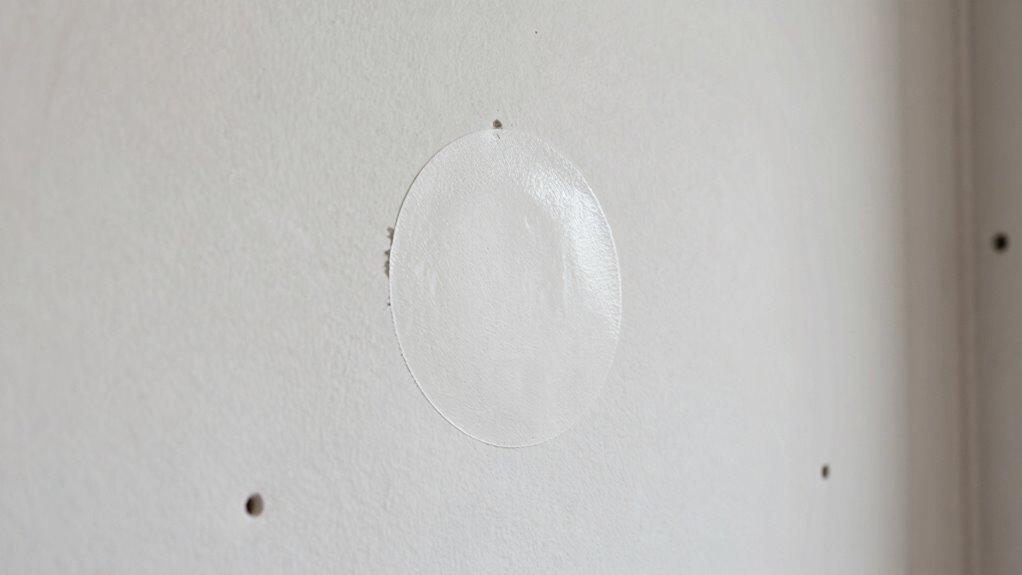
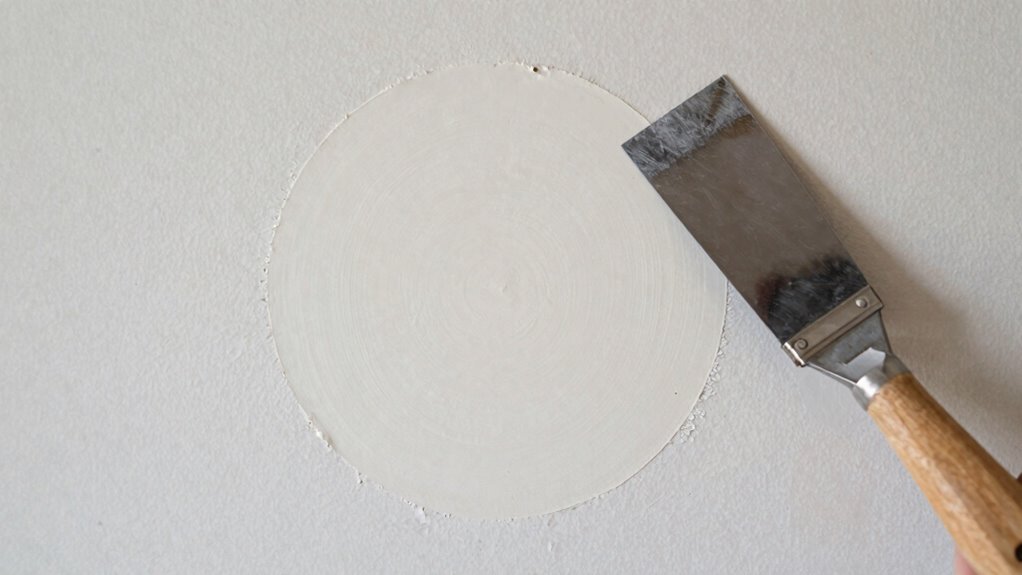
Sand and Finish for a Smooth, Seamless Repair
After the spackle has dried and you’ve smoothed out the patch, it’s time to focus on creating a flawless finish. Sand the area lightly with fine-grit sandpaper to smooth out any ridges or uneven spots. Be gentle to avoid damaging the surrounding wall or removing too much spackle. Once sanded, wipe away dust with a damp cloth. To achieve a seamless look, concentrate on texture blending—feather the edges of the repair to match the wall’s original surface. Then, match the paint color precisely to guarantee the repair disappears once painted. Visualize a wall with a uniform surface, free of bumps or noticeable patches. With careful sanding and finishing, your repair will blend seamlessly, leaving your wall looking smooth and professional. Understanding drywall materials can help you select the right tools and techniques for an optimal finish. Additionally, knowing how to properly prepare the surface ensures the repair will adhere better and last longer. Considering region-specific wall textures can also assist in matching the repair to your existing wall for an even more seamless appearance. Incorporating proper finishing techniques can further enhance the overall quality of your drywall repair.
Tips to Prevent Small Holes in Your Walls
Using proper tools and handling items carefully can help you avoid creating small holes in your walls. When hanging pictures or shelves, make sure to use the right anchors and avoid over-tightening screws. Being cautious and prepared keeps your walls smooth and damage-free.
Use Proper Tools
Choosing the right tools is essential to prevent small holes in your walls. Using proper tools guarantees a seamless repair that blends well with your existing wall. You’ll want quality items like a putty knife, fine-grit sandpaper, a paintbrush, and a paint that matches your wall color. Picture a smooth wall with a consistent texture, so your patch doesn’t stand out. The right tools help you carefully apply spackle, feather out edges, and match the paint finish. This way, you avoid creating new holes or damaging the wall further. Remember, a good tool kit makes the process easier and results more professional-looking, especially when considering wall texture and paint color for a flawless finish.
Handle Items Carefully
Handling items carefully is key to preventing small holes in your walls. When hanging decorative wall accents, use proper hooks or mounts to avoid unnecessary strain. Be mindful of furniture placement to prevent accidental bumps that can cause dents or holes. Always lift and move items gently, especially when positioning heavy or sharp objects near walls. Consider installing bumpers or padding behind furniture to reduce impact. Keep pathways clear to avoid knocking over items that might hit your walls.
| Tip | Explanation |
|---|---|
| Use proper hooks | Prevents wall damage when hanging decorative accents |
| Avoid overloading hooks | Reduces stress on wall anchors |
| Move furniture carefully | Prevents accidental holes or dents |
| Install bumpers or padding | Cushions impacts from furniture or décor |
| Keep pathways clear | Avoids accidental collisions with walls |
FAQs: Drywall Repair and Maintenance Tips
If you’re wondering how to efficiently repair small drywall holes, you’re not alone. These FAQs can help you maintain your walls and guarantee a seamless finish. When dealing with decorative wall finishes, matching paint color is essential for a flawless look. Proper patching techniques prevent future damage and keep your walls looking fresh.
Small drywall repairs are easy with proper techniques and matching paint for a flawless, long-lasting finish.
Consider these tips:
- Use the right patching tools, like a putty knife and sanding sponge
- Sand lightly for a smooth surface before painting
- Test paint color matching on a hidden area first
- Apply primer if needed for better paint adhesion
These maintenance tips help keep your walls in top condition, making small repairs less noticeable and maintaining the aesthetic appeal of your space.
Frequently Asked Questions
Can I Use Regular Spackle for Small Drywall Holes?
Yes, you can use regular spackle for small drywall holes, as it works well for quick drywall patching. However, if you want a smoother finish or a stronger repair, consider spackle alternatives like joint compound or specialized drywall patching compounds. These options are designed for drywall repair, providing better adhesion and a more seamless look. Just apply, smooth, and sand for a professional finish.
How Long Should I Wait Before Painting After Patching?
Waiting to paint after patching is like letting a cake cool before frosting. You should wait at least 24 hours to guarantee the patch is completely dry. During this time, perform drywall sanding to smooth the surface and remove any dust. Proper paint preparation, including cleaning the patched area, and patience ensures your paint will adhere well and look seamless. Rushing this step can lead to peeling or uneven coverage later.
Is It Necessary to Remove Paint Before Patching?
You don’t need to remove existing paint before patching small drywall holes, but it’s helpful to do some paint removal around the area if the paint is peeling or flaking. Start by cleaning the dust from the surface with a damp cloth, ensuring a smooth patch. Removing loose paint helps the patch adhere better and creates a more seamless finish once you sand and paint over it.
What Are Common Mistakes to Avoid During Drywall Repair?
You should avoid common drywall repair mistakes like neglecting to match the drywall texture, which makes the patch stand out. Don’t ignore the importance of maintaining structural integrity by not securing the patch properly or over-sanding, which weakens the repair. Rushing the process can cause cracks or uneven surfaces. Take your time to blend textures seamlessly and guarantee the patch is solidly attached, preserving both appearance and durability.
Can Small Holes Be Repaired Without Special Tools?
Yes, you can repair small holes without special tools by using spackle or joint compound, which you apply with a simple putty knife or even a credit card. To match your wall texture and guarantee patch durability, gently sand the area once dried and consider using a textured spray or brush to blend seamlessly. This simple method saves time and tools, giving your wall a smooth, durable finish.
Conclusion
By mastering the art of patching small drywall holes, you’ll maintain your walls’ pristine perfection with minimal mess. Remember, patience and preparedness prevent problems, while practice promotes perfection. Taking the time to fix tiny tears today saves you from costly, cumbersome corrections tomorrow. Keep your corners clean, your coats consistent, and your confidence constant. With these simple steps, you’re not just patching holes—you’re preserving the perfection of your space with skill, speed, and a sense of satisfaction.