
To guarantee your floor coatings stick, start with thorough cleaning to remove dirt, dust, and debris, and use degreasers for oil or grease stains. Next, etch or mechanically profile the surface to create a rough texture, which improves adhesion. Make sure the concrete is completely dry and test for moisture before applying primer. Avoid common mistakes like skipping prep steps or applying on wet surfaces—keep going to learn detailed techniques for long-lasting results.
Key Takeaways
- Clean the surface thoroughly to remove dirt, dust, grease, and loose debris, ensuring a smooth, contaminant-free base.
- Perform surface profiling using acid etching or mechanical grinding to create a textured, porous surface for better adhesion.
- Repair cracks, holes, and surface imperfections to provide a stable, uniform substrate for coatings.
- Conduct moisture testing with a moisture meter or plastic sheet method to confirm the concrete is dry enough for coating application.
- Apply a compatible primer evenly and allow sufficient drying time to promote strong bonding between concrete and coating.
concrete floor cleaning tools
As an affiliate, we earn on qualifying purchases.
As an affiliate, we earn on qualifying purchases.
Why Proper Surface Preparation Ensures Durable Floor Coatings
Proper surface preparation is essential because it directly impacts the longevity and performance of your floor coating. When you prepare the surface correctly, you create a strong bond between the concrete and the coating. Surface sealing is a key step that helps prevent moisture from seeping in, which can cause peeling or cracking over time. By ensuring the surface is smooth, clean, and free of debris, you improve coating adhesion and reduce the chances of future damage. Proper preparation also helps you identify and fix imperfections early, preventing issues down the line. Additionally, using accurate measurement tools during preparation can ensure the surface conditions are optimal for coating adhesion measurement accuracy. Investing time in proper surface prep creates a more adaptable and resilient coating, ultimately extending its lifespan. Proper surface preparation can also help you recognize and address any surface imperfections that could compromise the coating’s effectiveness. Ultimately, investing time in preparing your concrete properly guarantees that your coating lasts longer and maintains its appearance, saving you money and effort on repairs or reapplications.
concrete etching kit
As an affiliate, we earn on qualifying purchases.
As an affiliate, we earn on qualifying purchases.
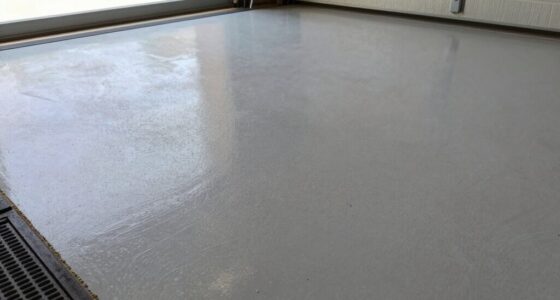
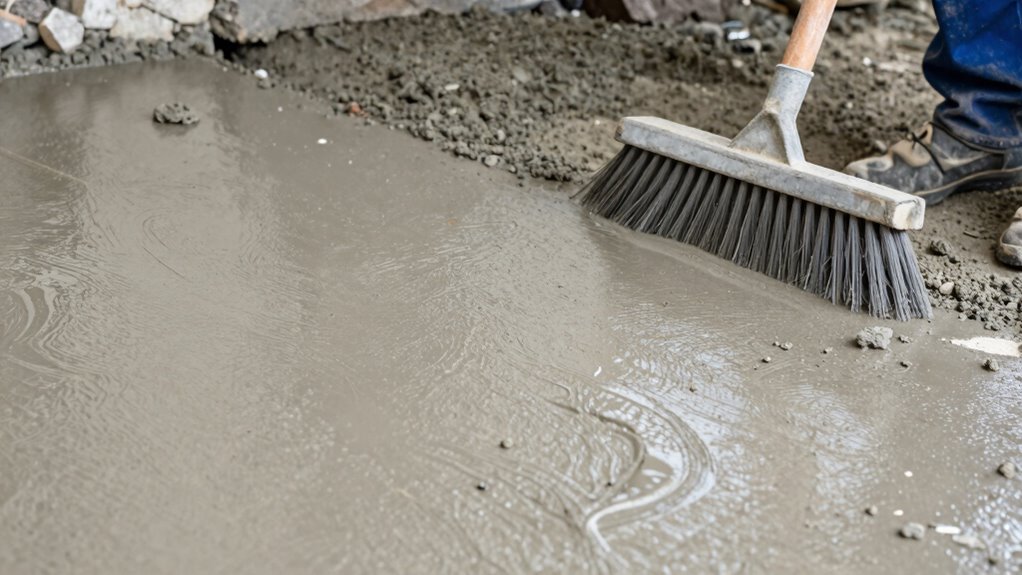
How to Thoroughly Clean Your Concrete Floor Before Painting
Before painting, you need to clean your concrete thoroughly by removing surface debris like dust, dirt, and loose particles. *Guarantee* to also eliminate any oil or grease stains, as they can prevent proper adhesion. A clean, residue-free surface ensures your floor coating will last longer and look better. Incorporating natural light into your space can also help you spot areas that need extra cleaning or attention. Additionally, ensuring your surface is free of any contaminants will promote better bonding of the coating. Paying attention to proper cleaning techniques will further ensure the best results for your project. Understanding the importance of surface preparation and how it influences adhesion can make a significant difference in the durability of your coating.
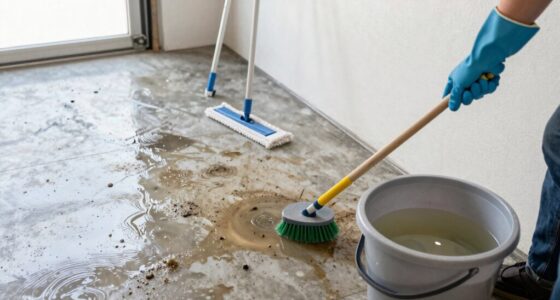
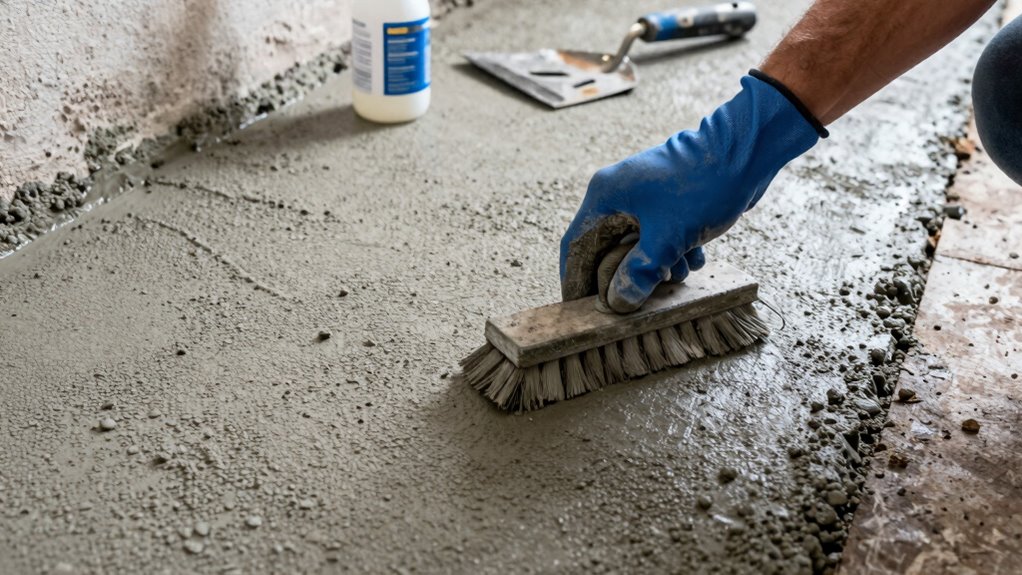
Remove Surface Debris
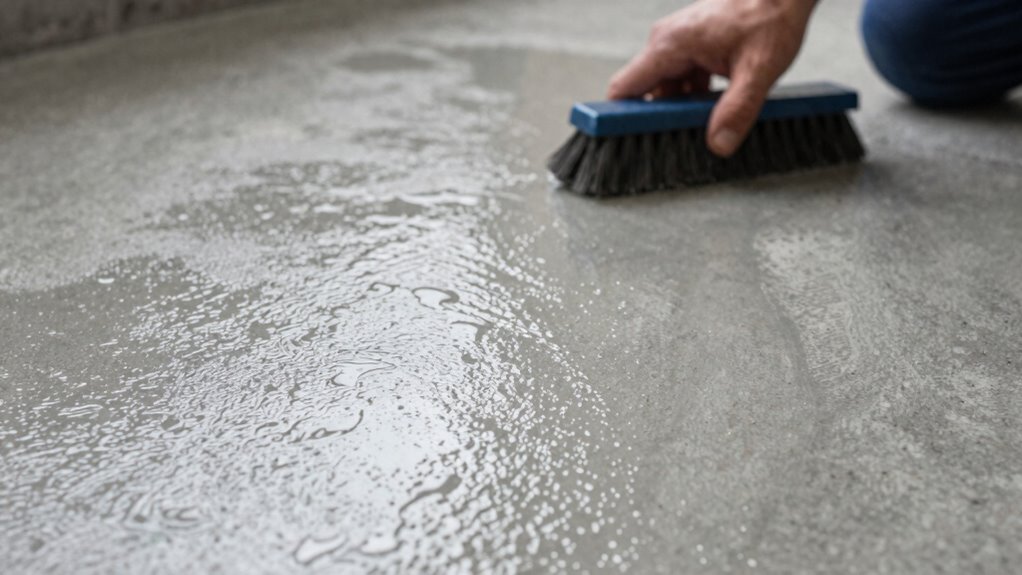
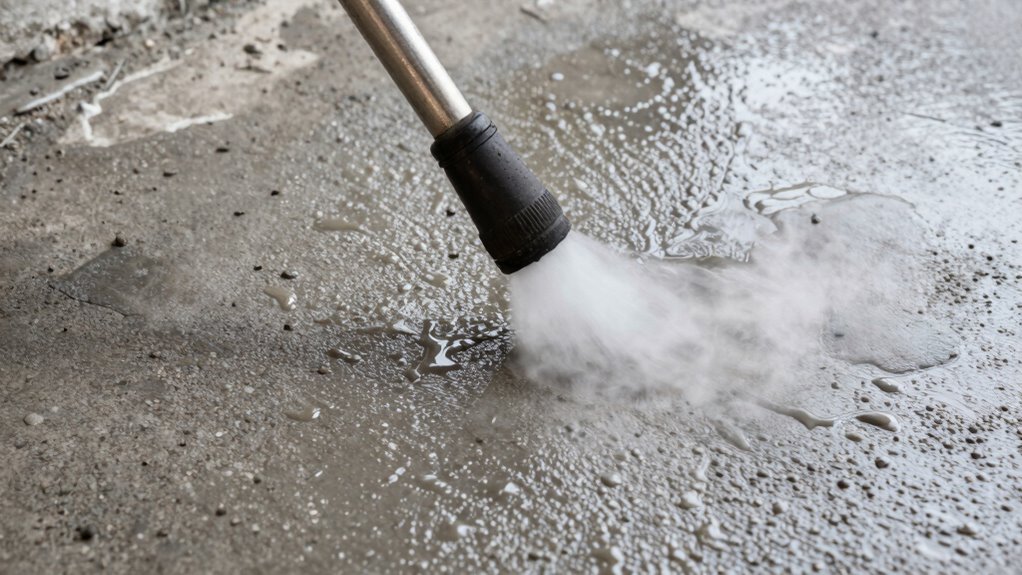
To make certain your concrete surface is ready for coating, start by removing all loose debris, dirt, and dust. Any surface debris can prevent proper surface sealing and compromise coating adhesion, leading to peeling or uneven finishes. Use a broom or vacuum to thoroughly sweep the floor, ensuring no particles remain. Pay special attention to corners and cracks where debris tends to gather. If necessary, follow up with a damp cloth or mop to pick up stubborn dust. The goal is a clean, smooth surface free of loose material that could interfere with adhesion. A well-prepared surface will promote better surface sealing, ultimately ensuring your floor coating adheres properly and lasts longer. Skipping this step risks future coating failure and uneven wear. Incorporating pressure washer cleaning can further remove stubborn grime and prepare the surface more effectively.
Eliminate Oil and Grease
Oil and grease spots can be stubborn obstacles to achieving a durable, smooth coating on your concrete floor. To eliminate them, you need to thoroughly clean the surface before applying any decorative patterns or surface sealing. First, identify all greasy areas. Second, apply a degreaser or heavy-duty cleaner designed for concrete. Third, scrub the spots with a stiff-bristled brush to lift the oils. Fourth, rinse with clean water and let it dry completely. For stubborn stains, repeat the process or use a solvent like acetone. Properly removing oil and grease guarantees your surface is clean and free of contaminants, so your coating adheres well and lasts longer. Additionally, ensuring the surface is free of water contamination is crucial for optimal adhesion. This step is essential for a flawless finish and to prevent future peeling or bubbling. Confirming the absence of contaminants like oil or dirt helps maintain the integrity of the coating. Using the right cleaning methods can also prevent surface issues that compromise the longevity of your paint or sealant. Moreover, understanding regional flavor variations in cleaning products can help you select the most effective solutions for your specific climate or environment. Incorporating knowledge of surface preparation ensures that your coating will bond properly and resist premature failure.
moisture meter for concrete
As an affiliate, we earn on qualifying purchases.
As an affiliate, we earn on qualifying purchases.
Removing Oil, Grease, and Contaminants for Better Adhesion
To guarantee your floor coating sticks properly, you need to identify common contaminants like oil, grease, and dirt. Using effective cleaning techniques, such as degreasers and proper scrubbing, helps remove stubborn residues. Proper surface preparation is essential for a strong bond, so take the time to thoroughly clean and prepare the concrete. Additionally, understanding the comparative advantage of different cleaning methods can optimize your preparation process for better adhesion. For example, selecting the right electric dirt bike cleaning equipment can make the process more efficient and effective.
Identifying Common Contaminants
Contaminants like oil, grease, and other residues can greatly hinder the adhesion of floor coatings, so it’s essential to identify and remove them thoroughly before applying any coating. These substances often cause chemical reactions that weaken bonding and lead to surface discoloration. To spot common contaminants, look for:
- Oily stains that feel slick or greasy to the touch
- Dark or shiny patches indicating grease buildup
- Unusual discoloration or patches that resist cleaning
- Residues that smear or smudge during surface inspection
Recognizing these signs helps you target problematic areas. Failing to identify contaminants can result in poor adhesion, surface discoloration, and coating failure. Proper identification ensures you address all residues before cleaning, including understanding the chemical properties of contaminants that interfere with adhesion. Additionally, understanding the contaminant types can help determine the most effective cleaning methods. Using effective cleaning methods, such as appropriate cleaning solutions, can create a more natural and inviting space, setting the stage for a durable, long-lasting finish.
Effective Cleaning Techniques
Effective cleaning is essential for guaranteeing proper adhesion of floor coatings, especially when removing stubborn substances like oil and grease. To achieve this, use degreasers suited for your coating type, whether epoxy, polyurethane, or acrylic. Proper cleaning improves surface porosity, allowing coatings to bond effectively. Consider the color options for your floor to ensure contaminants are visible during cleaning. Use the right tools—brushes, pressure washers, or scrapers—to remove debris thoroughly. Additionally, understanding shipwreck preservation techniques can offer insights into marine corrosion removal, which parallels rust treatment on floors.
Proper Surface Preparation
Before applying any floor coating, you must thoroughly remove oil, grease, and other stubborn contaminants, as these substances can prevent proper adhesion. To guarantee a solid bond, consider these steps:
- Use a degreaser or solvent designed for concrete, focusing on areas with decorative patterns or sealant options.
- Scrub the surface with a stiff brush to lift stubborn oils and grime.
- Rinse thoroughly with water and allow it to dry completely.
- For extra adhesion, consider acid etching or grinding to create a rough, clean surface.
- Ensuring the use of reputable products and techniques is crucial for achieving trusted results and long-lasting adhesion. Proper surface prep includes understanding how different contaminants can impact the adhesion process and the overall durability of your coating. Additionally, understanding material compatibility is essential to prevent chemical reactions that could weaken the coating’s bond.
Removing contaminants ensures your coating adheres properly, especially when working around decorative patterns or sealant options. Proper surface prep prevents peeling or bubbling, giving your floor a durable, professional finish.
concrete primer for floor coating
As an affiliate, we earn on qualifying purchases.
As an affiliate, we earn on qualifying purchases.
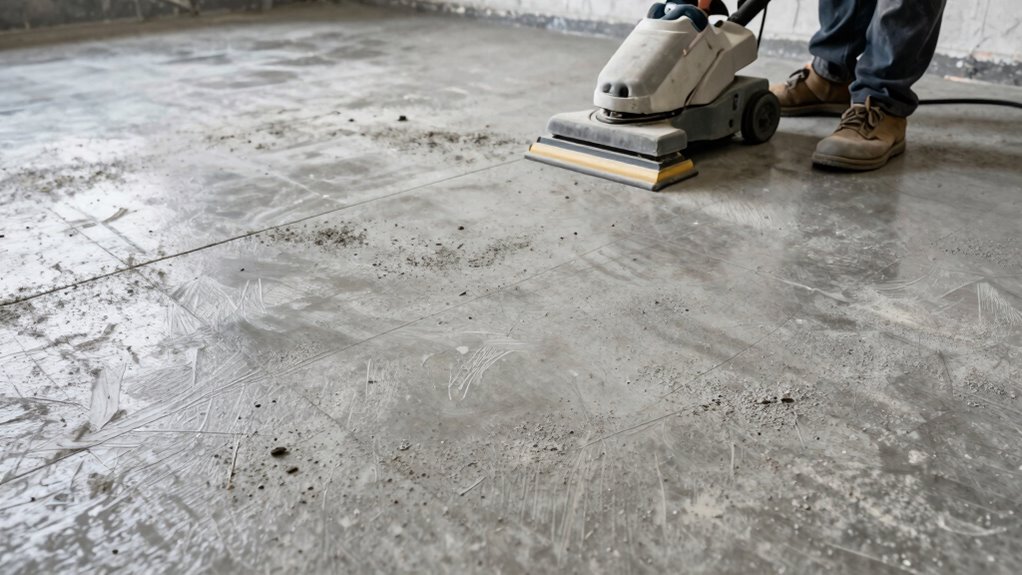
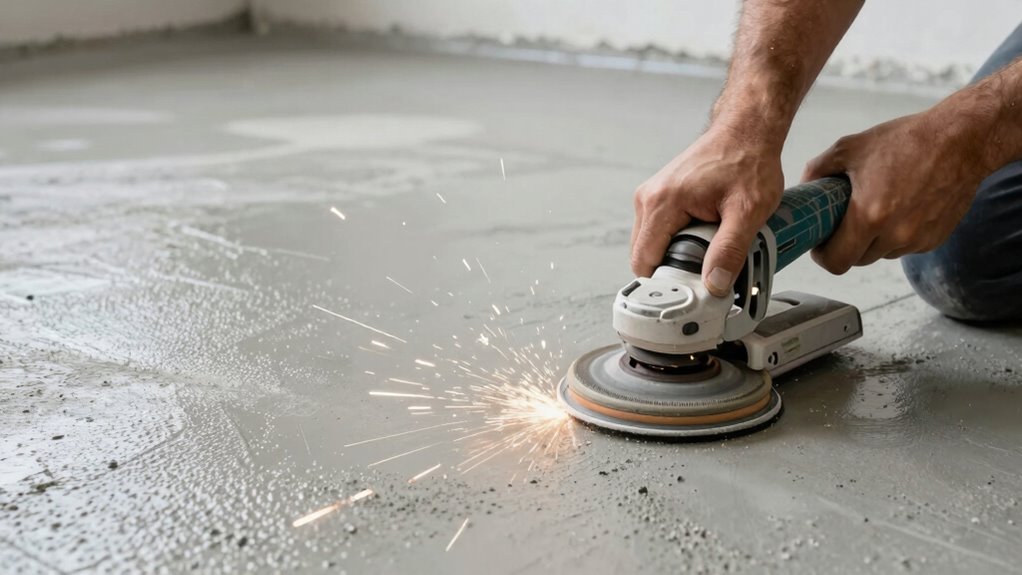
How to Etch or Roughen Concrete for Stronger Bonding
To guarantee your floor coating bonds properly, you need to roughen the concrete surface through etching or mechanical abrasion. Acid etching involves applying a diluted acid solution to create a textured surface that improves adhesion. Be sure to wear protective gear and rinse thoroughly afterward. Mechanical profiling, on the other hand, uses grinding or scarifying tools to physically roughen the surface. This method is effective for heavily worn or uneven concrete. Both techniques increase surface porosity, allowing the coating to grip better. Choose acid etching for smoother surfaces and mechanical profiling for rougher, more textured ones. Properly roughened concrete ensures a stronger bond and longer-lasting floor coating. Always follow safety guidelines and manufacturer instructions when performing either method.
Choosing the Best Primer for Your Concrete Floor
Choosing the right primer is vital for ensuring your floor coating adheres properly, so surface preparation and compatibility are key. You’ll want to take into account factors like the concrete’s condition and the primer’s bonding properties before application. Applying the primer correctly using recommended techniques will help you achieve a durable, long-lasting finish.
Surface Preparation Importance
Selecting the right primer is essential because it directly influences how well your concrete surface bonds with the floor coating. Proper surface preparation ensures the coating adheres effectively and looks its best. Think of it as creating a solid foundation for your project. To achieve this, consider these factors:
- Surface texture – smooth or rough, the primer must match the surface to promote adhesion.
- Cleanliness – remove dust, grease, and debris for maximum bonding.
- Porosity – highly porous surfaces may need primer that enhances penetration.
- Color enhancement – some primers improve the vibrancy of the coating, making colors pop.
Addressing these aspects guarantees better adhesion and a more durable, visually appealing finish. Proper surface prep is crucial to a flawless floor coating.
Primer Compatibility Factors
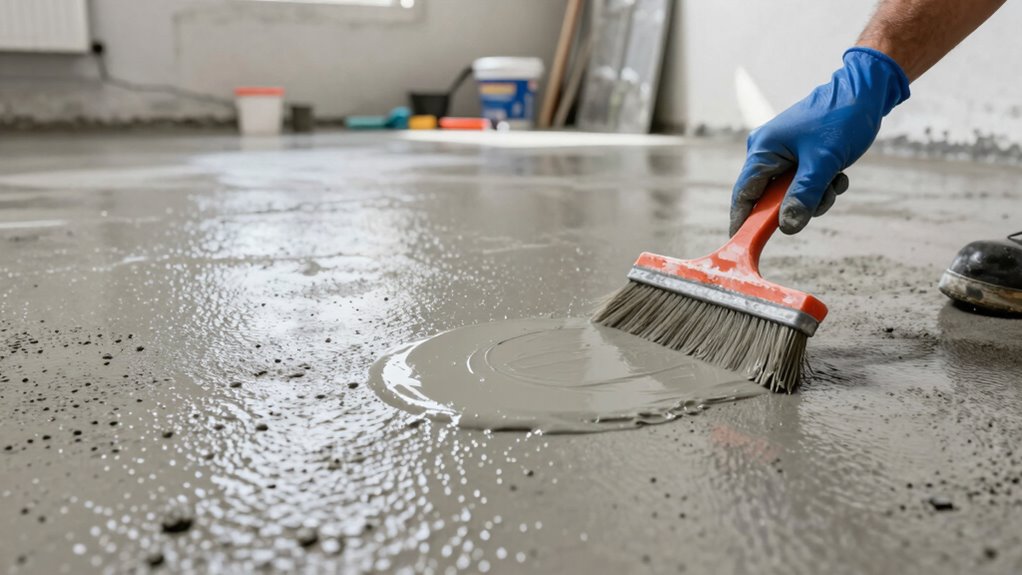
Ensuring your primer is compatible with your concrete surface is essential for achieving a strong, lasting bond. A suitable primer promotes effective surface sealing, which prevents moisture intrusion and enhances adhesion. When selecting a primer, consider its chemical bonding capabilities with your specific concrete type. Some primers are designed to chemically react with the concrete, forming a durable bond that resists peeling or lifting over time. Others focus on surface sealing to create an even, stable layer that improves coating adhesion. Using an incompatible primer can lead to poor adhesion, coating failure, or delamination. Always check the manufacturer’s recommendations for compatibility with your concrete surface and coating type. Proper primer selection guarantees maximum adhesion and longevity for your floor coating.
Application Techniques and Tips
Once you’ve identified the right primer for your concrete surface, applying it correctly is key to guaranteeing a durable bond. Start by cleaning the surface thoroughly to remove dust and grease. Next, follow these application tips:
- Use a roller or sprayer for even coverage, ensuring no missed spots.
- Apply the primer in thin, consistent coats to prevent pooling.
- Allow sufficient drying time before starting decorative patterns or color customization.
- Maintain a dust-free environment during curing to avoid imperfections.
Proper application helps the primer penetrate deeply, creating a strong bond for your decorative patterns. It also assures the surface is ready for color customization, resulting in a smooth, attractive finish that lasts longer.
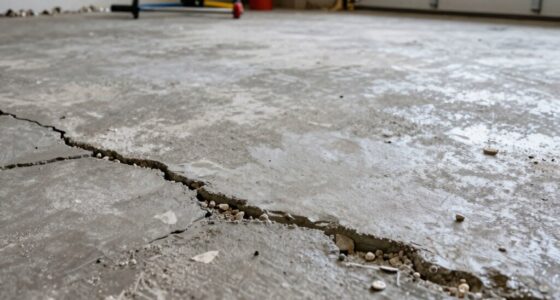
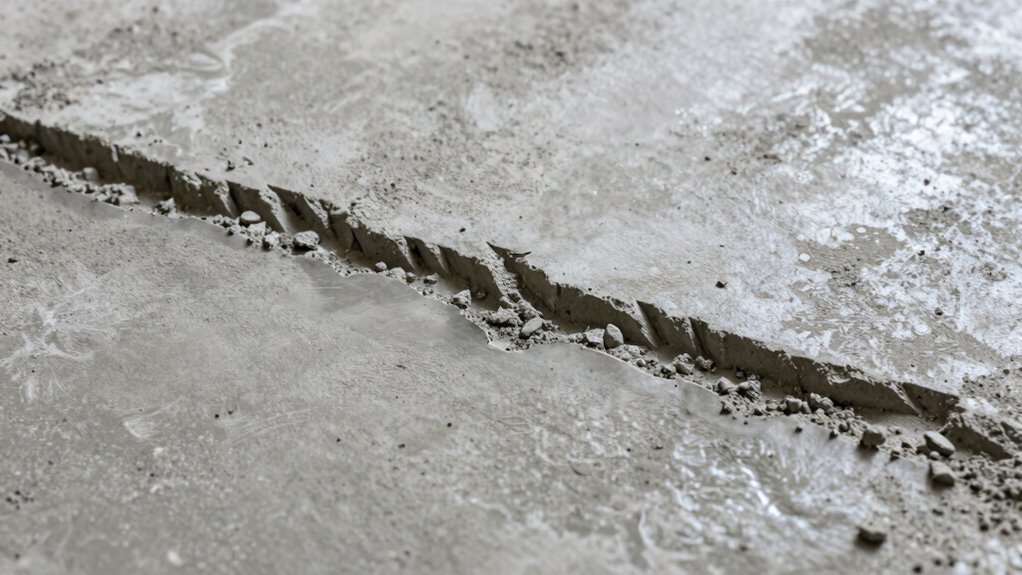
Repair Cracks and Surface Damage Before Applying Coatings
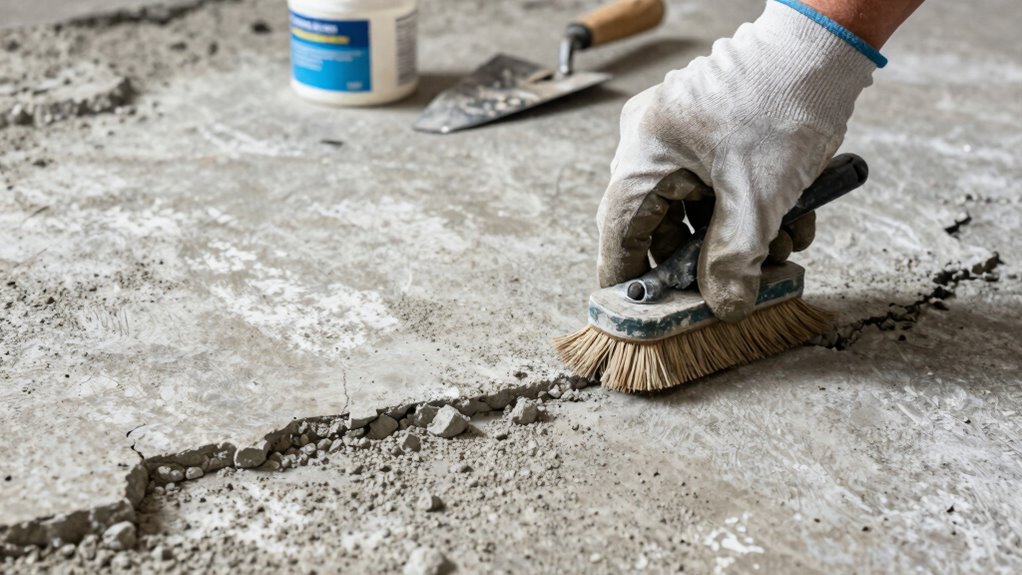
Have you checked your concrete surface for cracks or damage? Addressing these issues is vital for proper surface sealing and ensuring your coating sticks. Small cracks can be filled with crack filling products to prevent moisture intrusion. Larger surface damage should be repaired with suitable patching compounds before sealing. Here’s a quick guide:
| Damage Type | Repair Method |
|---|---|
| Small cracks | Crack filling with epoxy or sealant |
| Surface pitting | Patching with concrete repair mix |
| Holes or gouges | Patching with a suitable concrete patch |
| Surface spalling | Remove loose material, then seal and repair |
Repairing these imperfections creates a smooth, stable base, promoting better adhesion and longevity for your floor coating.
How to Properly Dry Your Concrete Floor Before Painting
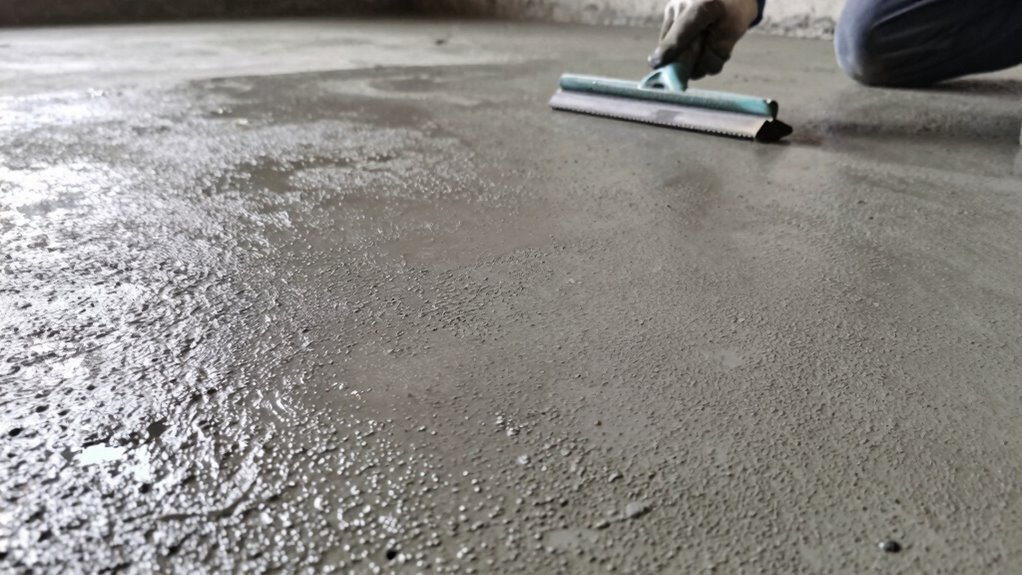
Before applying paint or coatings, making certain your concrete floor is thoroughly dry is essential, as moisture can cause adhesion problems and lead to peeling or bubbling. To dry your floor effectively:
Ensuring your concrete floor is completely dry prevents adhesion issues and ensures a durable, attractive finish.
- Remove any surface water with a squeegee or mop.
- Use fans or industrial blowers to increase airflow and reduce humidity.
- Wait 24-48 hours if the floor was recently wet or exposed to rain.
- Check for trapped moisture by placing a plastic sheet on the surface for 24 hours; if condensation appears, dry the area further.
Properly dried concrete creates a smooth base for decorative patterns and helps guarantee your chosen color selection adheres well, resulting in a long-lasting and attractive finish.
Check for Moisture and Compatibility Before Coating
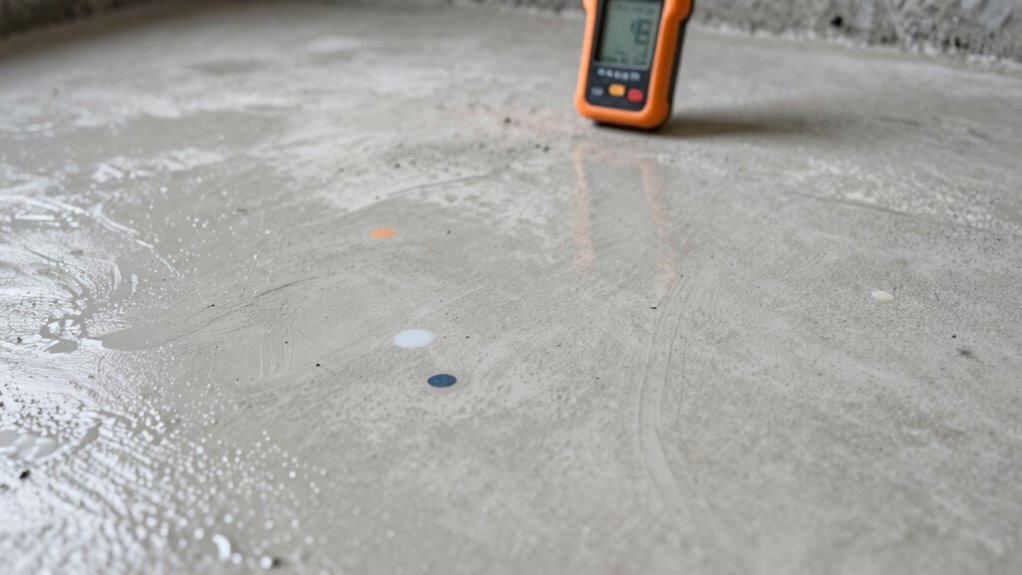
After confirming your concrete is thoroughly dry, the next step is to verify moisture levels and compatibility with your chosen coating. Moisture testing is vital to detect any trapped water that could cause future problems like peeling or bubbling. Use a moisture meter or perform a simple plastic sheet test to check for moisture vapor emissions. Once you confirm the concrete is dry enough, assess coating compatibility by reviewing the manufacturer’s specifications. Not all coatings work well with every surface or moisture level, so ensure your product is suitable for your specific concrete. Taking these steps helps prevent adhesion issues and guarantees a long-lasting finish. Proper moisture testing and compatibility checks are essential for a successful coating application that stands the test of time.
Tips to Protect Your Floor During Preparation
Protecting your floor during preparation is essential to prevent damage and guarantee a smooth coating application. To keep your surface intact, consider these tips:
Shield your floor during prep with protective coverings and careful planning for damage-free results.
- Cover the floor with protective sheeting to shield against scratches and debris that could ruin decorative patterns.
- Use painter’s tape around edges to prevent accidental paint or primer splatters, ensuring clean lines for color integration.
- Remove furniture and accessories, minimizing the risk of dents or scuffs during grinding or cleaning.
- Mark off areas with tape or barriers to avoid unintentional damage while working on surface prep.
Common Mistakes to Avoid When Preparing Concrete Floors
Failing to recognize common mistakes during concrete preparation can lead to issues that compromise the entire flooring project. One mistake to avoid is skipping proper cleaning and etching, which can prevent coatings from adhering well, especially if you’re doing DIY projects or aiming for decorative finishes. Another pitfall is applying coatings on a wet or uneven surface, which causes peeling or bubbling later. Many underestimate the importance of allowing the concrete to cure fully before starting. Also, neglecting to remove contaminants like oil, grease, or old paint can weaken adhesion. Rushing the process or skipping steps, such as surface profiling or patching cracks, results in uneven finishes. Being meticulous and avoiding these mistakes ensures your decorative finishes stick properly and last longer.
Frequently Asked Questions
How Long Should I Wait After Cleaning Before Applying the Coating?
You should wait at least 24 hours after cleaning before applying the coating, ensuring proper surface adhesion. Adequate preparation timing is vital, so the concrete dries completely and any residual moisture evaporates. If you’re in a humid environment or if the surface is porous, waiting longer, up to 48 hours, can improve adhesion. Rushing this step risks poor bonding, which could lead to peeling or uneven wear.
Can I Prep a Concrete Floor With Existing Paint or Coatings?
You can prep a concrete floor with existing paint or coatings, but remember, “A stitch in time saves nine.” First, choose the right color options to match your style. Then, use repair techniques like sanding or grinding to remove loose paint and create a rough surface. Proper prep guarantees your new coating adheres well and lasts longer, making your floor both durable and attractive.
What Tools Are Best for Etching or Roughening Concrete?
You should use a concrete etcher or a muriatic acid solution for etching or roughening your surface. These tools effectively create a textured surface that promotes adhesion. After etching, apply a suitable surface primer to seal the surface and enhance coating adhesion. Always follow proper safety protocols and manufacturer instructions during etching techniques to guarantee the surface is adequately prepared for your floor coating.
How Do I Test for Residual Moisture in the Concrete?
Imagine you’re a detective, uncovering hidden clues. To test for residual moisture, you use moisture testing tools like a pin meter or calcium chloride test kit—these are your investigative tools. Apply them to the concrete surface, and if the calcium chloride shows high moisture levels or the pin meter reads above recommended levels, it indicates residual moisture. This step guarantees your floor coating adheres properly, avoiding future issues.
Is It Necessary to Seal the Concrete Before Applying Floor Coatings?
Sealing concrete before applying floor coatings isn’t always necessary, but it can improve sealant compatibility and coating adhesion, especially on porous or uneven surfaces. If you choose to seal, verify the sealant is compatible with your coating to prevent adhesion issues. Properly sealing helps create a smoother surface, enhances durability, and extends the lifespan of your floor coating. Always test compatibility first to ensure ideal results and long-lasting protection.
Conclusion
So, there you have it—your foolproof plan to turn that boring concrete slab into a sleek, stick-to-it masterpiece. Just remember, skipping steps is like skipping breakfast; it’ll bite you later. Follow these tips, avoid rookie mistakes, and your floor coating will stick around longer than your New Year’s resolutions. With a little effort, you’ll be the envy of all your friends—until they see your impeccably prepared, glossy floor and realize they’ve been doing it wrong all along.