
Caulking is a simple way to seal gaps and cracks around your home, improving energy efficiency and preventing water damage. Start by inspecting areas like windows, doors, and fixtures for leaks or deterioration. Choose the right caulk for your needs, prepare surfaces by removing old sealant and cleaning thoroughly, then apply with a caulking gun, smoothing the bead quickly. Avoid common mistakes like skipping prep or overdoing it—continue to learn how to master this essential DIY skill.
Key Takeaways
- Inspect gaps and clean surfaces thoroughly before applying new caulk for effective sealing.
- Choose the right caulk type (silicone, acrylic) based on moisture exposure and movement.
- Use painter’s tape to create clean edges and a professional finish.
- Apply caulk steadily with a caulking gun, smoothing immediately for neat results.
- Regularly check and maintain caulked areas to ensure long-lasting, effective seals.
caulking gun for DIY projects
As an affiliate, we earn on qualifying purchases.
As an affiliate, we earn on qualifying purchases.
What Is Caulking and Why Is It Important?
Have you ever noticed gaps or cracks around windows, doors, or sinks? That’s where caulking comes in. Many people have caulking misconceptions, thinking it’s just a quick fix for leaks. But it’s actually an essential part of home maintenance, sealing gaps to improve energy efficiency and prevent water damage. Historically, caulking techniques were simple, relying on natural materials like clay or animal fats. Over time, methods evolved to include modern silicone and latex formulas that last longer and adhere better. Knowing what caulking is helps you understand its importance in keeping your home comfortable and protected. Proper application prevents drafts, blocks pests, and saves you money on heating and cooling. Additionally, choosing environmentally friendly crafting materials can make your home maintenance more sustainable. Understanding caulking history can also help you appreciate the evolution of home sealing techniques. Modern caulking products also incorporate antimicrobial properties, which can help prevent mold and mildew growth. Furthermore, understanding the resale value of your home can motivate you to maintain its integrity with proper sealing. Caulking isn’t just a repair; it’s a crucial step in maintaining your home’s integrity.
silicone caulk for windows and doors
As an affiliate, we earn on qualifying purchases.
As an affiliate, we earn on qualifying purchases.
Where Should You Look for Gaps and Cracks?
Start by inspecting your windows and doors for any visible gaps or cracks. Also, check around fixtures like sinks and bathtubs where water could seep through. These areas are common spots that need sealing to keep your home airtight. Be mindful to seal any potential vulnerabilities that could lead to water or air leaks. Using the right DIY tools can help you achieve a more effective and professional seal. Additionally, paying attention to home technology can assist in identifying hidden issues before they become major problems. Incorporating monitoring devices can provide real-time alerts for leaks or drafts, saving you time and money. Regularly cleaning your makeup brushes can also prevent the transfer of debris into sealed areas and maintain overall home hygiene.
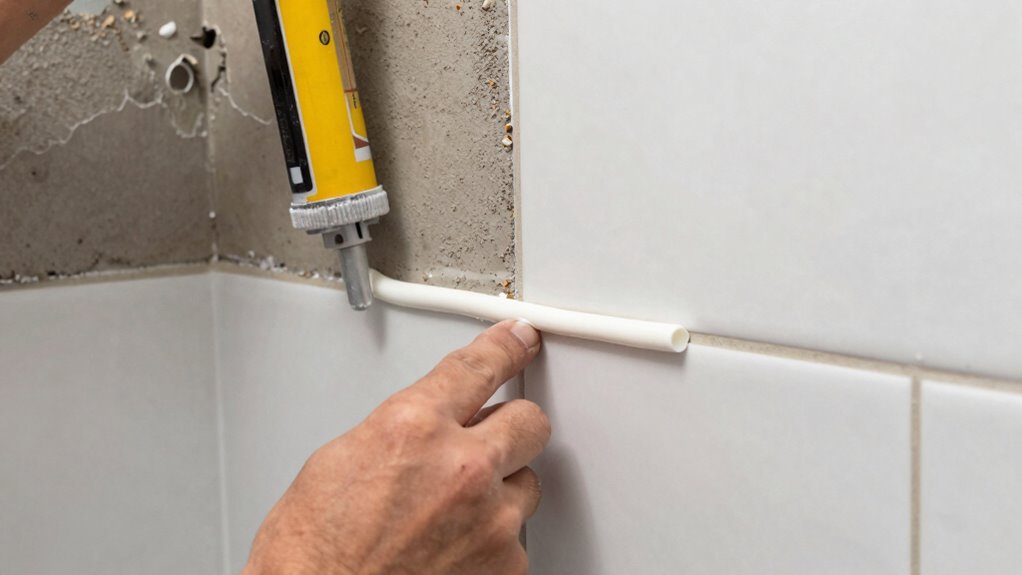
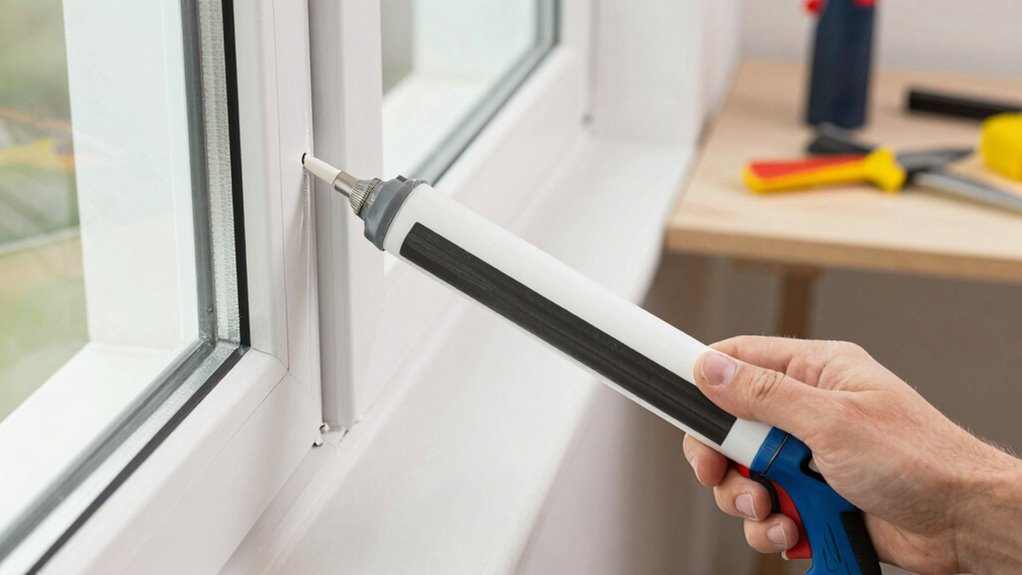
Inspect Windows and Doors
When inspecting your windows and doors, it’s important to look closely for any gaps or cracks that could let drafts slip through. Check around the window insulation and door framing for visible spaces or deterioration. Pay attention to the edges of window sashes and frames, as these are common spots for air leaks. Look for signs of cracked or loose caulking, which can reduce energy efficiency. Also, press gently around the frame to detect any drafts or cold spots. Pay special attention to areas where different materials meet, as these joints often develop gaps over time. Properly sealing these gaps helps improve insulation and keeps your home warmer and more energy-efficient. Additionally, maintaining good indoor air quality by sealing leaks prevents dust and allergens from entering through unsealed gaps. Understanding the different types of caulking materials can help you choose the best option for long-lasting repairs. Knowing how to identify and address air leaks is essential for maximizing your home’s energy savings and comfort.
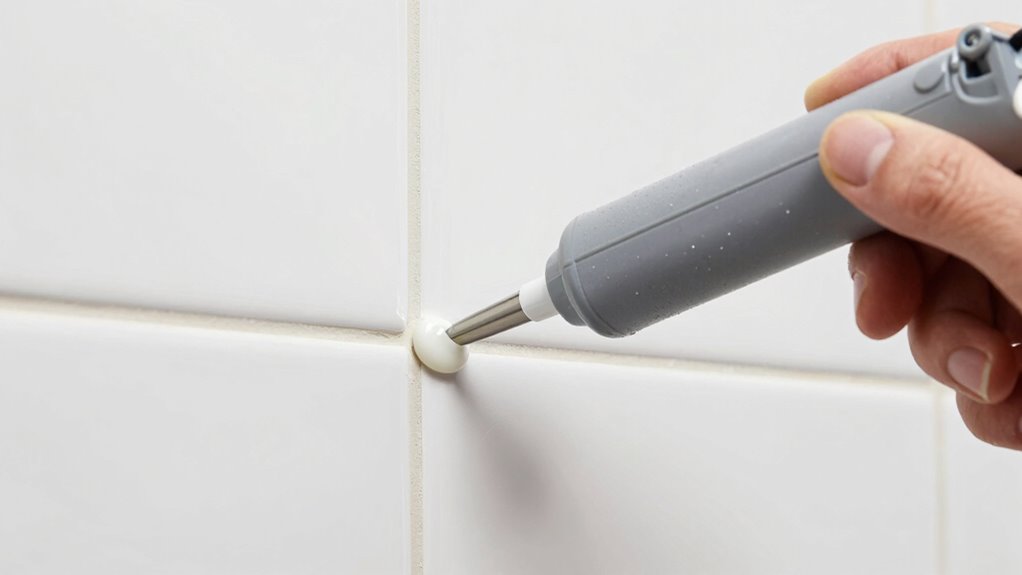
Check Around Fixtures
Checking around fixtures is vital because these areas are common spots for air leaks that can compromise your home’s insulation. During fixture inspection, focus on gaps and cracks where pipes, vents, or electrical outlets meet walls, ceilings, or floors. Look closely for any signs of deterioration, such as peeling paint, gaps, or uneven surfaces. You might notice drafts or cold spots near these fixtures, indicating potential gaps. Use a flashlight to highlight cracks or gaps that aren’t immediately visible. Proper gap identification helps you target the exact areas needing caulking or sealing. Being aware of home maintenance tips can help you improve your inspection process and ensure you don’t overlook small but significant issues. Recognizing the importance of damage prevention can motivate thoroughness and careful inspection. Additionally, understanding nail biology and care can offer insights into how small surface issues might be related to underlying structural concerns, emphasizing the need for detailed inspections.
painter's tape for caulking edges
As an affiliate, we earn on qualifying purchases.
As an affiliate, we earn on qualifying purchases.
How to Choose the Best Caulk for Your Home
Choosing the right caulk for your home can make a big difference in guaranteeing your repairs last and look professional. When selecting caulking materials, consider the area you’ll seal and the movement it needs to accommodate. For example, use silicon-based caulk for bathrooms and kitchens due to moisture resistance, or acrylic for less exposed spaces. Think about sealing techniques too—some caulks are paintable, while others are not. Understanding content formats can help you choose the most effective type of caulk for your project. Additionally, being aware of eco-friendly disposal tips can help you responsibly discard used or excess caulk and minimize environmental impact. Incorporating natural pool considerations can also influence the choice of environmentally friendly caulking options, especially if you aim for a sustainable backyard design. Exploring water-resistant materials can further enhance your sealing results, particularly in areas prone to moisture or water exposure. Recognizing the importance of authenticity and self-identity in your home improvement choices can also lead to more personalized and satisfying results.
caulk removal tool
As an affiliate, we earn on qualifying purchases.
As an affiliate, we earn on qualifying purchases.
Preparing Surfaces Before Caulking
Before applying caulk, you need to clean the surface thoroughly to guarantee good adhesion. Remove all old caulk completely, as leftover residue can prevent the new sealant from sticking properly. Taking these steps helps create a smooth, clean surface for a durable, professional finish. Incorporating inclusive casting practices can also ensure that the finished project reflects diverse perspectives and standards. Additionally, understanding curiosity can encourage you to explore different techniques and materials, leading to better outcomes. Recognizing the scientific skepticism surrounding certain methods can help you make more informed choices about your caulking projects.
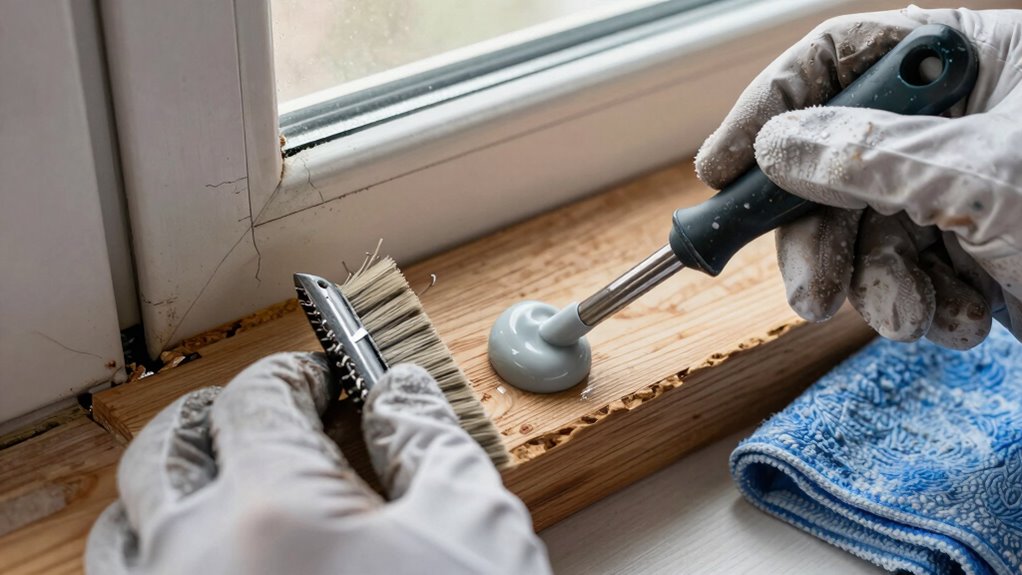
Clean Surface Thoroughly
To guarantee a strong bond, you need to start with a clean surface. Proper surface preparation is essential for effective sealing techniques. Begin by removing dirt, grease, and loose debris with a damp cloth or mild cleaner. Make certain the area is completely dry before proceeding. Any old paint, soap scum, or mold can interfere with adhesion, so take time to scrub thoroughly. Use a scraper or wire brush to eliminate peeling paint or loose material. If necessary, wipe the surface with a solvent like rubbing alcohol for extra cleanliness. A clean, dry surface allows the caulk to adhere properly and prevents future leaks. Remember, thorough cleaning is the foundation of a successful sealing job, ensuring your caulking lasts longer and performs better.
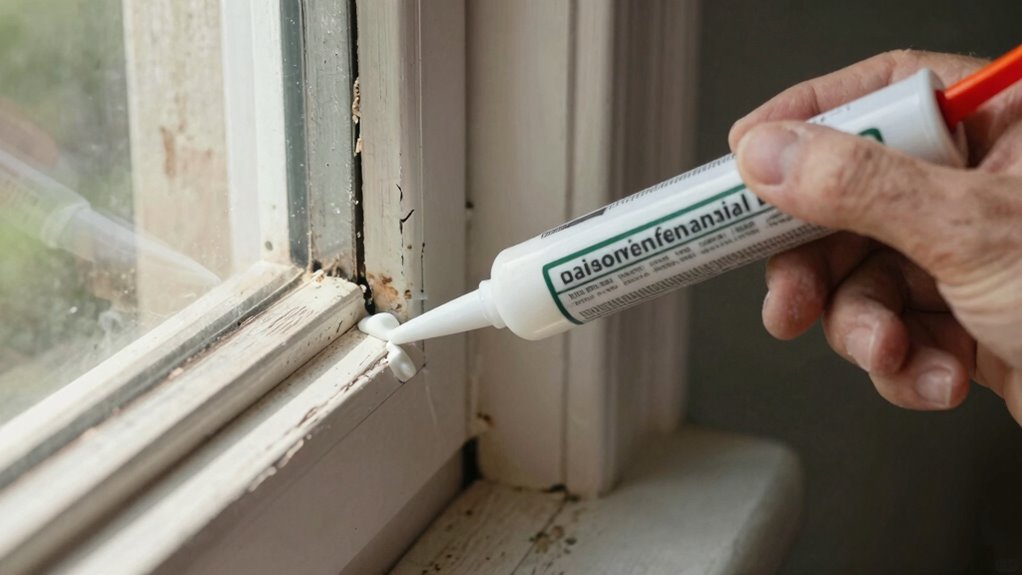
Remove Old Caulk
Removing old caulk is a necessary step to guarantee a smooth and effective new seal. If you skip this, your caulking longevity will suffer, and gaps may develop, allowing moisture to seep in. Use a utility knife or caulk remover tool to carefully cut and scrape away the old caulk. Make certain you remove all residues, as leftover material can prevent the new caulk from adhering properly. This thorough removal also helps prevent mold buildup, which thrives in damp, unsealed areas. Once the old caulk is gone, clean the surface thoroughly to eliminate dirt and debris. Proper preparation not only extends the lifespan of your new caulk but also plays a crucial role in mold prevention, keeping your space cleaner and healthier.
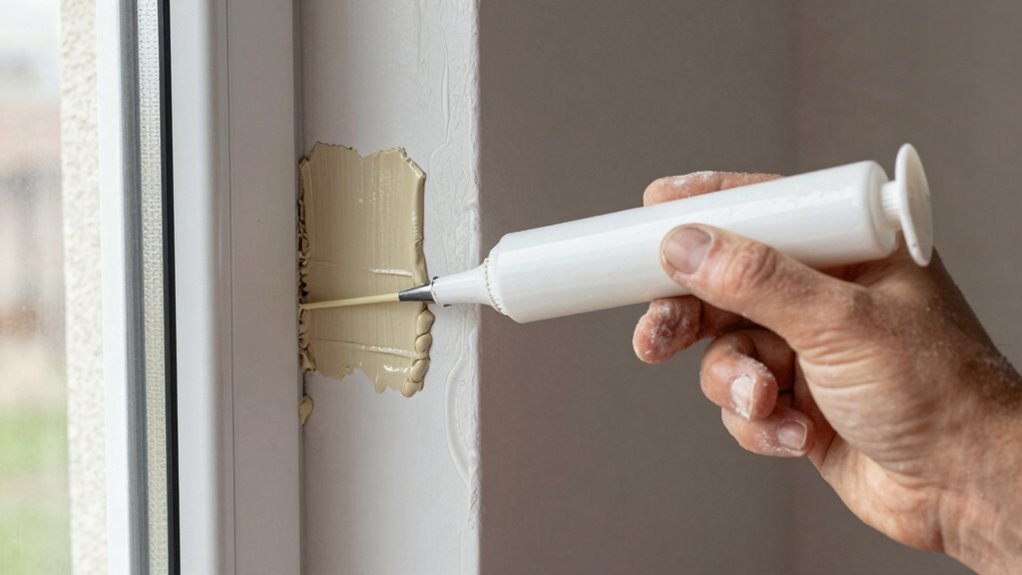
How to Apply Caulk for a Seal That Lasts
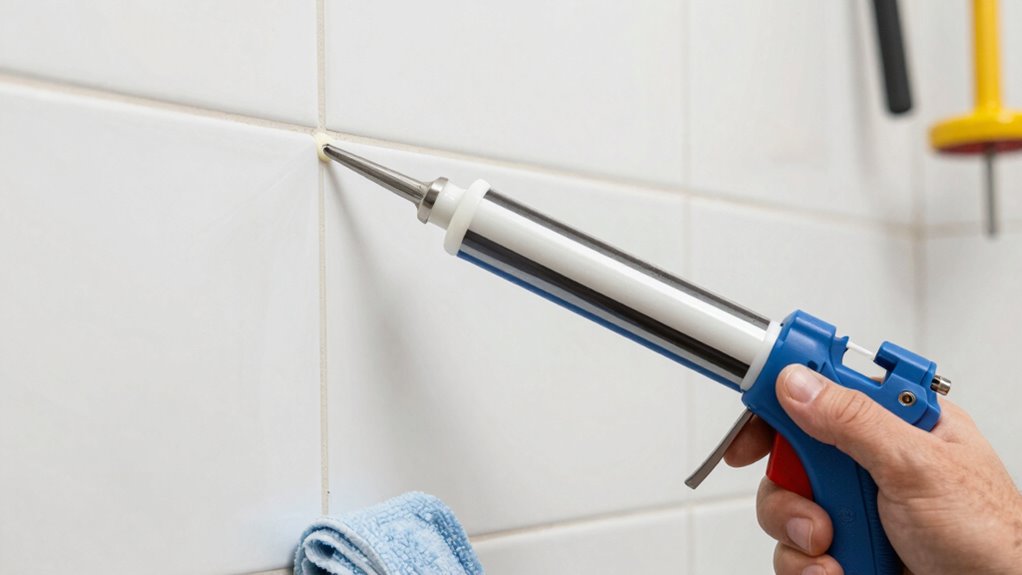
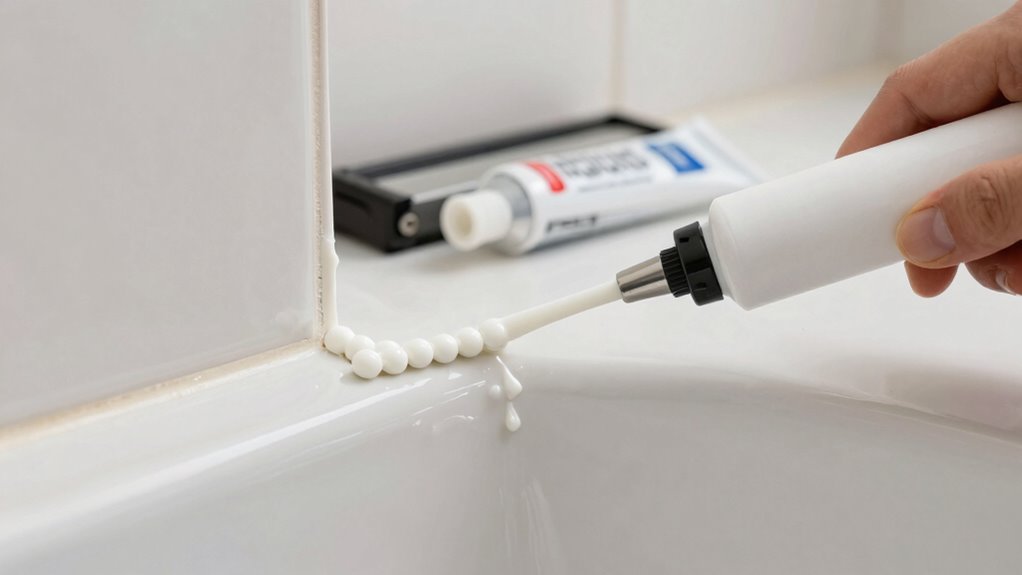
Have you ever struggled with a caulk seam that cracks or peels away too quickly? To guarantee a durable seal, start with the right caulk type for your project. Consider whether you need a silicone, acrylic, or hybrid caulk, and match the color to your surroundings for a seamless look. When applying, follow these tips:
- Cut the tip of the caulk tube at a 45-degree angle for better control.
- Use painter’s tape to create clean edges before applying the caulk.
- Smooth the bead with a damp finger or caulk tool immediately after application.
Choosing the correct caulk type and color matching properly helps create a long-lasting, professional seal that won’t crack or peel over time. Proper technique makes all the difference.
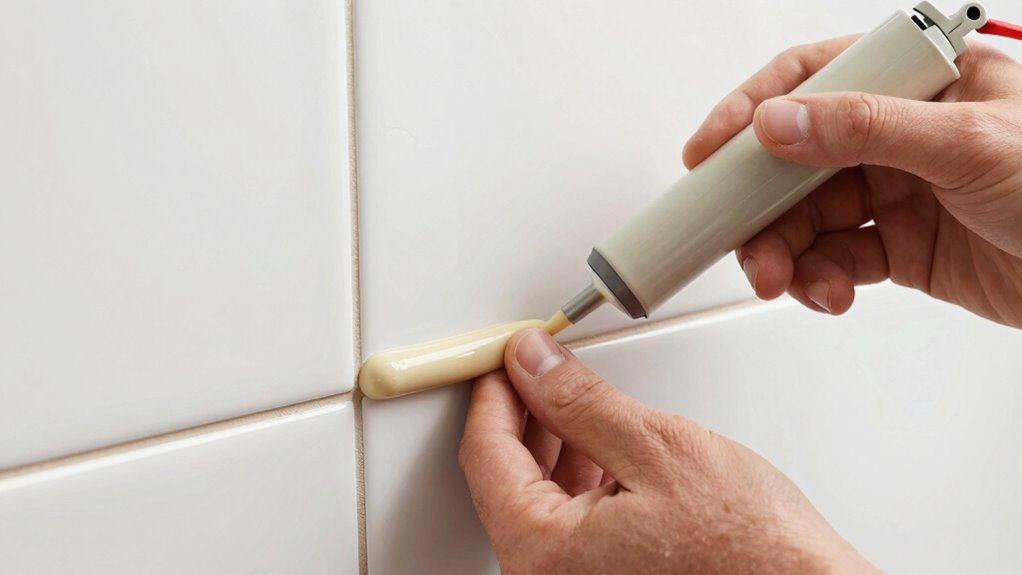
Tips for Smoothing and Finishing Your Caulk
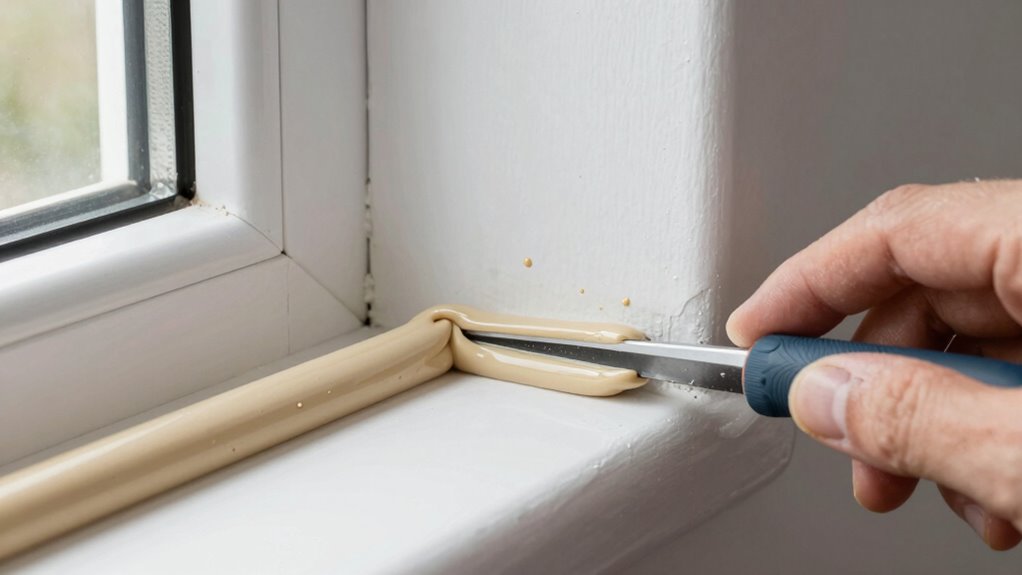
Choosing the right tools and applying steady pressure help you achieve a smooth, even finish. Using a caulk smoothing tool or your finger can make a big difference in the final look. Pay attention to finishing techniques, like tooling the edges, to create a clean, professional seal.
Proper Tool Selection
Ever wondered how the right tools can make your caulking look professional? Choosing the proper tools is essential for smooth, neat finishes. A quality caulk smoothing tool helps you shape the bead precisely, guaranteeing it blends seamlessly with the surrounding surface. Look for tools with different edge shapes to match your project, especially if you’re matching colors or aiming for moisture resistance. You might also consider a putty knife or a silicone spatula for better control. Keep in mind, color matching your caulk can improve the overall look, especially in visible areas. Additionally, using a damp finger or a specialized tool can help smooth out the caulk without disturbing the bead. Proper tool selection ensures a clean, durable finish that resists moisture and looks great.
Consistent Pressure Application
Applying consistent pressure while smoothing your caulk is essential for achieving a professional finish. Maintaining pressure consistency ensures the bead stays even and fills gaps completely. Use your application technique to steady your hand and control the amount of force you apply. Move the caulk tool or your finger smoothly along the seam, avoiding sudden presses or releases that create uneven surfaces. Practice a steady, controlled motion to distribute the caulk evenly. Keep a consistent speed and pressure throughout to prevent gaps or ridges. If you notice unevenness, pause briefly to adjust your grip and reapply uniform pressure. Mastering pressure consistency helps produce a clean, smooth finish that looks polished and seals effectively.
Finishing Techniques
Wondering how to achieve a sleek, professional-looking caulk line? Finishing techniques are key. First, choose the right caulk type that matches your project, whether silicone for flexibility or acrylic for paintability. For a seamless look, use a damp finger or a caulk finishing tool to smooth the bead quickly before it skins over. When it comes to color matching, pick a caulk that closely blends with your wall or trim for a unified appearance. To refine your finish:
- Use a wet finger or tool for a smooth, even surface
- Wipe away excess caulk for cleaner edges
- Match the caulk color to your surface for a polished look
These tips help you create neat, durable seals with professional flair.
Common Mistakes to Avoid When Caulking
One of the most common mistakes when caulking is applying the sealant too thickly or unevenly, which can lead to cracks or gaps over time. To avoid this, focus on proper caulking techniques, ensuring a smooth, even bead. Also, neglecting safety precautions, like wearing gloves or working in well-ventilated areas, can pose risks.
| Mistake | How to Avoid |
|---|---|
| Applying too much sealant | Use a steady, controlled squeeze for consistent beads. |
| Ignoring surface prep | Clean and dry surfaces thoroughly before caulking. |
| Overlooking safety | Wear protective gear and work in ventilated spaces. |
How to Maintain and Re-Apply Caulk Over Time
Over time, caulk can degrade due to exposure to weather, temperature changes, and regular wear, which may cause it to crack, shrink, or peel. Knowing how to maintain and reapply caulk preserves its lifespan and ensures a clean, sealed finish. Regular inspection helps you spot issues early. When reapplying, clean the area thoroughly, removing old caulk and debris for better adhesion. Use proper reapplication techniques, like smoothing the new caulk with a wet finger or caulk tool for a seamless finish. Keep in mind:
- Check caulking lifespan regularly to determine when reapplication is necessary
- Remove old, damaged caulk completely before applying fresh sealant
- Use compatible caulk for the surface and climate conditions
These steps will help you maintain a durable, effective seal over time.
Tools and Materials You’ll Need to Get Started
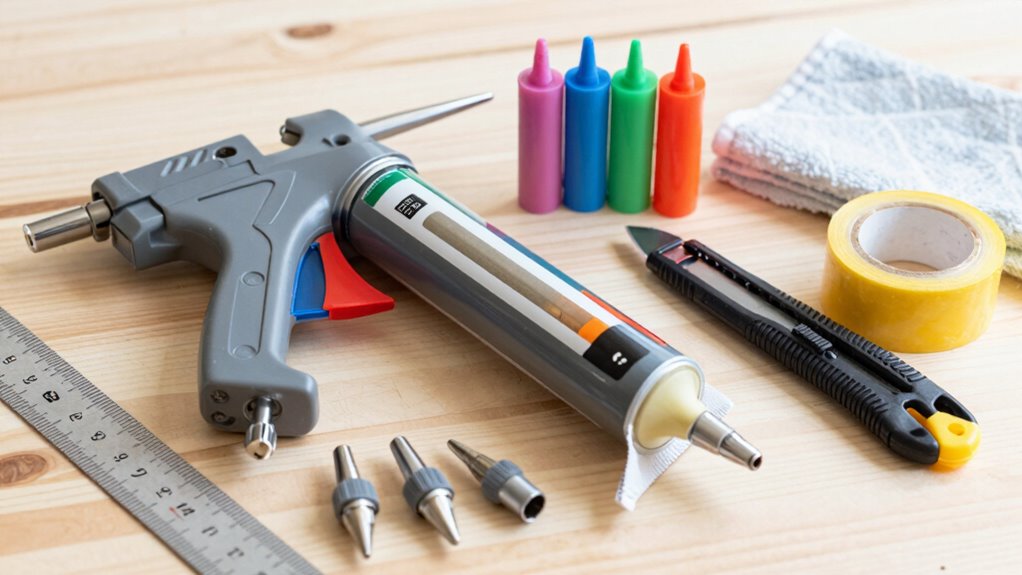
Before you start caulking projects, gathering the right tools and materials is vital for a smooth and professional finish. You’ll need various tools like a caulk gun, utility knife, and a damp cloth for cleanup. When choosing caulk, understand the different caulk types—silicone, acrylic, and polyurethane—to match your project’s needs. Be sure to select the right one for your task. Proper tool maintenance is essential; keep your caulk gun clean and replace worn-out blades regularly to guarantee smooth application. Have painter’s tape on hand for clean lines and a caulk smoothing tool or finger to shape the bead. With the right tools and materials, plus attention to tool maintenance, you’ll make your caulking projects easier and results more professional.
Know When to Hire a Professional for Caulking
While some caulking projects are straightforward enough to handle on your own, there are times when hiring a professional is the smarter choice. If you’re dealing with complex or large-scale jobs, it’s better to guarantee proper caulking safety and minimize environmental impact. Professionals have the expertise to avoid common mistakes that could lead to leaks or mold growth. They also use eco-friendly materials and techniques, reducing environmental impact. Consider hiring a pro if:
- The area is difficult to access or requires specialized tools
- You’re unsure about the correct caulking safety procedures
- The project involves sensitive materials or finishes that need expert handling
Knowing when to call in a professional can save you time, money, and potential health risks, ensuring a durable, safe, and environmentally conscious result.
Frequently Asked Questions
How Long Does Caulk Typically Last Before Needing Replacement?
Caulk typically lasts about 5 to 10 years before needing replacement, depending on the caulk type and environmental factors. You should check for cracks, gaps, or mold, which indicate it’s time for reapplication. Proper maintenance extends caulk lifespan, but when you notice deterioration, timely replacement guarantees your sealing remains effective. Regular inspections help you catch issues early, preventing water damage or drafts around windows, doors, or tubs.
Can I Use Outdoor Caulk Indoors or Vice Versa?
Think of caulk like a superhero costume — designed for specific environments. You shouldn’t use outdoor caulk indoors or vice versa, because outdoor sealing needs to withstand weather, while indoor sealing focuses on preventing drafts and water leaks. Using the wrong type is like putting a raincoat on a superhero who’s only fighting inside; it won’t perform well. Stick to the right caulk for each application to guarantee lasting, effective sealing.
What Environmental Conditions Affect Caulk’s Durability?
Environmental factors like temperature fluctuations, humidity, and exposure to sunlight considerably impact caulk’s durability. When temperature swings occur, the caulk expands and contracts, which can cause cracks or gaps over time. High humidity or direct sunlight can weaken the material or cause it to degrade faster. To guarantee longevity, select a caulk suitable for your specific environment and maintain stable indoor conditions whenever possible.
Is It Necessary to Wear Protective Gear While Caulking?
Yes, you should wear protective gear while caulking. Safety precautions include goggles to protect your eyes from splashes, gloves to prevent skin irritation from chemicals, and a mask if you’re working with strong fumes. Wearing protective gear keeps you safe from potential irritation or injury. Always follow safety guidelines and use the right equipment to guarantee a safe and effective caulking process.
How Do I Remove Old or Damaged Caulk Effectively?
To remove old or damaged caulk effectively, start by using a utility knife or a caulk removal tool to cut along the edges. Then, gently pry it away with a putty knife or plastic scraper. For stubborn spots, apply a caulk remover solution, following safety precautions like wearing gloves and eye protection. Always work in a well-ventilated area, and dispose of the debris properly.
Conclusion
Now that you know the basics, caulking becomes a simple task—like painting by numbers. With the right tools, a little prep, and patience, you can keep your home sealed tight and looking great. Remember to check for gaps regularly and reapply when needed. Whether you do it yourself or call in a pro, maintaining your caulking is key to a cozy, energy-efficient home that lasts for years to come.