
You should replace your weather stripping when you notice visible cracks, tears, or gaps, which can cause drafts and energy loss. If it feels brittle, hard, or uneven when pressed, it’s a sign it’s worn out. Drafts, increased energy bills, and temperature fluctuations also indicate it’s time for a change. Regular inspections can catch issues early, and exploring more about proper replacement methods can help you keep your home comfortable and energy-efficient.
Key Takeaways
- Visible cracks, tears, or brittleness indicate the weather stripping needs replacement.
- Gaps or drafts around doors or windows suggest worn-out weather stripping.
- Increased energy bills or temperature fluctuations point to ineffective insulation.
- Hardening or loss of flexibility in the material signals deterioration.
- Regular inspections reveal early signs of damage, prompting timely replacement.
weather stripping replacement kit
As an affiliate, we earn on qualifying purchases.
As an affiliate, we earn on qualifying purchases.
Common Problems Caused by Failing Weather Stripping
When weather stripping starts to fail, you might notice drafts or cold spots around doors and windows. These issues can lead to increased energy bills and reduced comfort. Climate considerations play a big role; in colder climates, failing weather stripping allows cold air inside, making your heating system work harder. In warmer areas, it lets in hot air, increasing cooling costs. Material durability is also essential—over time, exposure to sunlight, moisture, and temperature fluctuations can weaken the materials, causing cracks or gaps. When weather stripping deteriorates, it compromises your home’s insulation, leading to drafts, increased noise, and potential moisture problems. Regular inspection and maintenance of weather stripping can help extend its lifespan and maintain energy efficiency. Proper material selection based on your climate can also enhance durability and performance. Understanding weather stripping materials can guide you in choosing the most suitable type for your environment. Additionally, being aware of signs of deterioration can help you identify when replacement is necessary. Recognizing the impact of exposure to elements can help you prevent early deterioration. Replacing worn weather stripping promptly helps maintain energy efficiency and keeps your home comfortable regardless of climate.
door and window weather stripping
As an affiliate, we earn on qualifying purchases.
As an affiliate, we earn on qualifying purchases.
What Signs Show Your Weather Stripping Is Worn Out?
If you notice drafts or cold spots around your doors and windows, it’s a clear sign that your weather stripping may be worn out. These gaps allow air leaks, reducing your home’s energy efficiency and increasing heating or cooling costs. Worn weather stripping often causes more noticeable temperature fluctuations, making you feel uncomfortable even when your HVAC system runs constantly. As part of seasonal maintenance, check for visible cracks, tears, or compression in the seal. If the weather stripping feels brittle or no longer springs back when pressed, it’s time to replace it. Paying attention to these signs helps you maintain energy efficiency tips and keeps your home comfortable year-round. Regular inspection of home sealing components can help identify issues early and improve overall energy performance. Properly maintaining air sealing is essential for preventing drafts and reducing energy waste. Incorporating natural landscaping around your home can also help reduce wind flow and lessen the impact of drafts. Additionally, understanding the importance of weather stripping materials can guide you in choosing the most durable options for your climate. Being aware of signs of wear can help you act promptly before energy loss becomes significant. Replacing damaged weather stripping now prevents further energy loss and saves money on utility bills.
energy-efficient weather stripping
As an affiliate, we earn on qualifying purchases.
As an affiliate, we earn on qualifying purchases.
How to Visually Inspect Weather Stripping for Damage
To check your weather stripping, start by looking for cracks or tears along its surface. Make sure there are no gaps or areas where it feels compressed or uneven. Also, examine for signs of deterioration or wear, such as brittleness or missing sections. Proper installation and maintenance can help prolong its effectiveness. Additionally, inspecting for damage can prevent energy loss and improve overall home insulation.
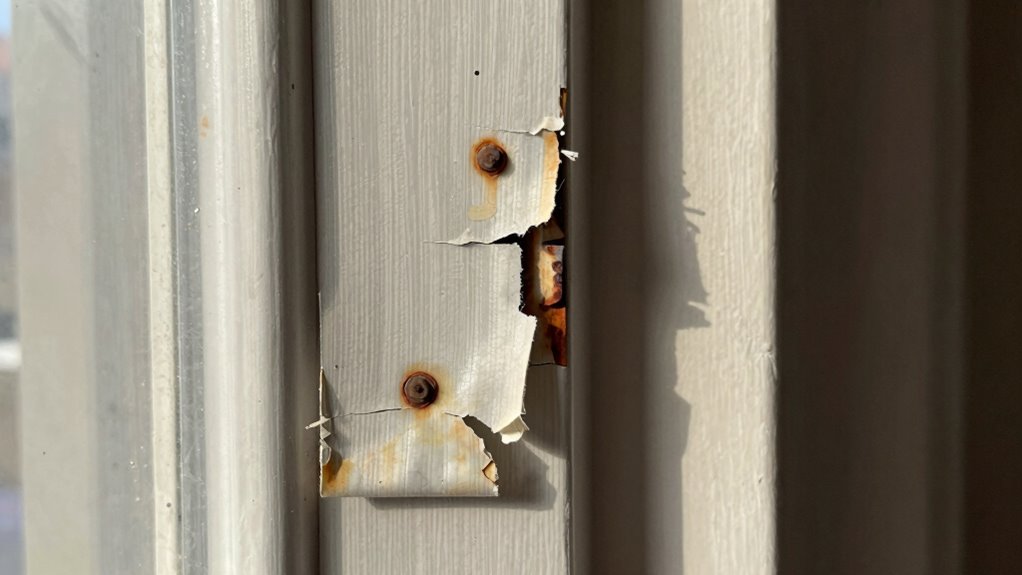
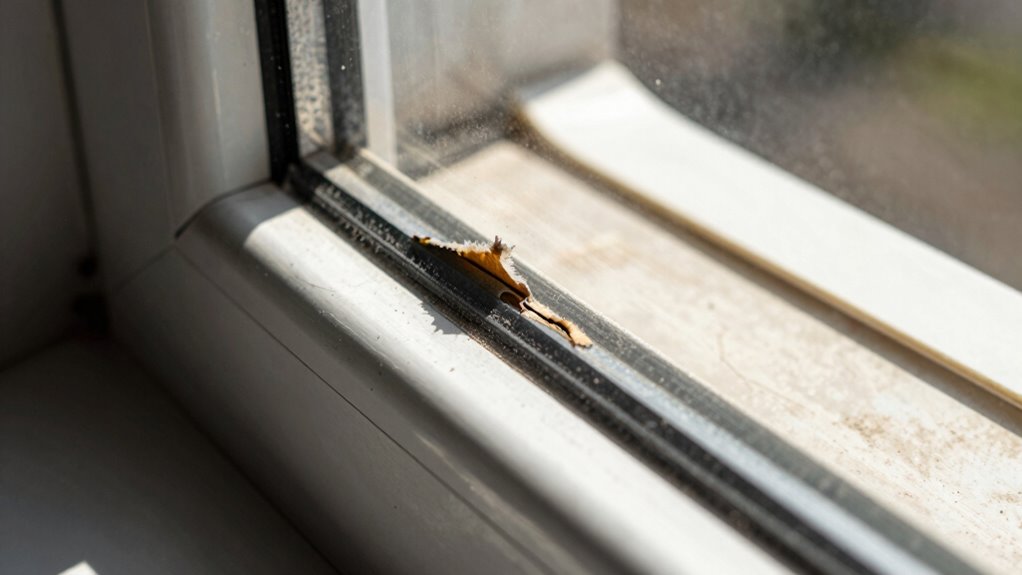
Look for Cracks or Tears
Cracks and tears in weather stripping are clear signs it needs replacing. During your inspection, focus on crack detection and tear repair. Look closely at the edges and surfaces for any visible damage. Here are three key things to check:
- Cracks – Small or large, cracks compromise the seal and allow drafts.
- Tears – Rips or splits in the material reduce effectiveness.
- Deformation – Warped or misshapen weather stripping indicates deterioration. Regularly inspecting weather stripping materials can help identify early signs of damage before they become major issues. Also, pay attention to the material durability to ensure the weather stripping maintains its integrity over time. Additionally, understanding how weather stripping works can help you recognize when it’s no longer performing properly. Being aware of proper installation techniques can also extend the lifespan of your weather stripping.
If you find cracks or tears, it’s time to replace the weather stripping. Damaged areas can’t be properly sealed, which impacts energy efficiency. Addressing these issues early helps prevent drafts and saves on heating and cooling costs. Regular visual checks ensure your weather stripping stays in top condition. Keeping an eye on signs of deterioration can also help you maintain energy efficiency over time.
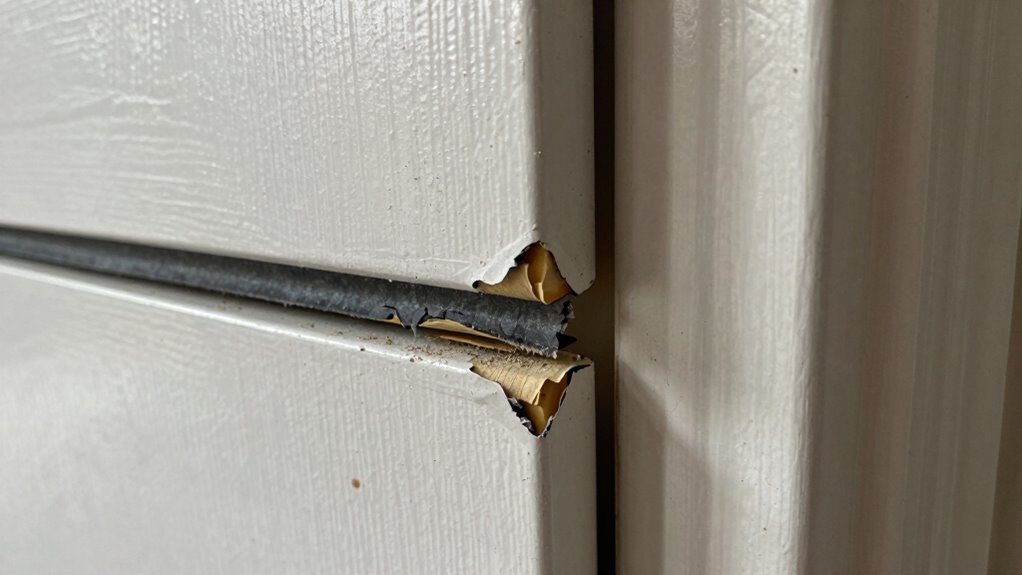
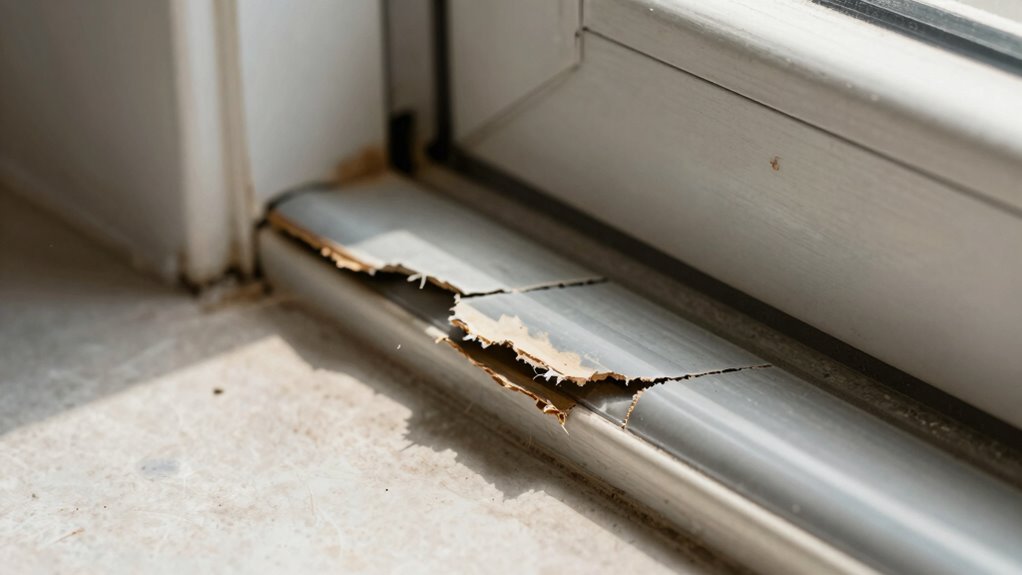
Check for Gaps or Compression
Beyond cracks and tears, inspecting for gaps or compression reveals how well your weather stripping seals. Gaps detection involves closely examining the edges where the strip contacts the door or window frame. Look for any spaces that allow air to pass through, indicating an ineffective seal. During the compression check, press along the weather stripping to see if it compresses evenly and returns to its original shape. If the strip feels overly compressed or leaves a gap when released, it may no longer provide a proper seal. Pay attention to areas where the weather stripping pulls away or appears flattened. These signs suggest it’s time to replace the weather stripping to maintain energy efficiency and prevent drafts. Proper inspection guarantees your home stays comfortable and protected. Additionally, weather stripping quality can impact its durability and sealing effectiveness over time. Regularly inspection techniques can help identify early signs of wear and extend the lifespan of your weather stripping. Incorporating proper maintenance practices can further enhance its performance and longevity. Being aware of material deterioration signs can also assist in determining when replacement is necessary, and understanding how seal integrity affects overall home comfort is crucial.
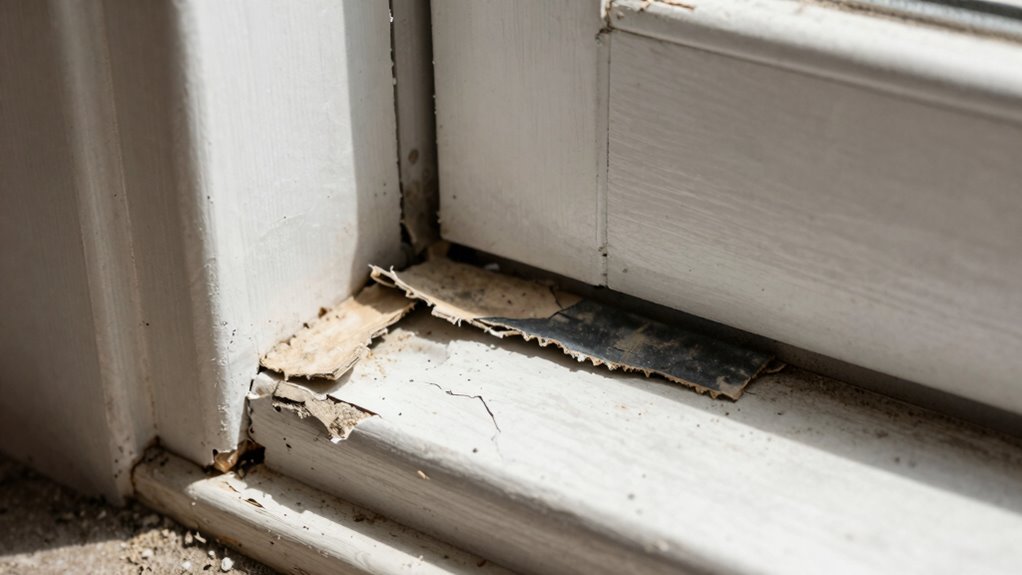
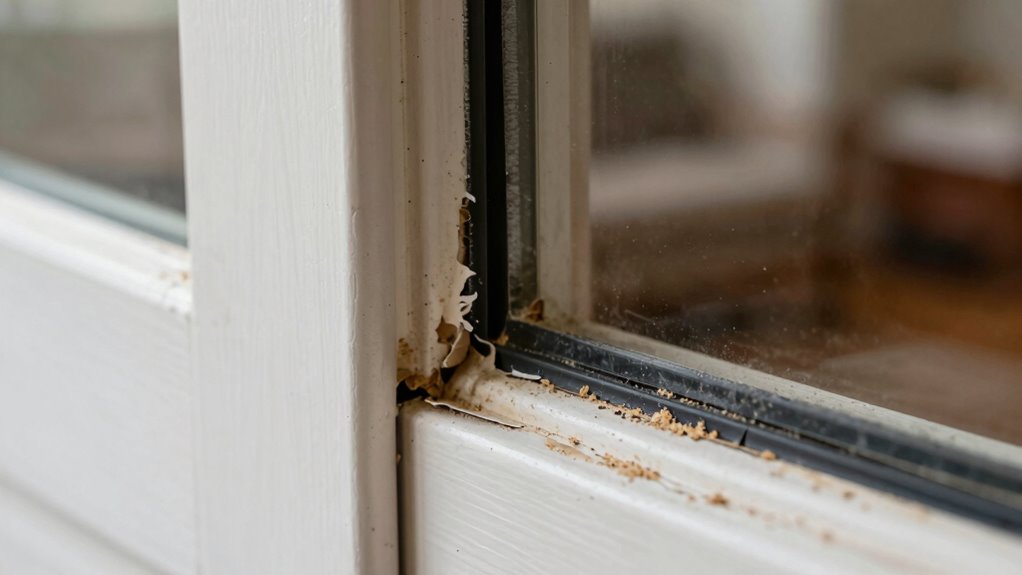
Examine for Deterioration or Wear
Examining weather stripping for deterioration or wear involves closely inspecting its surface for visible damage. Look for cracks, tears, or warping that indicate material deterioration. Damaged weather stripping reduces its durability and effectiveness. To assess its condition, check these key signs:
- Cracks or splits in the material, which compromise the seal.
- Hardening, cracking, or loss of flexibility, showing reduced weather stripping durability.
- Gaps or compressed areas that no longer seal tightly against the door or window frame.
Regular inspections can help identify early signs of material deterioration, preventing energy loss and drafts. Additionally, understanding the effects of humidity on weather stripping can help you determine if moisture has contributed to its wear. If you notice any of these issues, it’s a clear sign the weather stripping is deteriorating and needs replacing. Regular visual inspections help ensure your home stays energy-efficient and protected from drafts, especially as environmental factors like humidity can accelerate wear and tear.
draft sealing weather stripping
As an affiliate, we earn on qualifying purchases.
As an affiliate, we earn on qualifying purchases.
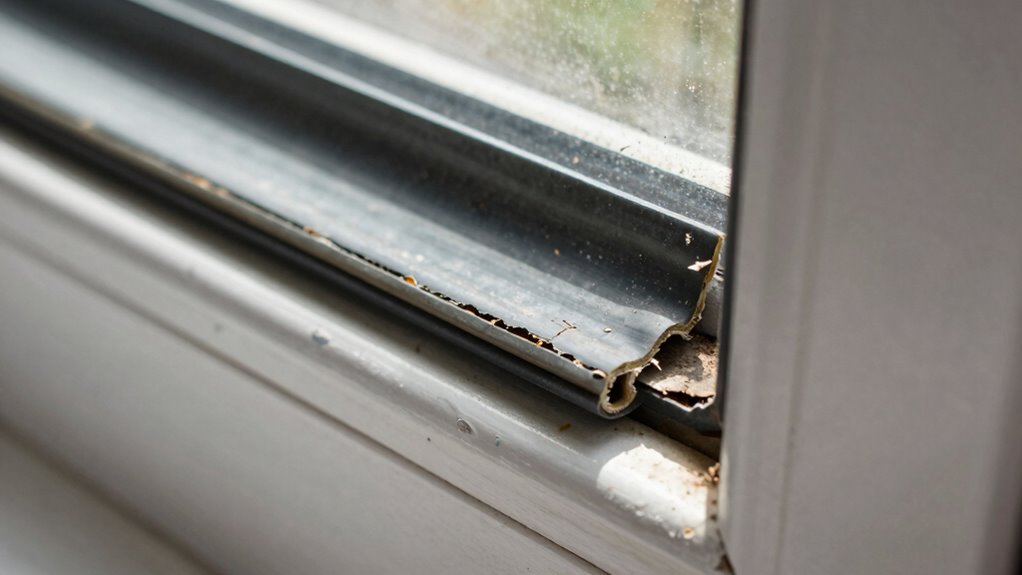
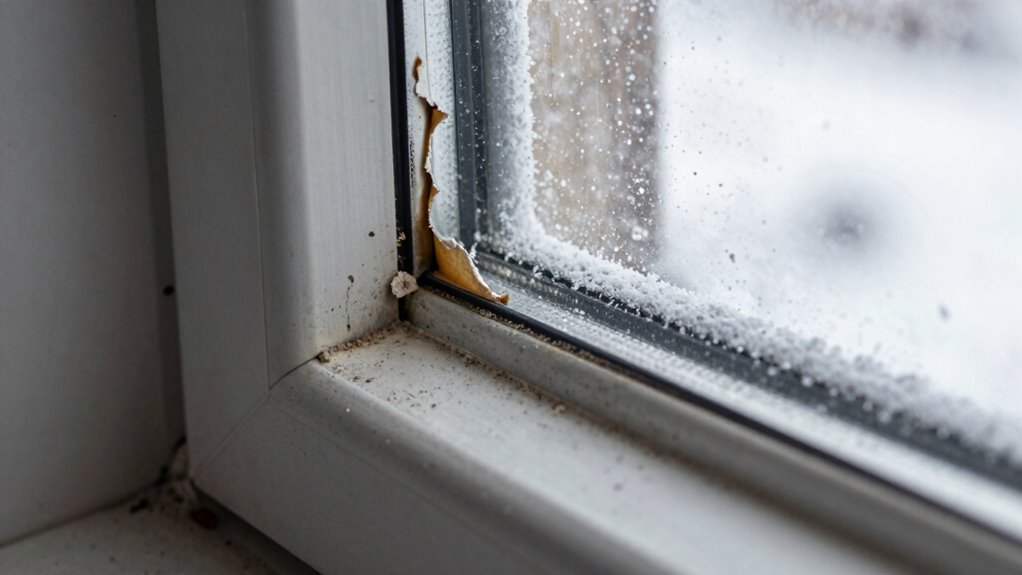
Why Weather Stripping Gets Damaged and How to Prevent It
Weather sealing can become damaged over time due to exposure to the elements, frequent use, and poor installation. Sun, rain, and temperature fluctuations cause materials to crack, warp, or become brittle. Frequent door and window use accelerates wear, especially if the weather sealing isn’t properly maintained. Poor installation can create gaps that allow drafts and moisture in, speeding up deterioration. To prevent damage, perform seasonal maintenance by inspecting and cleaning weather sealing regularly. DIY repairs, like replacing cracked sections or sealing small gaps, can extend its lifespan. Applying protective coatings or choosing durable materials can also help resist weather-related damage. Staying proactive with these steps ensures your weather sealing remains effective longer, saving you energy and preventing costly repairs later.
Step-by-Step Guide to Replacing Weather Stripping at Home
To replace your weather stripping successfully, start by gathering the necessary tools like a screwdriver, utility knife, and new weather stripping. Next, carefully remove the old stripping from your doors or windows, making sure to clean the surface thoroughly. Finally, install the new weather stripping, ensuring it fits snugly to prevent drafts and improve energy efficiency.
Gather Necessary Tools
Before you start replacing your weather stripping, gather all the necessary tools to make the process smooth and efficient. Proper preparation guarantees your seasonal maintenance boosts energy efficiency and keeps drafts out. First, you’ll need a utility knife or scissors to remove old weather stripping. Second, have a caulk gun and weather-resistant adhesive for installing new strips securely. Third, gather a measuring tape to ensure you cut the right length, preventing gaps that hurt energy efficiency. Having these tools ready helps you work quickly and accurately. This preparation minimizes frustration, saves time, and guarantees your home stays warm in winter and cool in summer. Being well-equipped makes the task straightforward, leading to better results and a more comfortable living space.
Remove Old Stripping
Removing old weather stripping is a straightforward process, but it’s important to do it carefully to avoid damaging your door or window frames. Start by inspecting the stripping and noting how it’s attached, whether with adhesive, nails, or clips. Use a utility knife or putty knife to gently lift and peel away the material, working slowly to prevent damage. Consider recent historical weather patterns—if your area experiences harsh winters or humid summers, it’s especially vital to remove worn or damaged stripping during seasonal maintenance schedules. Removing old stripping ensures a clean surface for the new material, maximizing energy efficiency and comfort. Take your time to avoid tearing or scratching the frame, and dispose of the old stripping properly.
Install New Weather Stripping
Once you’ve removed the old weather stripping, it’s time to install the new material to guarantee a tight seal. Proper installation ensures effective weather sealing and enhances insulation. First, measure the length of the areas needing new weather stripping to ensure a precise fit. Next, cut the new strip to match these measurements. Finally, press the weather stripping firmly into place, making sure there are no gaps.
- Choose a weather sealing type suitable for your door or window—foam, rubber, or vinyl.
- Test fit the new strips before sticking or securing them permanently.
- Use a brush or roller to press the weather stripping into tight contact for maximum insulation enhancement.
This process helps maintain energy efficiency and keeps drafts out.
Choosing the Best Weather Stripping Material for Your Home
Choosing the right weather stripping material is essential for maximizing energy efficiency and preventing drafts in your home. To do this effectively, consider how historical weather patterns impact your area—knowing if you face harsh winters or hot summers helps determine the best material. For example, foam tape works well for interior doors, while rubber or silicone seals are better for exterior doors exposed to moisture. Think about your home’s specific needs and how different materials align with your energy conservation techniques. Some materials provide better insulation, while others resist wear and tear longer. By selecting the appropriate weather stripping, you guarantee your home stays comfortable year-round, reducing energy costs and maintaining consistent indoor temperatures.
Tips to Maintain and Extend the Life of Your Weather Stripping
Regularly inspecting your weather stripping is key to extending its lifespan and maintaining its effectiveness. Keeping it in good shape enhances your home’s energy efficiency and insulation benefits. To do this, consider these tips:
- Clean and replace damaged sections promptly to prevent drafts and energy loss.
- Use a flashlight to check for gaps or cracks, sealing them with weather-resistant caulk or new stripping.
- Maintain proper door and window alignment to ensure a tight seal, maximizing insulation benefits.
Frequently Asked Questions
How Often Should I Replace My Weather Stripping?
You should replace your weather stripping every 5 to 10 years, depending on sealant durability and installation techniques. Over time, weather stripping can crack, warp, or lose adhesion, reducing its effectiveness. Regularly inspect it for gaps or damage, especially after harsh weather. Proper installation techniques guarantee longevity, so replacing worn-out strips promptly maintains energy efficiency and keeps drafts out. Acting early prevents higher heating or cooling costs.
Can Weather Stripping Be Recycled or Reused?
Weather stripping’s recycling potential is pretty limited, like trying to squeeze juice from a stone. Most types, especially foam and rubber, aren’t easily reused or recycled because they break down or lose effectiveness. However, some metal or vinyl strips might be repurposed or recycled through specialized programs. Your best bet is to check local recycling guidelines or consider reusing intact strips around your home for small sealing projects, giving them a second life.
What Are the Costs Involved in Replacing Weather Stripping?
Replacing weather stripping costs between $100 and $300, depending on your home’s size and the material chosen. You’ll want to take into account the cost comparison of materials—foam, rubber, or vinyl—as each varies in durability and price. While some materials are cheaper upfront, they might need replacement sooner. Investing in durable, high-quality weather stripping could save you money in the long run by reducing energy bills and maintaining comfort.
Does Weather Stripping Impact Indoor Air Quality?
Weather stripping acts like a gatekeeper for indoor air, so yes, it impacts indoor air quality. By sealing gaps, it helps reduce pollution control issues caused by dust, allergens, and outdoor pollutants. When worn out, it can let in unwanted particles, making indoor air less healthy. Think of it as the first line of defense—maintaining it guarantees your home stays cleaner, healthier, and more comfortable.
Are There Eco-Friendly Weather Stripping Options Available?
Yes, eco-friendly weather stripping options are available. You can choose sustainable options made from recycled or natural materials like rubber, cork, or plant-based products. These eco-friendly materials minimize environmental impact while maintaining effective insulation. By opting for these sustainable choices, you help reduce waste and energy consumption. They’re a smart, environmentally conscious way to improve your home’s energy efficiency without compromising on performance.
Conclusion
Ignoring worn weather stripping may save you a little now, but it leaves your home vulnerable to drafts, energy loss, and higher bills. Replacing it promptly might seem like a small task, but it’s a powerful step toward comfort and efficiency. Just as a single crack can compromise a whole wall, a simple upgrade can strengthen your home’s defenses. Don’t wait for the storm to pass—seal the gaps today and enjoy a cozier, more protected space tomorrow.