
Use this guide to set up an electric roasting pan, cook food in it, and check that the food is ready. It is for beginners using a countertop electric roaster with a removable cooking pan and lid. Setup takes about 15 minutes; cooking time depends on the recipe, the food, and the appliance.

Get home appliances delivered free with Prime
- Fast, free delivery on millions of items
- Prime Video, Amazon Music and more included
- Member-only deals all year

28-Quart Stainless Steel Electric Roaster Oven with Self-Basting Lid
- ✔ Capacity: 28 quarts
- ✔ Temperature range: 150°F–450°F
- ✔ Wattage: 1450 watts

SUNVIVI 24-Quart Roaster Oven with 3 Buffet Trays
- ✔ Capacity: 24 quarts
- ✔ Turkey capacity: Up to 28 pounds
- ✔ Temperature range: 150–450°F
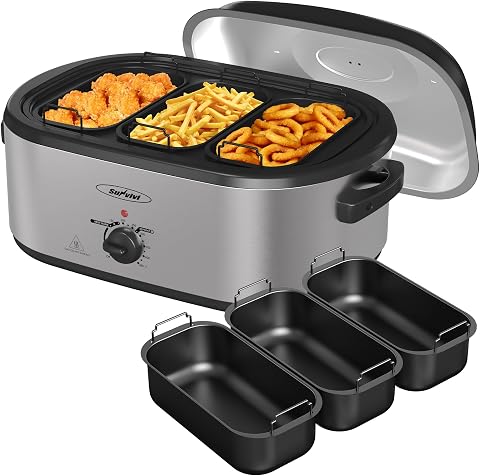
Sunvivi 24-Quart Electric Roaster Oven with 3-Compartment Buffet Server
- ✔ Capacity: 24 quarts
- ✔ Temperature range: 150–450°F
- ✔ Wattage: 1450 watts
Difficulty: Beginner | Time: 15 minutes to set up, plus cooking time
What You’ll Need
Tools & Materials:
- Electric roasting pan with its cooking pan and lid
- Stable, heat-resistant countertop with clear space around the roaster
- Electrical outlet that matches the appliance rating
- Oven mitts or heat-resistant gloves
- Food thermometer for meat, poultry, or other foods that need a temperature check
- Recipe and ingredients
Knowledge:
- Ability to follow the roaster’s temperature and cleaning instructions
- Basic food safety, including keeping raw meat separate from ready-to-eat food
Read the appliance manual before first use. Check whether the cooking pan must be in place before the roaster is plugged in, and whether the model needs water or a rack for your recipe. Do not assume it works exactly like a conventional oven.
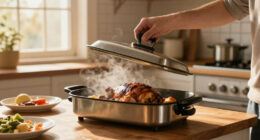
28-Quart Stainless Steel Electric Roaster Oven with Self-Basting Lid
For buyers who want an electric roaster to handle more than one kind of meal, this 28-quart stainless steel model is the most flexible choice in the group. Its 150–450°F control and warm function support roasting, baking, slow cooking, and holding food for serving. That range makes it easier to use across different occasions than either 24-quart SUNVIVI model, both of which put more emphasis on buffet-style sides.The self-basting lid is designed to circulate moisture, while the removable pan and rack make it easier to lift food out and clean up afterward. Those are practical advantages for a large roast, but they do not make the unit compact: its listed dimensions are 27 × 22 × 23 inches, and its 28-quart capacity may be excessive for small households. Compared with the SUNVIVI buffet models, we get more listed cooking capacity and a warm setting, but no included side-dish server. Choose it for cooking room and flexibility; skip it if counter space or serving multiple sides from one appliance matters more.
Pros:
- 28-quart capacity gives more room than the two 24-quart alternatives.
- 150–450°F control supports roasting, baking, and slow cooking.
- Warm function helps hold the main dish for serving.
- Removable pan and rack simplify food removal and cleanup.
Cons:
- Its 27 × 22 × 23-inch footprint takes substantial counter and storage space.
- The large capacity may be unnecessary for smaller meals.
- Unlike the SUNVIVI options, it does not include buffet trays for sides.
Best for: Cooks who want a larger-capacity roaster for varied meals and have room to store a full-size appliance.
Not ideal for: Small households with limited counter or cupboard space, or hosts who want included buffet compartments for side dishes.
Bottom line: We recommend this model for buyers who value cooking flexibility and extra capacity more than an integrated buffet setup.
“We recommend this model for buyers who value cooking flexibility and extra capacity more than an integrated buffet setup.”
SUNVIVI 24-Quart Roaster Oven with 3 Buffet Trays
This SUNVIVI is the lineup’s strongest match for hosts who want the roaster to help manage the whole meal. It pairs a 24-quart roasting chamber with three buffet trays and a divider pan, letting us keep sides warm while the main course is ready. The stated fit for a turkey up to 28 pounds gives buyers a concrete size reference that the other two listings do not provide.Cooking flexibility is broadly comparable to the 28-quart pick: the thermostat covers 150–450°F, and the self-basting dome lid recirculates moisture. The tradeoff is less stated capacity and a setup with more pieces to wash after serving. Its 25-inch width still needs dedicated counter or storage space, so “24-quart” should not be mistaken for compact. Compared with the third product, it has the same buffet-oriented role but lists a 12-inch depth and dishwasher-safe trays and roasting pan. We’d choose it when serving convenience and the stated turkey fit outweigh the appeal of the larger 28-quart chamber.
Pros:
- Three buffet trays and a divider pan support serving sides alongside the main dish.
- The listing specifies turkey capacity up to 28 pounds.
- Adjustable 150–450°F thermostat covers roasting and warming tasks.
- Roasting pan and buffet trays are described as dishwasher safe.
Cons:
- At 25 inches wide, it still requires substantial counter or storage space.
- The trays, divider, rack, and pan add cleanup after use.
- Its 24-quart capacity is smaller than the 28-quart overall pick.
Best for: Holiday hosts who want a roaster that can hold a large turkey and keep several side dishes warm at the table.
Not ideal for: Buyers who need a compact appliance, want the greatest listed capacity, or prefer a simple pan with fewer parts to clean.
Bottom line: We’d choose this model when a stated large-turkey fit and integrated buffet serving matter more than extra roasting capacity.
“We’d choose this model when a stated large-turkey fit and integrated buffet serving matter more than extra roasting capacity.”
Sunvivi 24-Quart Electric Roaster Oven with 3-Compartment Buffet Server
This 24-quart Sunvivi shares the buffet-first idea of the second-ranked model: a self-basting lid and three compartments let us roast the main course while keeping sides warm. Its listed footprint is 10 inches deep by 25 inches wide, two inches shallower than the other SUNVIVI listing, which may help when counter depth is tight. It still needs a long span of counter space, and the listing does not give the same turkey-weight specification as its near counterpart.The main distinction is the removable enamel roasting pan, paired with a stainless steel exterior. The pan and buffet server are described as dishwasher safe, but the care notes advise avoiding steel wool and drying the unit after cleaning to help protect the coating. That extra attention makes it a less carefree choice than the SUNVIVI with the specified turkey capacity. For buyers who want the buffet format and a slightly shallower listed depth, it remains useful; those who prioritize care simplicity or a clear turkey-size limit should compare it closely with the other 24-quart option.
Pros:
- Three buffet compartments keep side dishes warm while the main dish is served.
- The 150–450°F thermostat matches the temperature range of the other picks.
- Removable roasting pan and buffet server are described as dishwasher safe.
- Its listed 10-inch depth is shallower than the other SUNVIVI model’s 12-inch depth.
Cons:
- The enamel coating can be damaged by steel wool and needs thorough drying after cleaning.
- The 25-inch width still takes a long stretch of counter or storage space.
- The listing does not specify a turkey-weight capacity.
Best for: Hosts who want a three-compartment buffet server and can give the enamel pan gentle care after meals.
Not ideal for: Buyers who use abrasive scrubbers, want a specified turkey capacity, or need an appliance substantially narrower than 25 inches.
Bottom line: We’d pick this version for its slightly shallower listed depth and buffet layout, provided we’re comfortable caring for the enamel pan.
“We’d pick this version for its slightly shallower listed depth and buffet layout, provided we’re comfortable caring for the enamel pan.”
As an Amazon Associate we earn from qualifying purchases.
Before You Start
Place the roaster on a level, dry, heat-resistant surface away from walls, curtains, and the edge of the counter. Keep the cord out of walkways and do not use an extension cord unless the manual permits it. The outer housing and lid can become hot during use. Never immerse the electric base or cord in water.
Follow the manual and your recipe for temperature, cooking time, and accessories. Roaster designs vary, so use water, a rack, or a liner only when the manufacturer allows it. Keep raw food refrigerated until you are ready to cook it.
Step-by-Step Instructions
Step 1: Inspect and assemble the roaster
Unplug the appliance, then set the removable cooking pan into the base. Check that the pan sits flat and that the lid, rack, and any included accessories are clean and undamaged. Leave the base on a stable, heat-resistant surface with space for ventilation.
Tip:Do not operate the roaster with the cooking pan missing or incorrectly seated. Check the manual for any model-specific assembly steps.
Check: The pan is level in the base, the lid fits, and the appliance is unplugged while you prepare it.
Step 2: Prepare the food and accessories
Prepare the ingredients according to your recipe. If the recipe calls for a rack, place it inside the cooking pan. Add water or other liquid only if the recipe and appliance instructions call for it. Keep raw meat and its juices away from cooked food, utensils, and surfaces.
Tip:Do not fill the pan past the maximum level marked by the manufacturer. Leave enough room for the lid to close without touching the food.
Check: The food is ready to cook, required accessories are in place, and the lid closes without forcing it.
Step 3: Preheat the roaster if the recipe calls for it
Put the cooking pan in the base, close the lid, and plug the roaster directly into an appropriate outlet. Set the temperature specified by the recipe or manual. Let the appliance preheat for the time the manufacturer recommends; if no time is given, follow the recipe and avoid guessing that it is ready based only on the indicator light.
Tip:Indicator lights differ by model. Consult the manual to learn what they signal and whether the roaster should preheat with the pan empty.
Check: The roaster has reached the recipe’s starting temperature according to the appliance instructions.
Step 4: Load the food and set the temperature
Arrange the food in the pan or on the rack as directed by the recipe, using oven mitts if the pan is hot. Close the lid, set the cooking temperature, and start timing according to the recipe’s instructions. Keep the lid closed as much as practical so heat stays inside.
Tip:Do not crowd food tightly if the recipe calls for room around pieces. Avoid placing food where it prevents the lid from closing securely.
Check: The food is positioned as directed, the lid closes, and the temperature setting matches the recipe.
Step 5: Monitor cooking without relying on time alone
Cook for the recipe’s suggested time, then begin checking for doneness near the lower end of its range. Open the lid carefully, keeping your face and hands away from escaping steam. Check the food with a food thermometer where appropriate, inserting it into the thickest part without touching bone or the pan.
Tip:Use a reliable food safety temperature reference for the specific food. Color and clear juices alone do not confirm that meat or poultry is safe to eat.
Check: The food has reached the safe internal temperature or other doneness cue specified by a trusted recipe or food safety source.
Step 6: Serve or hold the food safely
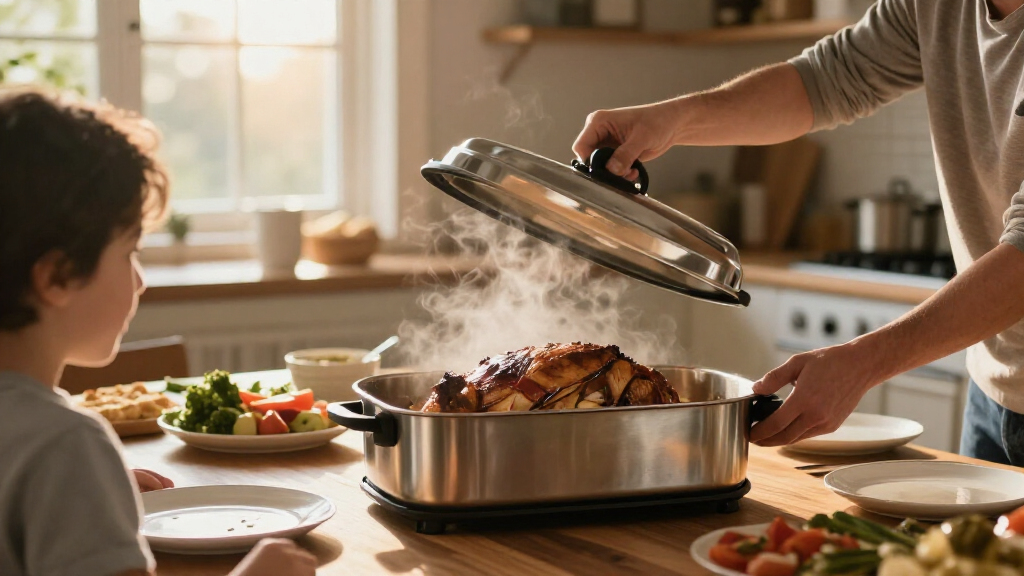
Turn off and unplug the roaster when cooking is complete. Use heat-resistant gloves to lift the lid and remove the food, or use a keep-warm setting only if the manual allows it. Transfer leftovers to shallow containers and refrigerate them promptly; do not leave perishable food at room temperature for more than two hours.
Tip:Keep the roaster on a heat-resistant surface while hot, and warn others that the pan, lid, and base may remain hot after unplugging.
Check: The food is served or held according to safe handling guidance, and the roaster is switched off and unplugged.
Step 7: Cool and clean the appliance
Let the roaster cool completely. Remove the cooking pan and wash it, the lid, and permitted accessories as directed in the manual. Wipe the electric base with a damp cloth only if the manufacturer allows it; keep water away from electrical parts. Dry all components before storage.
Tip:Abrasive pads and harsh cleaners can damage some cooking surfaces. Check the manual before using a dishwasher or soaking the pan.
Check: The roaster is clean and dry, with the electric base and cord free of food residue and moisture.
Common Mistakes to Avoid
- Using the roaster without checking the model’s instructions. — Read the manual for preheating, water use, racks, temperature settings, and cleaning before cooking.
- Opening the lid repeatedly to check progress. — Keep the lid closed and check near the recipe’s expected finish time; each opening releases heat and steam.
- Judging meat or poultry by color or cooking time alone. — Check the thickest part with a food thermometer and follow safe temperature guidance for the food.
- Overfilling the pan or adding unapproved water or accessories. — Stay below the marked fill limit and use only accessories and liquids allowed by the manual and recipe.
Troubleshooting
Problem: The roaster does not heat.
Solution: Check that the outlet works, the cord is fully connected, the temperature control is set, and the cooking pan is seated as required. If it still does not heat, unplug it and consult the manual or manufacturer.
Problem: The food is cooking more slowly than the recipe suggests.
Solution: Confirm the temperature setting and that the lid is closed. Check doneness with a thermometer, then continue cooking in short intervals. Roaster performance and food size can change cooking time.
Problem: The top is browning too quickly while the center is not done.
Solution: Lower the temperature if the recipe permits, keep the lid closed, and continue cooking until the center reaches safe doneness. Check whether the food is too close to the heating area or the pan is overloaded.
Problem: Steam or liquid escapes around the lid.
Solution: Turn off and unplug the roaster if liquid is spilling or creating a hazard. Let it cool before checking that the lid is seated and the pan is below its fill limit. Do not move a hot, full roaster.
What Success Looks Like
The food is cooked to the recipe’s intended texture and has reached the appropriate safe internal temperature where required. The roaster was operated according to its manual, switched off and unplugged, and cleaned only after it cooled. No liquid reached the electrical base.
Next Steps
Store the dry roaster and accessories together, and keep the manual with them for the next use. Note any cooking time or temperature adjustments that worked for your specific appliance, then verify doneness with a thermometer again on future batches.
Frequently Asked Questions
Can I use an electric roasting pan like a regular oven?
Use it for recipes that suit your model, but do not assume oven temperatures or timings transfer exactly. Follow the roaster manual and check food for doneness.
Should I add water to an electric roaster?
Only add water when the appliance instructions and recipe call for it. Some models and cooking methods do not require water, and excess liquid can spill.
Do I need to preheat an electric roaster?
Follow the recipe and the manufacturer’s directions. Preheating methods differ by model, including whether the pan should be empty or loaded.
Can I leave the roaster on warm after cooking?
Use a keep-warm setting only if your model has one and its manual permits it. Follow food safety guidance for hot holding and refrigerate leftovers promptly.