TL;DR

Get home appliances delivered free with Prime
- Fast, free delivery on millions of items
- Prime Video, Amazon Music and more included
- Member-only deals all year
Hunker describes a DIY method for making a box-shaped planter from reused wood pallets, using basic carpentry tools and fasteners. The guide recommends choosing pallets marked HT, removing damaged wood and taking care around nails; planter size and finish can be customized.
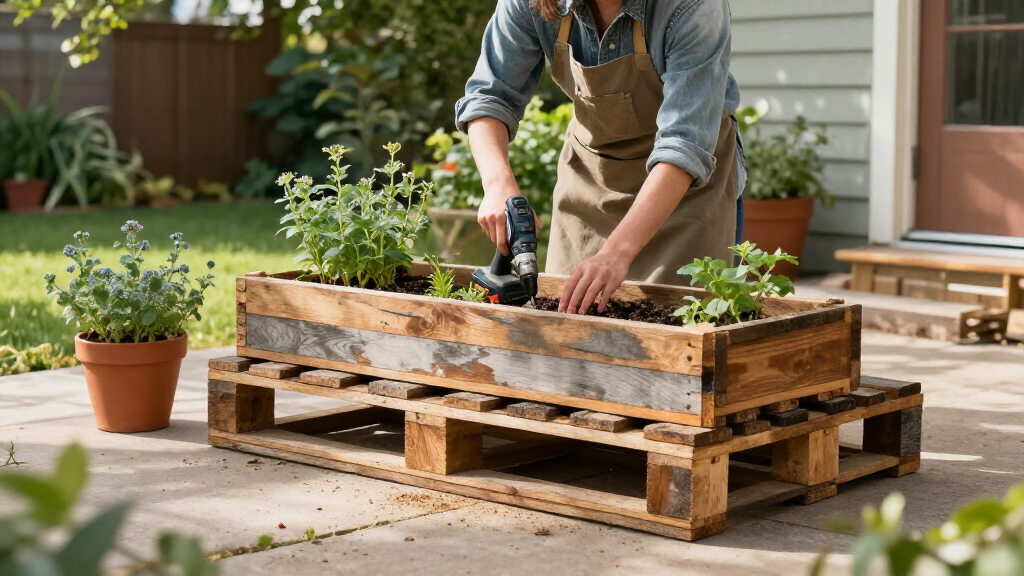
Hunker has published a guide to building a rustic planter from old wood pallets, offering a way to make a custom container from reclaimed boards rather than buying a ready-made planter. The instructions describe a basic wooden frame, with the size and exterior design adjusted to suit different plants and spaces.
The guide says the project calls for pallet boards, a saw, a sander and a way to fasten the frame, such as wood glue, screws or nails. Paint or stain is optional. It suggests looking for pallets in relatively good condition and marked HT, meaning heat-treated, rather than pallets preserved with chemicals that could leach into soil.
To make the frame, builders cut boards to form four corners and horizontal pieces for the top and bottom edges. The guide describes using either four corner posts or pairs of boards joined in an L shape. After assembling the frame, builders cover the sides and base with flat boards. Severely rotten or damaged wood should be removed rather than used as part of the structure.
The exterior boards can be arranged vertically, horizontally or diagonally for different looks. Hunker also suggests using more weathered boards where they will be visible and boards in better condition for the frame and interior. As a precaution if the pallet boards may not hold up, plants can remain in their existing pots and sit inside the wooden structure.
A Custom Planter From Reclaimed Boards
The project offers readers a way to reuse pallet wood and make a planter in a chosen size, instead of having to find a store-bought container that fits a particular space or style. The guide says the box design can be scaled from a small planter for succulents to a larger one for vegetables, though larger builds may require more wood or more than one pallet.
That flexibility comes with practical limits. Pallet condition, board dimensions and the builder’s cutting and assembly choices will affect the finished planter. The guide presents the project as accessible to beginners while leaving room for more experienced woodworkers to alter the design; it does not provide a cost estimate or a tested durability rating.
Products Worth Considering

Dyson Cyclone V10 Origin Cordless Vacuum

Dyson V8 Cyclone Cordless Vacuum
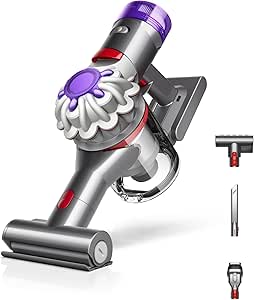
Dyson Car+Boat Cordless Handheld Vacuum
As an affiliate, we earn on qualifying purchases.
From Pallet Frame to Finished Box
The Hunker report frames the build as an alternative for people who want a planter that suits rustic decor or a specific planting area. Its instructions focus on a simple box rather than a fixed plan with set dimensions, so builders determine the height and width based on their intended use and available lumber.
The assembly sequence starts with dismantling or cutting apart a pallet, then removing unsuitable wood and building the corner frame. The source notes that pulling boards apart can crack them, while cutting may avoid some breakage. It recommends gloves when handling boards because nails may remain in the wood. Once the frame is covered, builders can leave it bare or apply paint or stain, choosing a finish to complement the plants and setting.
“Look for ones in relatively good condition that are marked HT.”
— Hunker DIY guide
Pallet Condition and Build Life
The guide does not provide a specific lumber list, measurements, load limits or an estimate of how long a finished planter will last. Pallets can vary in size and condition, so the amount of usable wood and the project’s difficulty will depend on the materials available. The source advises removing severe rot and checking for the HT mark, but it does not describe a broader inspection or testing process for every pallet.
It is also unclear from the report how the planter will perform outdoors in different climates or whether a particular paint or stain is suitable for every planting situation. Readers should check product labels and use finishes appropriate to their intended use.
Check the Wood Before Assembly
The next step for anyone following the guide is to choose a pallet, check its condition and plan the planter’s dimensions before cutting. Builders should wear gloves while handling pallet boards, watch for nails and use appropriate eye protection when cutting or sanding. A stable, level work surface and careful handling of saws and other tools are also advisable.
After assembling the frame, builders can decide whether to cover the sides fully, leave gaps, add a diagonal pattern or finish the wood with paint or stain. The source offers a set of design options rather than a single required final appearance; it does not report a completed build or independent test of the finished planter.
Key Questions
What kind of pallet does the guide recommend?
Hunker recommends pallets in relatively good condition marked HT, indicating heat treatment. It advises avoiding pallets preserved with chemicals that could leach into soil.
What tools and materials are needed?
The guide lists pallet boards, a saw, a sander and fasteners such as wood glue, screws or nails. Paint or stain is optional. Gloves are recommended when dismantling or handling boards because nails may be present.
Can the planter be made in different sizes?
Yes. The box design can be adjusted for different plants, from small succulents to vegetables. Larger planters use more wood and may require more than one pallet.
How can plants be protected if the boards are not sturdy?
The guide suggests leaving plants in their existing pots and placing the pots inside the pallet planter. That way, the planter acts as an outer container if its boards fail.
Source: hunker.com