Proper garage floor prep is essential to guarantee your coating lasts, not fails. Start by thoroughly inspecting and cleaning the surface to remove dirt, oil, and contaminants. Repair any cracks or damage and use the right tools to create a smooth, clean, and textured surface. Applying primers and sealers correctly also plays a critical role. Skipping or rushing these steps can lead to peeling or bubbling. Keep exploring to discover how to prepare your garage floor for a lasting finish.
Key Takeaways
- Proper cleaning and removal of contaminants ensure strong adhesion and prevent coating failure.
- Addressing cracks and surface damage before coating improves durability and prevents future peeling.
- Using the correct primers and sealants enhances adhesion and protects against moisture-related issues.
- Rushing or skipping surface preparation steps leads to poor adhesion, bubbling, and uneven finishes.
- Adequate drying and curing time are essential for coatings to bond properly and last long.

Rust-Oleum 251965 EPOXYSHIELD Garage Floor Coating Kit, 1 Car, Gloss Gray
Durable, 2-part epoxy formula works on interior concrete surfaces, such as garage floors, workshops, basements and more
As an affiliate, we earn on qualifying purchases.
As an affiliate, we earn on qualifying purchases.
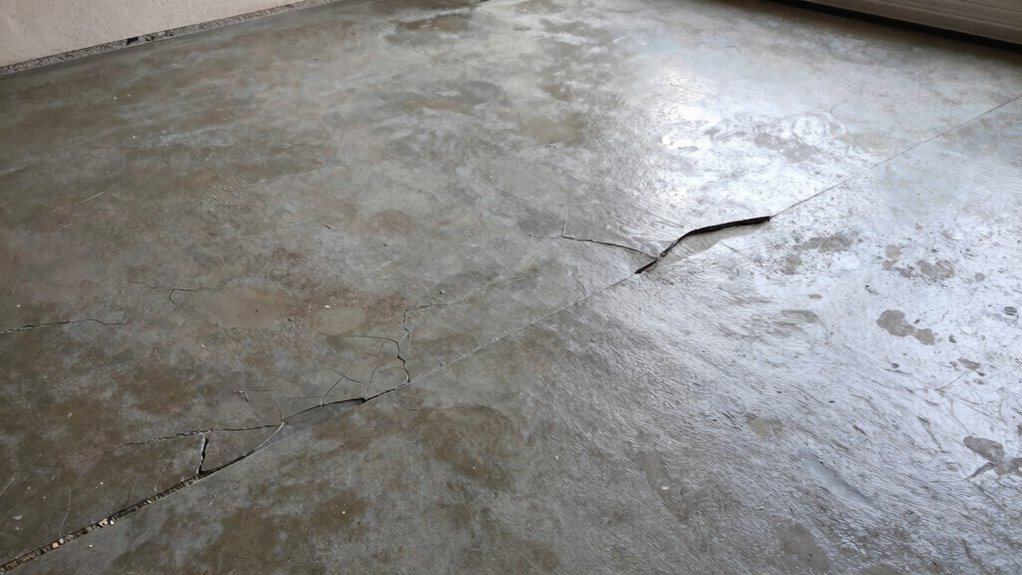
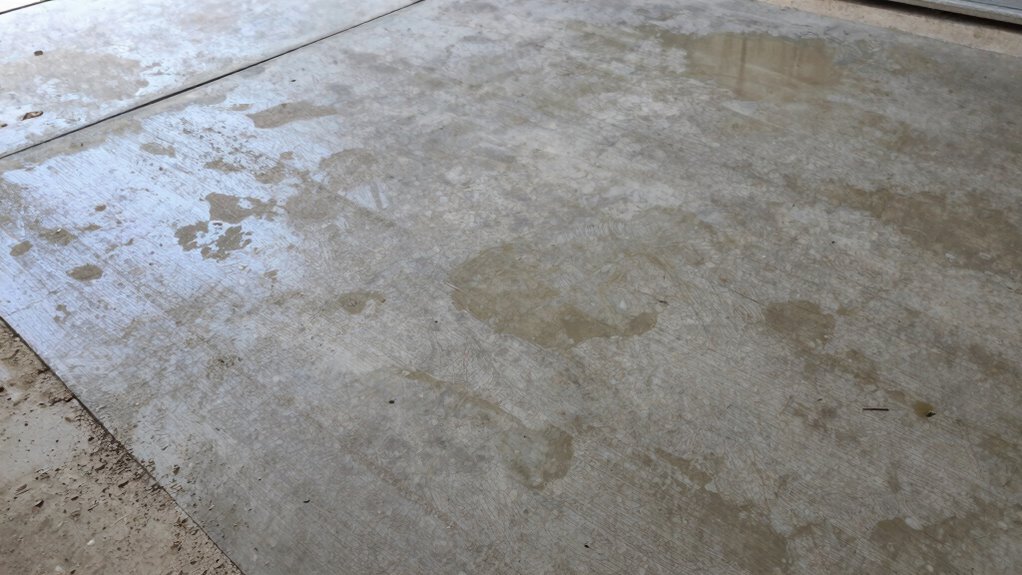
Evaluate Your Garage Floor’s Condition
Before you begin any garage floor preparation, it’s vital to assess its current condition. Check for cracks, chips, or uneven areas that could affect the final coating. Look for oil stains, dirt, or other contaminants that might interfere with adhesion. Consider how the floor impacts your garage aesthetics—cracks or stains can detract from a clean, organized look. If you use your garage for storage solutions, evaluate if the surface supports heavy items or if repairs are needed to prevent future damage. Understanding your garage’s current state helps determine whether you need repairs or just surface cleaning. This step guarantees your efforts will lead to a durable, attractive finish, making your garage more functional and visually appealing. Additionally, addressing any water damage or moisture issues early on can prevent future floor deterioration, ensuring a long-lasting, successful coating application. Recognizing potential moisture problems early on allows you to take preventative measures that extend the life of your garage floor. Being aware of existing damage can also guide your decision on whether a complete resurfacing is necessary. Conducting a thorough inspection and understanding the structural integrity of your floor can save you time and resources in the long run. Using knowledge about hydrotherapy techniques in your assessment can help identify moisture issues that might not be immediately visible.

Rust-Oleum 338806 Concrete & Garage Floor Recoat Primer, Gallon, Gray
Ready to use, concrete floor primer for previously painted or sealed interior and exterior concrete surfaces
As an affiliate, we earn on qualifying purchases.
As an affiliate, we earn on qualifying purchases.
Clean the Surface and Remove Contaminants
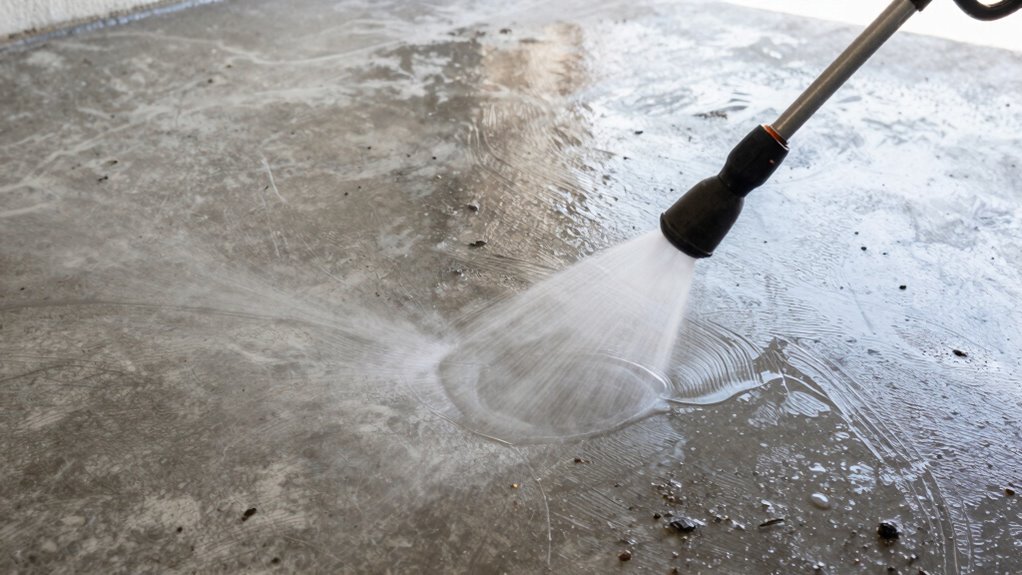
Once you’ve assessed your garage floor’s condition and identified any damage or uneven areas, the next step is to thoroughly clean the surface. Surface contamination, like oil, grease, or dirt, can prevent coatings from adhering properly. Use appropriate cleaning agents designed for concrete, such as degreasers or heavy-duty cleaners, to break down stubborn stains. Scrub the surface thoroughly with a stiff brush or scrubber to remove dirt and contaminants. Rinse the area well with water to eliminate any residual cleaning agents, as leftover residues can interfere with adhesion. Make sure the floor is completely dry before moving on to the next step. Proper surface cleaning and contaminant removal are essential for ensuring a strong bond. A clean, contaminant-free surface guarantees your coating bonds effectively, setting the foundation for a durable, long-lasting finish. Proper preparation also involves drying the surface thoroughly to ensure no moisture remains that could compromise adhesion. Additionally, understanding how contrast ratio affects the visibility of imperfections can help you better prepare the surface for optimal coating application. Recognizing the importance of surface preparation can significantly impact the longevity and appearance of your garage floor coating. Incorporating a quality sealant before applying the coating can further improve adhesion and protect against future stains.

DAP Liquid Cement Crack Filler (Ready to Use), Gray, 32 Oz (7079837584)
Ready-to-use, concrete patch and repair formula is ideal for repairing horizontal cracks in interior or exterior concrete
As an affiliate, we earn on qualifying purchases.
As an affiliate, we earn on qualifying purchases.
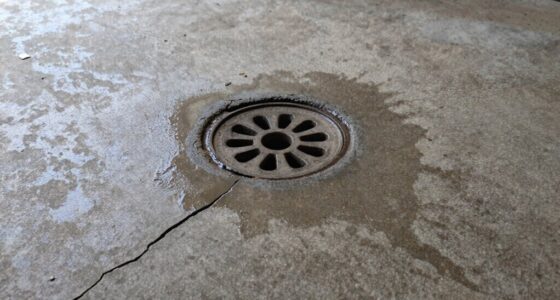
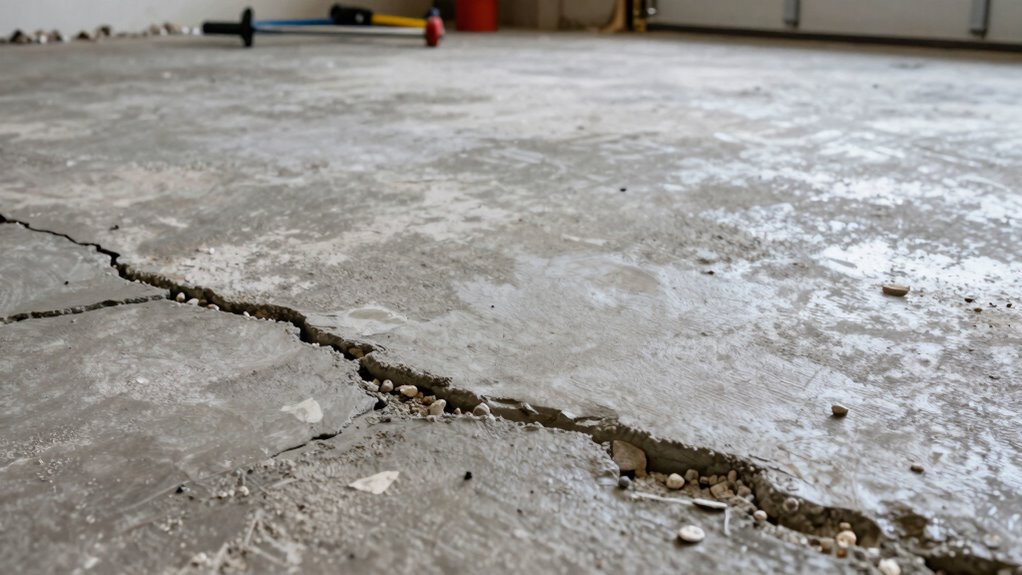
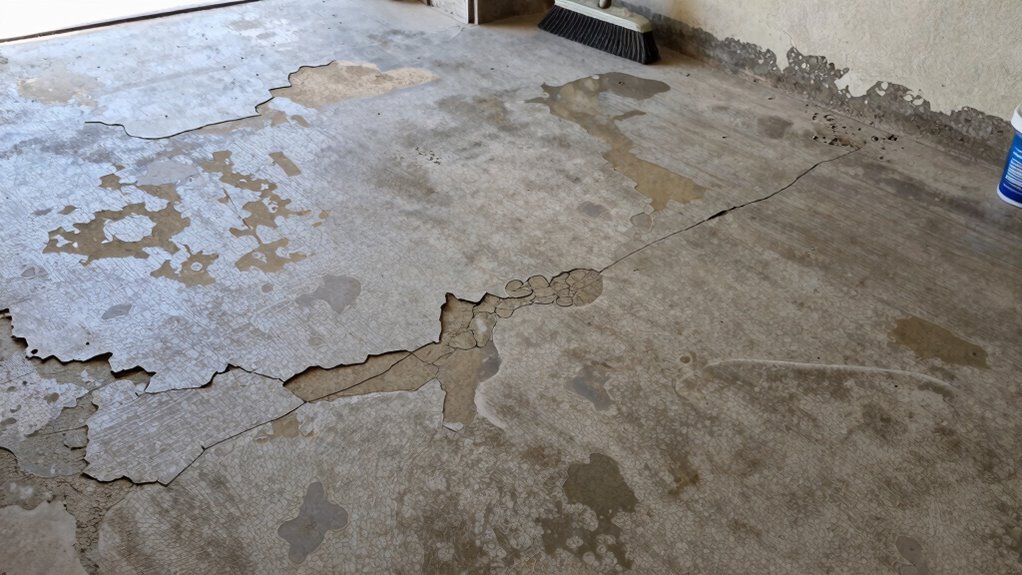
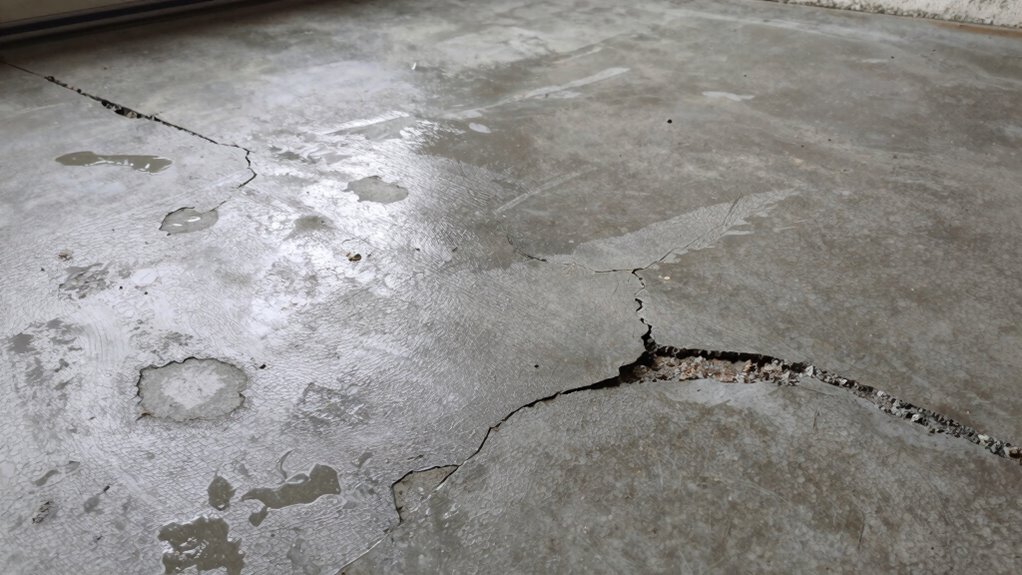
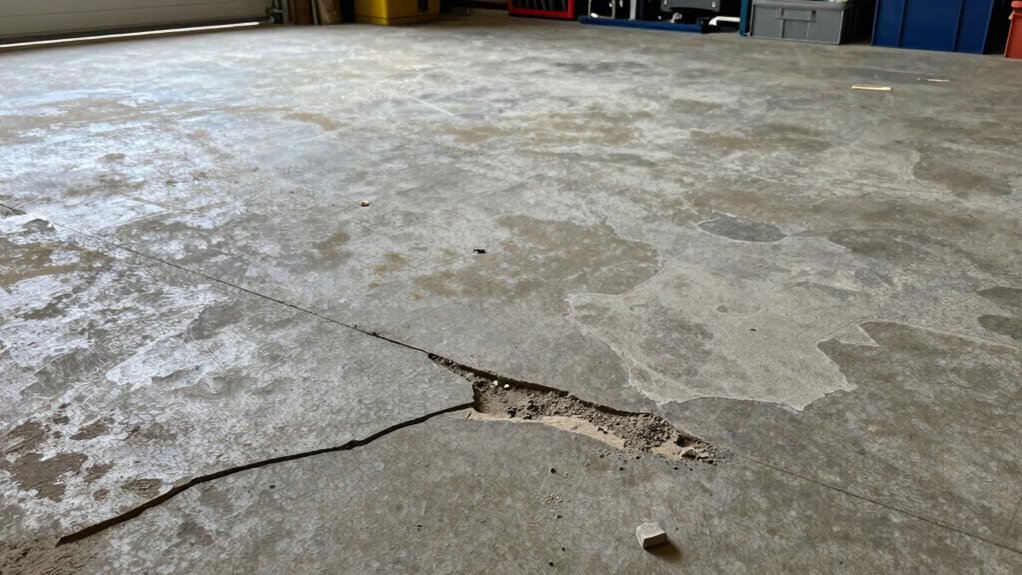
Repair Cracks, Chips, and Surface Damage
You’ll want to start by recognizing common damage like cracks, chips, and surface gouges. Before making repairs, make sure the area is thoroughly cleaned to remove dirt and loose debris. Using the right repair techniques will help restore your garage floor’s smoothness and durability.
Identifying Common Damage Types
Understanding the different types of damage that can occur on your garage floor is essential for effective repair. Recognizing common issues helps you choose the right fix and guarantees long-lasting results. Common damage includes cracks, chips, and surface erosion. Cracks often appear as hairline fractures or larger splits, sometimes accompanied by staining patterns that indicate underlying moisture issues. Chips are small, rounded or jagged pieces missing from the surface, often caused by impact. Surface erosion creates a dull, worn look, exposing the aggregate and increasing vulnerability to further damage. Regular inspection is key to maintaining a strong, appealing garage floor. Additionally, understanding surface preparation is crucial for ensuring that coatings adhere properly and last over time. Proper damage assessment can also help determine whether repairs require minimal patching or more extensive surface restoration. Taking the time to evaluate the types of damage thoroughly ensures that you select the most effective repair method for each issue. Being aware of common damage patterns can help you anticipate potential issues before they become severe, saving time and money in the long run. To enhance durability, addressing issues early with appropriate repair techniques can significantly extend the lifespan of your garage floor.
Proper Cleaning Before Repairs
Before repairing cracks, chips, or surface damage on your garage floor, thorough cleaning is a vital step. You need to remove dirt, grease, and loose debris to guarantee proper adhesion of repair materials. Pay special attention to chemical stains, which can weaken the surface and interfere with bonding. Additionally, understanding surface porosity helps you determine if the concrete absorbs cleaning solutions, requiring more effort or specific products. If you ignore surface porosity, repairs may not bond well or last long. Proper cleaning creates a clean, uniform surface, making repairs secure and durable. Skipping this step can cause patch failures, leading to costly rework and compromised coating performance. Recognizing dog breeds and their specific needs can also guide you in choosing appropriate maintenance products for different surfaces. Being aware of indoor air quality factors, such as dust and microplastics, can also influence cleaning practices to ensure a healthier environment. Proper surface cleaning also considers concrete surface characteristics, which play a crucial role in how well repairs and coatings adhere over time. Having a clear understanding of surface porosity can help you select the most effective cleaning methods and products for your specific garage floor.
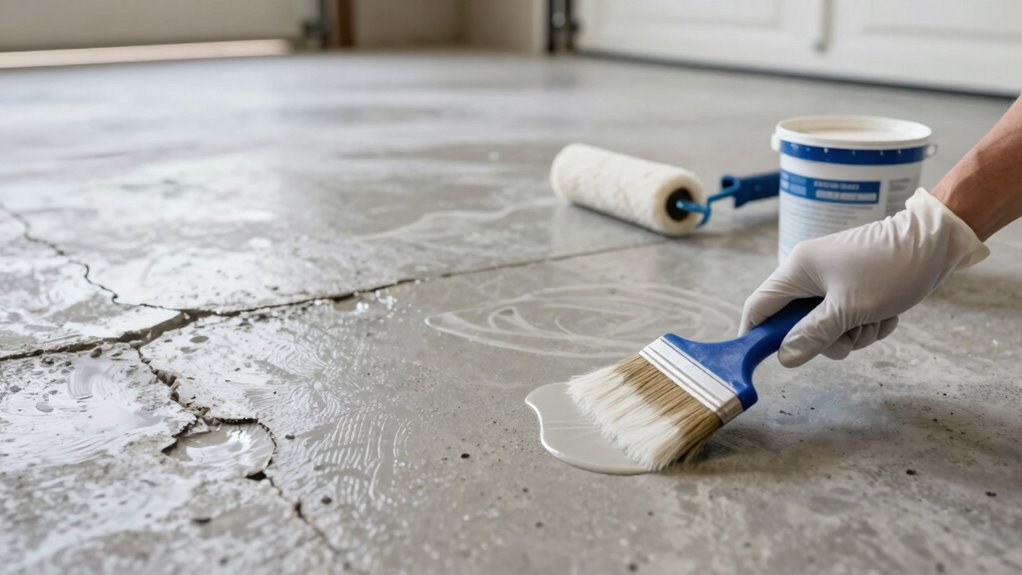
Effective Repair Techniques
When repairing cracks, chips, or surface damage on your garage floor, choosing the right techniques is essential to guarantee a strong and lasting fix. Proper garage floor prep ensures the repair adheres well and enhances coating durability. To do this effectively, follow these steps:
- Clean the damaged area thoroughly, removing debris and loose material.
- Use a suitable patching compound or epoxy designed for garage floors, applying it smoothly into cracks or chips.
- Sand the repaired surface once cured, creating a uniform, smooth finish perfect for coating application.
- Ensuring proper surface preparation prevents future damage and promotes better adhesion of the coating. Additionally, understanding the testing accuracy of your repair materials can help ensure a durable fix. Recognizing the importance of surface testing methods can also play a role in confirming the success of your repair process. Using proper testing techniques can help identify potential issues before applying the final coating, saving time and money. Incorporating professional-grade materials can further enhance the longevity of your repair. These techniques help prevent future damage, improve adhesion, and ensure your coating lasts longer. Proper repair methods are the foundation for a durable, professional-looking garage floor.
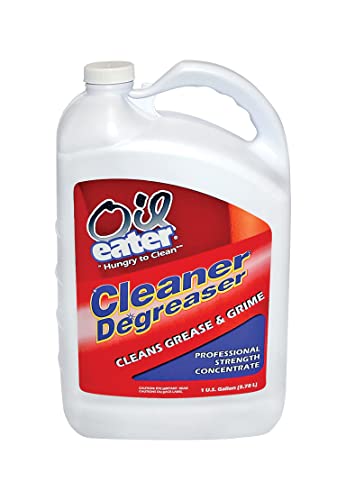
Oil Eater Original 1 Gallon Cleaner, Degreaser – Dissolve Grease Oil and Heavy-Duty Stains – Professional Strength
Powerful Cleaning: Dissolves Grease, Oil And Dirt From Any Washable Surface
As an affiliate, we earn on qualifying purchases.
As an affiliate, we earn on qualifying purchases.
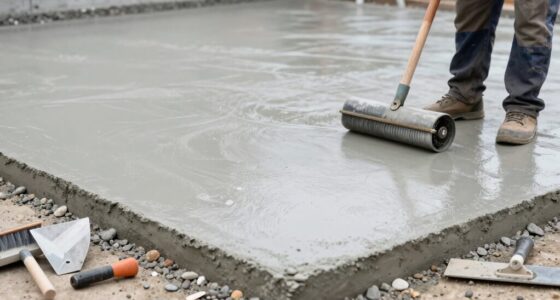
Choose the Best Tools and Techniques for Surface Prep
To prepare your garage floor effectively, you need to choose the right cleaning methods and tools. Using the correct techniques guarantees the surface is free of debris and ready for coating. Selecting appropriate tools, like scrapers and grinders, makes the prep work more efficient and thorough.
Proper Surface Cleaning Methods
Proper surface cleaning is essential for guaranteeing your garage floor prep is successful, and choosing the right tools and techniques can make all the difference. Start by removing surface debris with a broom or vacuum to ensure a clean surface. Use appropriate cleaning solutions, such as degreasers or concrete cleaners, to break down dirt and grease. Scrubbing with a stiff-bristled brush helps loosen stubborn grime. Rinse thoroughly with water to eliminate any residue, and let the surface dry completely before proceeding. Incorporating effective filtration/suction basics can also help remove loosened debris and moisture more efficiently.
Correct Tool Selection Techniques
Choosing the right tools for garage floor prep can considerably impact the quality and durability of your finish. Focus on tool ergonomics to reduce fatigue and improve control, making your prep process more efficient. Select tools that fit comfortably in your hand and are suited for the specific task, whether it’s grinding, sanding, or cleaning. Proper tool maintenance is essential; keep equipment clean, sharp, and in good working condition to guarantee peak performance. Well-maintained tools prevent surface damage and extend their lifespan. Avoid using worn or inappropriate tools, as they can compromise surface prep quality. By choosing ergonomically designed tools and maintaining them properly, you’ll achieve a smoother, more even surface, setting the foundation for a successful coating application.
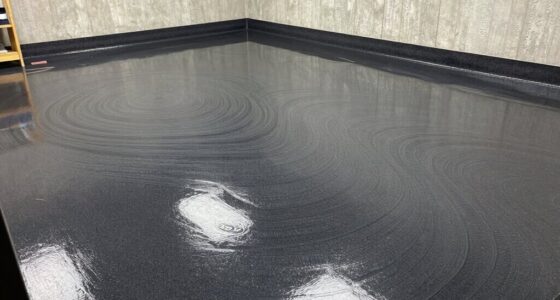
Apply Primer and Sealers for Longevity
Applying a primer and sealer is a crucial step that helps protect your garage floor and guarantees the longevity of your coating. Proper primer application guarantees good adhesion, while choosing the right sealer prevents moisture and stains. When selecting a sealer, consider your floor’s condition and the environment it faces. Here are key points to keep in mind:
- Primer application: Apply evenly and follow manufacturer instructions for drying times.
- Sealer selection: Choose a sealer compatible with your coating type and suitable for your garage’s conditions.
- Timing: Allow sufficient drying time between primer, sealer, and topcoat to ensure maximum adhesion and durability.
Taking these steps ensures your garage floor remains protected, vibrant, and long-lasting.
Common Mistakes to Avoid During Floor Prep
Skimping on surface preparation is a common mistake that can compromise the entire coating process. If you skip thorough cleaning and proper surface texture, the coating won’t adhere well, leading to peeling or bubbling over time. Poor surface texture also affects color uniformity, causing uneven finishes and blotchy appearances. Avoid rushing through prep steps like grinding or etching, which guarantee a smooth, clean surface. Failing to address existing cracks or uneven areas can result in coating failure. Take your time to prepare the floor meticulously—this step is vital for a durable, professional-looking finish. Remember, the better your surface texture and cleanliness, the more likely you’ll achieve consistent color and long-lasting results.
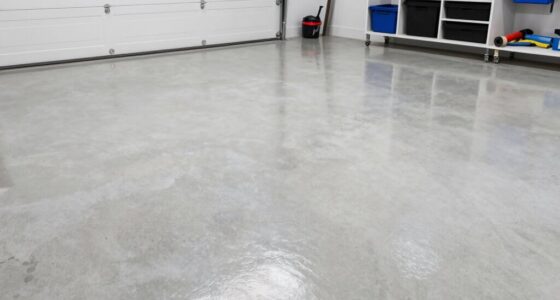
Is Your Garage Floor Ready for Coating? Signs to Check
Before you coat your garage floor, it’s essential to verify if it’s truly ready. Look for signs that indicate whether the surface is properly prepared for coating. First, inspect the floor for dirt, grease, or oil spots; these must be thoroughly cleaned to ensure adhesion. Second, evaluate the surface’s condition—any cracks or peeling areas need repair before coating. Third, consider your garage organization and lighting; good lighting helps you spot imperfections, while organized space prevents debris from settling on the floor. If the surface is clean, smooth, and free of damage, and you have proper lighting, your garage floor is ready to be coated. Taking these steps guarantees a successful, long-lasting finish.
Frequently Asked Questions
How Long Should I Wait Before Applying the Coating After Prep?
You should wait at least 24 to 48 hours after prep before applying the coating, ensuring proper surface adhesion. During this time, the floor dries completely, which boosts chemical compatibility and prevents bubbles or peeling later. Avoid rushing the process because inadequate drying can cause coating failure. Check the manufacturer’s instructions for specific curing times, and make sure the surface is clean and dry for ideal results.
Can I Use Household Cleaning Products to Clean the Garage Floor?
You shouldn’t rely on household cleaning products for your garage floor—they’re like using a butter knife for surgery. DIY cleaning with harsh chemicals can trigger unintended chemical reactions, leaving residue that hampers coating adhesion. Instead, opt for a degreaser or a concrete cleaner designed for garage floors. Proper cleaning guarantees your coating bonds well, like a handshake built on trust, and keeps your garage looking sharp for years.
What Environmental Conditions Affect Proper Garage Floor Preparation?
Environmental conditions like moisture levels and temperature fluctuations greatly impact proper garage floor preparation. You need to guarantee the floor is dry and free of excess moisture, as high moisture can cause coating failure. Additionally, avoid applying coatings during extreme temperature fluctuations; ideally, work in a stable, moderate climate. This helps the surface adhere properly and prevents issues like peeling or bubbling, ensuring a durable, long-lasting finish.
How Do I Know if My Repair Work Is Sufficient Before Coating?
You can tell your repair work is sufficient if you’ve thoroughly cleaned the surface to remove any contamination and completed surface etching to create proper adhesion. Check that all cracks or chips are filled and smooth. After cleaning, the surface should feel clean, dry, and slightly textured. If it passes the scratch test—lightly scratching with a coin or tool—it’s ready for coating. Proper preparation guarantees your coating sticks and lasts.
Are There Specific Safety Precautions During Surface Preparation?
During surface preparation, you should wear personal protective gear like gloves, goggles, and a dust mask to protect yourself from debris and fumes. Make certain proper ventilation to avoid inhaling harmful dust and vapors, especially when using strong cleaners or solvents. Always work in a well-ventilated area, and consider using fans or open windows. These precautions keep you safe and help achieve a successful, professional coating application.
Conclusion
Your garage floor’s success hinges on proper prep—skipping steps is like building on quicksand. When you evaluate, clean, repair, and prime with care, you set the stage for lasting beauty and durability. Think of your surface as a blank canvas; the better you prepare it, the more stunning the final masterpiece. Remember, a flawless foundation isn’t just a step—it’s the heartbeat of a perfect coating. So, get ready, prep well, and watch your garage transform.