TL;DR

Get home appliances delivered free with Prime
- Fast, free delivery on millions of items
- Prime Video, Amazon Music and more included
- Member-only deals all year
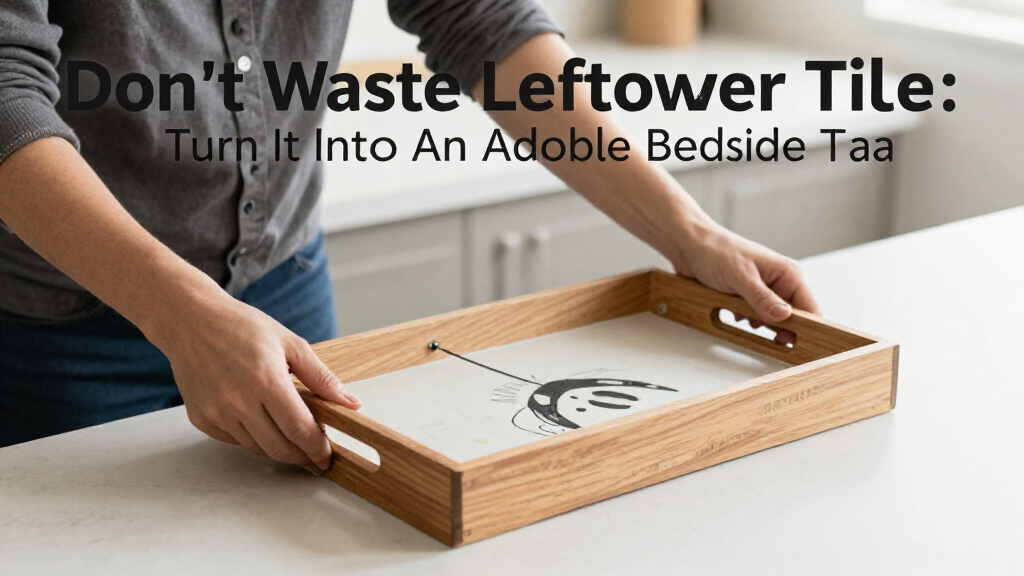
A Hunker home-improvement report describes a DIY bedside tray made by attaching two cabinet pulls to a large tile. The article estimates the project at about $20, but that figure depends on materials and local prices; the tray also needs a stable bond and protected edges before use.
Hunker has reported a DIY bedside-tray project that turns a large leftover tile into a small organizer by attaching two metallic cabinet pulls with adhesive. The idea gives homeowners a possible use for spare renovation material and a place to gather small nightstand items, though the source does not provide independent testing of the finished tray’s strength or safety.
The project is attributed to DIYer Christina Dennis, who used a large hexagonal tile and E6000 adhesive to attach a pull at either side as handles. Hunker says other tile shapes can work, provided the tile is large enough for items such as a phone or eye mask. It recommends checking the tile’s dimensions and measuring each pull before buying, so the hardware fits along the edges.
Hunker estimates the supplies would bring the project’s total to around $20. The article cites a small tube of E6000 at $4.48 and cabinet pulls starting at about $5 each at Home Depot, while saying some porcelain or marble floor tiles can cost less than $4. Those are prices reported in the source and may vary by store, location and date; the total also depends on what materials the maker already has.
To assemble the tray, the article says to apply adhesive to the sides of each pull, press them onto the tile, and let the bond set according to the product instructions before handling or loading it. Dennis used two pulls, but Hunker says hardware could instead be fitted around more sides to form a border. Rough tile edges can be sanded, beginning with 60- or 80-grit paper and moving to 200- or 400-grit paper, and self-adhesive felt pads can be added underneath to help protect furniture.
A Second Use for Spare Tile
The project offers a straightforward reuse option for tile left over after a renovation, rather than requiring a larger build or specialized tools. For readers with a suitable tile and spare hardware, it may also reduce the amount of new material needed for a small bedside organizer. The source’s roughly $20 estimate suggests a relatively low-cost project, but it is not a guaranteed price or a comparison with every ready-made tray.
A tray can group frequently used belongings in one place and make it easier to move them together when clearing a nightstand. Hunker cites research published in the journal Sleep stating that clutter may interfere with good rest. That reference is presented as context for organizing, not as evidence that this particular tray improves sleep. The practical result depends on the user’s room and habits.
The design also has limits: tile is rigid and may be heavy, and the pulls are held in place by an adhesive bond rather than mechanical fasteners. It is best treated as a small decorative organizer, not a carrying tray for heavy or fragile items, unless the maker has verified that the materials and bond can safely support the load.
large decorative tile for DIY tray
As an affiliate, we earn on qualifying purchases.
As an affiliate, we earn on qualifying purchases.
How the Tile Tray Is Made
The source presents the tray as a small craft project that can use leftover material from a bathroom upgrade or a tile purchased for the purpose. It favors a large hexagonal floor tile for its shape and size, while allowing for other formats. The central decision is whether the tile provides enough surface area for the intended items without overwhelming the nightstand.
Hunker identifies E6000 as an adhesive intended for bonding metal with materials including glass, ceramic and porcelain. That description comes from the report; users should check the adhesive manufacturer’s current directions for compatible surfaces, cure time, ventilation and handling. The source also notes that adding pulls to every side can increase the price and suggests looking for multipacks if choosing that design.
Because this project uses tile and adhesive, safe handling matters. Tile can have sharp edges or produce dust when sanded. Work in a ventilated area, wear eye protection and a suitable dust mask while sanding, and follow the adhesive label. If the tile is cracked, unstable or too rough to finish safely, do not use it as a bedside surface.
“The remaining supplies will bring the total cost of this project to around $20.”
— Hunker
metal cabinet pulls for DIY projects
As an affiliate, we earn on qualifying purchases.
As an affiliate, we earn on qualifying purchases.
Bond Strength and Actual Cost
The supplied report does not state the tile’s exact dimensions or weight, the adhesive cure time used for Dennis’s tray, or how much weight the completed organizer can safely hold. It also does not report whether the tray was tested for repeated handling, spills or long-term wear. Those details matter because the pulls are attached with adhesive and the finished piece may be heavy.
The cited retail prices are not confirmed as current, and the article does not give a dated shopping list covering every possible tile, pull and finishing supply. The actual total will depend on local prices and whether the maker already owns suitable materials. It is also not clear whether the tray shown or described included sanding and felt pads.
As an affiliate, we earn on qualifying purchases.
Check Materials Before Assembly
Anyone attempting the project should first choose a tile that fits the nightstand and the items it needs to hold, then measure the tile and pulls together. Before applying adhesive, check that the surfaces are clean and compatible with the product, and read the label for application and curing instructions. Keep the tray unloaded until the adhesive has fully cured as directed.
After curing, inspect both pulls and the tile for movement, cracks or sharp edges before placing anything on it. Add felt pads if the underside could scratch furniture, and avoid lifting the tray by its handles with heavy or breakable objects on it. The source provides no scheduled follow-up or independent durability test, so the project’s longer-term performance remains unreported.
As an affiliate, we earn on qualifying purchases.
Key Questions
What materials does the bedside tray project use?
The Hunker report describes a large tile, two cabinet pulls and E6000 adhesive. It also suggests optional sandpaper for rough edges and self-adhesive felt pads for the underside.
How much does the project cost?
Hunker estimates the supplies at around $20, citing adhesive at $4.48 and cabinet pulls starting at about $5 each, with some tiles priced below $4. These are source-reported prices, not a guaranteed current total.
Can a different tile shape be used?
Yes. The report says the shape can vary, but recommends choosing a tile large enough for the items that will sit on it and measuring the pulls against the tile before purchase.
How can the tray be made less likely to scratch a nightstand?
Hunker suggests smoothing rough tile edges with progressively finer sandpaper and adding self-adhesive felt pads underneath. Wear eye protection and a suitable dust mask while sanding, and do not use a tile with unsafe sharp or damaged edges.
Is the tray suitable for carrying heavy items?
The report gives no tested weight limit. Since the handles are attached with adhesive, treat it as a small organizer and do not carry heavy or fragile items unless the bond’s strength has been safely verified.
Source: rss
NFL season / tailgating Picks
team gear
As an affiliate, we earn on qualifying purchases.