
Before installing garage cabinets, you should level the floor, fix any structural damage, and repair cracks in the walls or ceiling. Clear out clutter and remove obstacles to create a safe workspace. Check for electrical or plumbing issues that might interfere with mounting. Verify all supports and wall surfaces are sturdy, and take precise measurements and markings. Addressing these steps now guarantees a smooth installation—keep going to learn more about preparing your garage properly.
Key Takeaways
- Ensure the garage floor is level and smooth to provide a stable foundation for cabinets.
- Repair any cracks, structural damage, or foundation issues on walls and floors.
- Reinforce and secure wall supports, studs, and anchors to handle cabinet weight.
- Clear clutter and obstructions for safe, unobstructed installation and access.
- Verify that electrical wiring, plumbing, and ventilation are properly secured and out of the way.
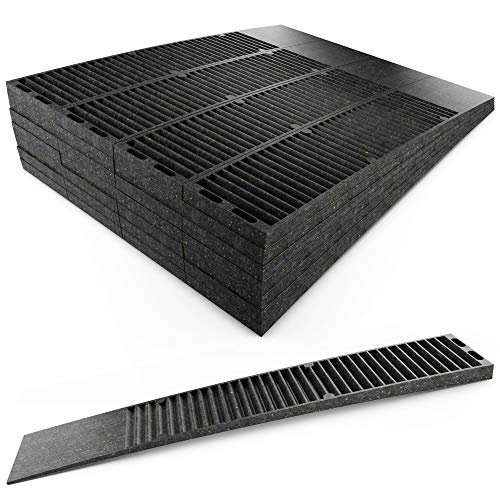
Pro-Grade Composite Shims for Heavy Duty Leveling. 24 pk 7.75 Inch, Never Rot, Easy Snap, Level Wedges. Water, Weather Resistant for Toilets, Doors, Windows, Sheds. Support Appliances and Furniture
SUPER STRONG & DURABLE COMPOSITE SHIMS: Our plastic wedge shims, made from 100% high-quality recycled materials, boast 30%…
As an affiliate, we earn on qualifying purchases.
As an affiliate, we earn on qualifying purchases.
Level Your Garage Floor Before Installing Cabinets
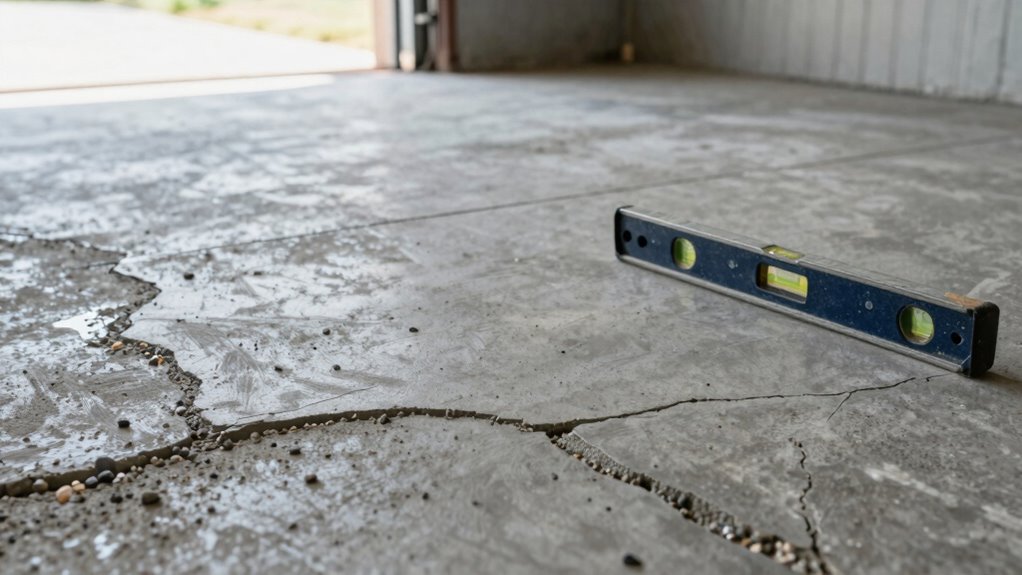
Before installing garage cabinets, it’s essential to verify the floor is level. An uneven garage floor can cause cabinets to wobble or become unstable over time. To determine if your garage floor needs leveling, use a long level or straightedge across multiple areas. If you notice gaps or a tilt, you’ll need to apply leveling techniques. These may include self-leveling compounds or underlayment patches designed for concrete surfaces. Proper leveling guarantees your cabinets sit securely and function properly. Take your time to assess the entire space, especially high or low spots. Addressing these uneven areas beforehand prevents future issues, saving you time and effort during installation. A level garage floor creates a solid foundation for your new cabinets. Additionally, understanding how whole-home water systems can impact your home’s infrastructure helps ensure all aspects of your renovation are properly managed. Being aware of cabling solutions during the installation process can also prevent potential future disruptions or safety hazards. Checking for floor stability can further help identify hidden issues that may affect your cabinet installation. Moreover, assessing structural integrity of the concrete slab can reveal underlying problems that need addressing prior to installation. Incorporating a moisture barrier can also be beneficial in preventing future water damage and maintaining a stable foundation for your cabinets.

RadonSeal Complete DIY Foundation Crack Repair Kit, 10 Ft – Low-Viscosity Urethane Injection Sealant for Crawl Spaces & Concrete Basement Walls, Stops Water Leaks & Radon Gas, Drill-Free Filler
Drill-Free Injection: Repair basement wall cracks effortlessly without drilling, ensuring minimal disruption to your home's structure.
As an affiliate, we earn on qualifying purchases.
As an affiliate, we earn on qualifying purchases.
Clear Out Clutter and Obstructions First
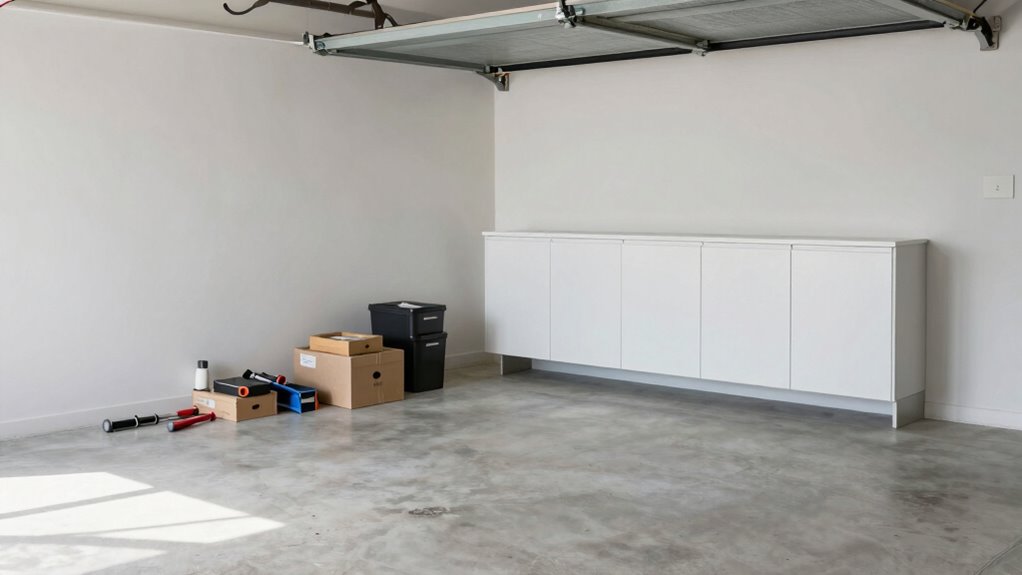
Before installing garage cabinets, you should clear out clutter and obstructions. Remove unnecessary items, clear any pathway blockages, and organize your existing storage. Doing this makes the installation smoother and helps you better assess your storage needs. Additionally, taking the time to stay aware of your surroundings ensures you can identify potential hazards or obstacles during the setup process. Being familiar with essential DIY tools and safety tips can also prevent accidents and make the project more efficient. Incorporating proper workspace organization can further streamline the process and improve overall safety. Considering outdoor transformation essentials can help optimize the space for both storage and aesthetic appeal. Recognizing the importance of caregiver emotional well-being can also keep you motivated and resilient throughout the project.
Remove Unnecessary Items
Clearing out unnecessary items is a crucial first step before installing garage cabinets. Start by sorting through your belongings and removing anything you no longer need or use. This decluttering process helps you better assess your space and plan effective storage solutions. Keep in mind your desired garage style—whether sleek and modern or practical and functional—so you can choose cabinets that complement your aesthetic. Removing clutter also makes way for improved organization, preventing overcrowding and making future access easier. As you clear out, consider donating, recycling, or discarding items that no longer serve a purpose. This step guarantees your garage space is streamlined and ready for new storage solutions, making your cabinet installation smoother and more efficient. Incorporating sound healing science principles, like creating a calm environment during organizing, can make the process more enjoyable and stress-free. Additionally, taking time to create a peaceful space during this process can help reduce stress and make the task feel more manageable. Recognizing the importance of space optimization can further enhance your overall garage organization plan.
Clear Pathway Obstructions
After removing unnecessary items, it’s time to clear pathway obstructions. You want your garage to be safe and accessible, especially when working around lighting fixtures or installing new storage solutions. Remove any bikes, tools, or bins blocking walkways. Check for cords or hoses that could cause trips. Move furniture or shelving that may be in the way of cabinet placement. Clear debris or clutter from the floor to prevent accidents. Keep pathways wide enough for easy movement and access. Using proper techniques when clearing the area ensures you don’t accidentally damage existing structures or fixtures. Proper garage organization can also help maintain clear pathways and prevent future obstructions. Regularly assessing and adjusting your home safety measures can further reduce the risk of accidents during projects. Incorporating storage solutions into your planning can enhance overall accessibility and safety. Additionally, understanding the importance of space management can help you optimize your garage layout effectively. Clearing these obstructions guarantees your garage is safe, well-lit, and ready for the new cabinets, reducing the risk of damage or injury during installation. A tidy space makes it easier to work efficiently and helps your garage look organized once the cabinets are in place.
Organize Existing Storage
Have you considered how clutter can hinder your garage organization plans? Clearing out old tools, boxes, and unnecessary items is essential before installing new garage cabinets. This step improves garage aesthetics by making the space look tidy and inviting. When you organize existing storage, you’ll identify what’s truly useful and what can be discarded or donated. Use storage accessories like bins, shelves, and hooks to create a streamlined system that maximizes space. Removing obstructions and clutter guarantees your new cabinets fit perfectly and function efficiently. Plus, an organized garage reduces stress and makes finding items quick and easy. Taking the time to clear out the mess now sets a solid foundation for a clean, functional, and visually appealing garage.

12 Pack L12 x H 8" Black Heavy Duty Shelf Brackets with Screws Metal Shelf Brackets Shelf Support Angle Brackets for Shelves L Brackets Heavy Duty Floating Shelf DIY
Heavy Duty design, maxium support weight of 240lb for a pair of this shelf bracket. Designed to support…
As an affiliate, we earn on qualifying purchases.
As an affiliate, we earn on qualifying purchases.
Identify and Fix Plumbing or Electrical Hurdles
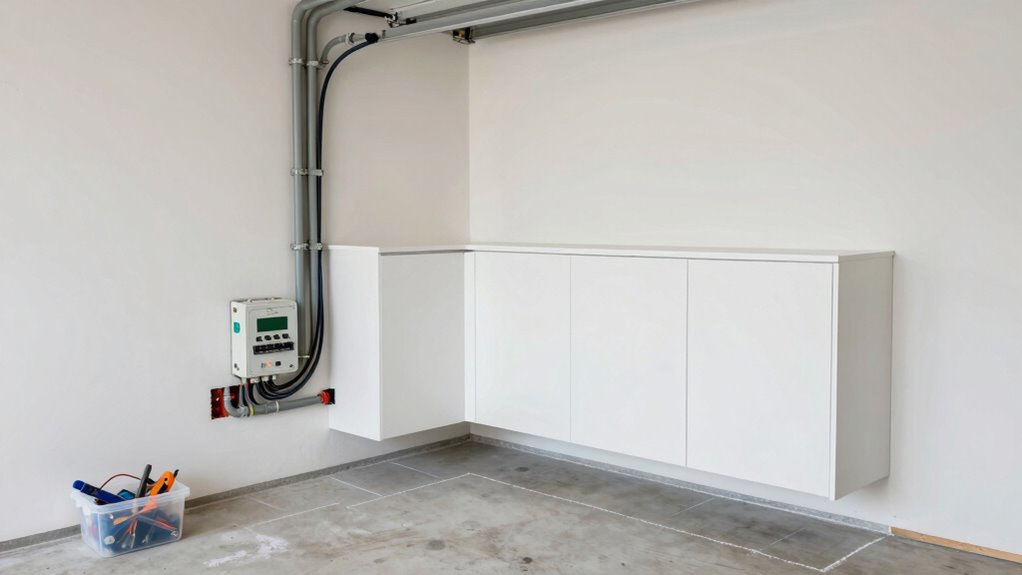
Before installing garage cabinets, it’s essential to identify and fix any plumbing or electrical issues that could interfere with the project. You want to guarantee that existing plumbing upgrades won’t be disrupted and that electrical wiring is safe and accessible.
Picture this: you might find exposed wires dangling, outdated electrical panels, or pipes that need rerouting. These issues can cause delays or hazards later on.
- Hidden electrical wiring behind walls
- Outdated circuit breakers
- Leaking or corroded plumbing
- Insufficient electrical capacity for new outlets
Addressing these problems now prevents costly repairs afterward and guarantees your garage remains safe and functional once the cabinets are installed. Ensuring your electrical system is up to code can help avoid future safety issues. Additionally, assessing the contrast ratio of your electrical setup can help ensure consistent power delivery, preventing flickering lights or power surges that could damage your new cabinets or tools. It’s also wise to inspect your electrical system for hidden wiring that may be difficult to detect without proper tools. Conducting a thorough electrical inspection can help identify potential hazards before they become costly problems. Incorporating a comprehensive assessment of your system can further ensure all existing components are compatible with the new installation.

Akro-Mils 30235 AkroBins Plastic Storage Bins, Space-Saving Stackable Bins for Garage, Pantry, Craft Organization, 11" x 11" x 5", Black, 6-Pack
MULTI-PURPOSE STORAGE BINS: These stackable storage bins hold up to 50 pounds and are great for closet organization,…
As an affiliate, we earn on qualifying purchases.
As an affiliate, we earn on qualifying purchases.
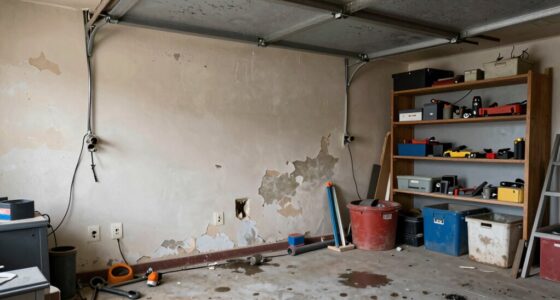
Check for and Repair Structural Damage
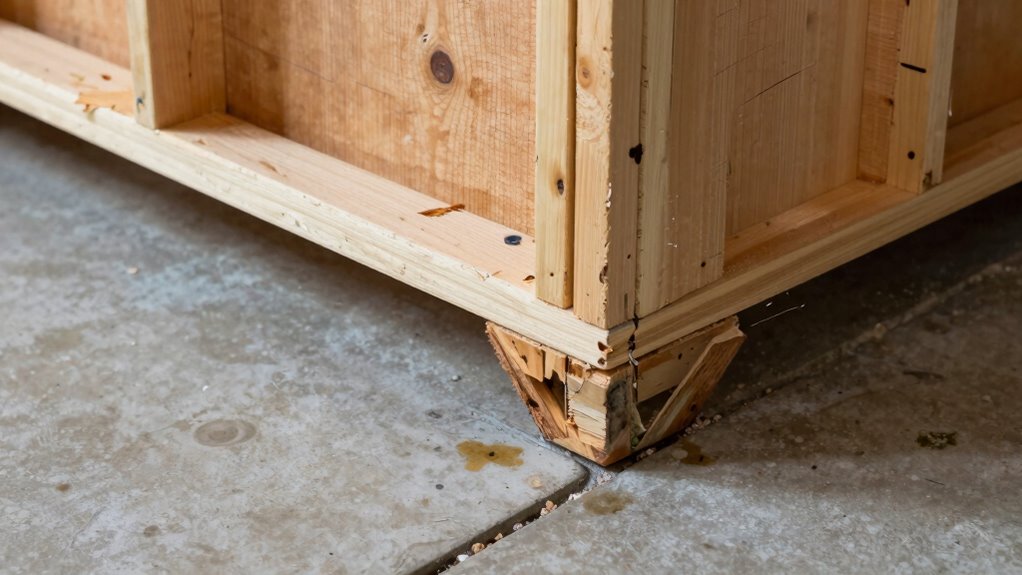
Before installing garage cabinets, you need to guarantee your garage’s structure is sound. Check the foundation for stability and look for any cracks in the walls. Repair any issues you find to prevent future damage and ensure a secure installation. Incorporating durable materials can also enhance vacuum performance and longevity. Additionally, verifying the overall structural integrity of your garage can help prevent potential problems that might compromise your cabinet installation.
Inspect Foundation Stability
Ensuring your garage’s foundation is stable is a vital first step before installing new cabinets. A thorough foundation inspection helps identify any issues that could compromise weight support or cause future damage. During your stability assessment, look for signs of trouble, such as uneven floors or cracks in the concrete. Consider these key points:
- Visible cracks or shifting in the foundation
- Sagging or uneven garage floors
- Water damage or moisture intrusion
- Evidence of previous repairs or patchwork
Addressing these issues before cabinet installation prevents future structural problems. If you notice any irregularities, consult a professional for repairs. Confirming a solid, stable foundation ensures your garage cabinets will stay secure and safe for years to come.
Repair Wall Cracks
If you notice cracks or other signs of damage on your garage walls, it’s essential to address them before installing new cabinets. Start by inspecting the cracks to determine if they’re superficial or indicative of structural issues. For minor cracks, crack sealing with appropriate filler can prevent further damage and stabilize the wall surface. If cracks are wider or suggest structural movement, consider wall reinforcement methods like adding braces or supports. Strengthening the wall ensures it can support the weight of your cabinets without shifting or collapsing later. Repairing wall cracks now helps maintain the integrity of your garage structure and ensures a secure foundation for your new storage solutions. Addressing these issues beforehand saves you from costly repairs down the line.
Seal Cracks in Walls and Ceilings
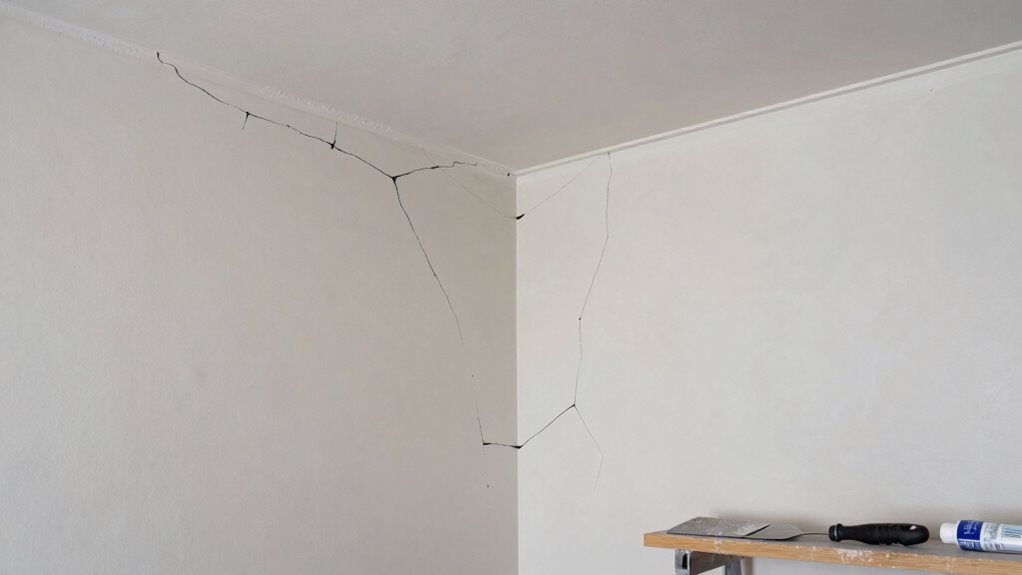
Cracks in walls and ceilings can lead to problems down the line, so addressing them before installing garage cabinets is essential. Proper wall sealing and crack filling guarantee a smooth, stable surface for your cabinets. If you skip this step, cracks might worsen or cause uneven mounting surfaces. To prepare, you’ll want to:
Address cracks before installing garage cabinets to ensure a stable, secure surface and prevent future issues.
- Identify all visible cracks and assess their severity
- Use appropriate crack filling compounds for different crack sizes
- Sand down rough or uneven filled areas
- Apply a primer or sealant to prevent future cracking
Taking these steps helps create a solid foundation, reduces the risk of damage later, and assures your garage cabinets stay securely in place. Sealing cracks now saves you headaches down the line.
Improve Garage Lighting for Better Visibility

A well-lit garage makes it easier to work, find tools, and stay safe during projects. Improving garage lighting is essential for visibility enhancement before installing cabinets. Start by adding bright LED fixtures or installing multiple light sources to eliminate shadows and dark corners. Consider task lighting over workbenches and storage areas to increase precision and reduce eye strain. Confirm your garage lighting is evenly distributed to avoid uneven illumination. Replace dim or outdated bulbs with higher lumen options for maximum brightness. Good lighting not only helps you see clearly but also enhances safety by reducing tripping hazards. Before installing your garage cabinets, prioritize visibility improvement. This ensures you can organize effectively and access your tools without hassle, making your garage more functional and safer.
Address Moisture and Ventilation Issues
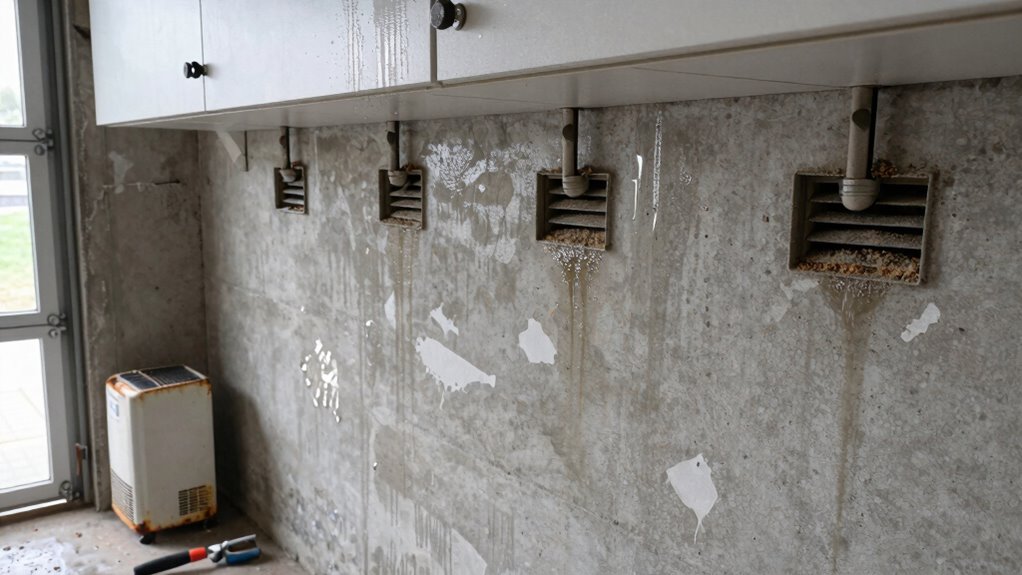
You need to make sure your garage has proper ventilation to prevent moisture buildup. Controlling humidity levels helps keep your cabinets dry and prevents mold. Addressing these issues now saves you headaches later on.
Ensure Proper Ventilation Flow
Have you checked whether your garage has proper ventilation to prevent moisture buildup? Good air circulation is essential to keep the space dry and prevent mold. Ventilation fans are a simple way to promote airflow, especially in enclosed garages. To optimize ventilation, consider:
- Installing exhaust fans to remove humid air
- Using intake vents for fresh air entry
- Ensuring vents are unobstructed
- Adding window vents or openings for natural airflow
These steps help maintain proper air circulation, reducing moisture and humidity. Proper ventilation flow keeps the environment dry, protecting your garage cabinets and stored items from damage. Before installing new cabinets, ensure your garage’s ventilation system is efficient, so moisture doesn’t become a problem later on.
Control Moisture Levels
Addressing moisture and ventilation issues is vital before installing garage cabinets to prevent long-term damage. High humidity can cause wood warping, mold, and deterioration. To guarantee proper humidity control, identify sources of excess moisture and improve airflow. Using a dehumidifier can help maintain consistent moisture levels, especially in damp or poorly ventilated areas. Proper dehumidifier placement is essential—position it away from walls and vents but close enough to treat the air effectively. Regularly monitor humidity levels with a hygrometer, aiming for 30-50%. Adequate ventilation, combined with humidity control, reduces moisture buildup, protecting your cabinets and stored items from damage. Taking these steps now saves you from costly repairs and replacements later on.
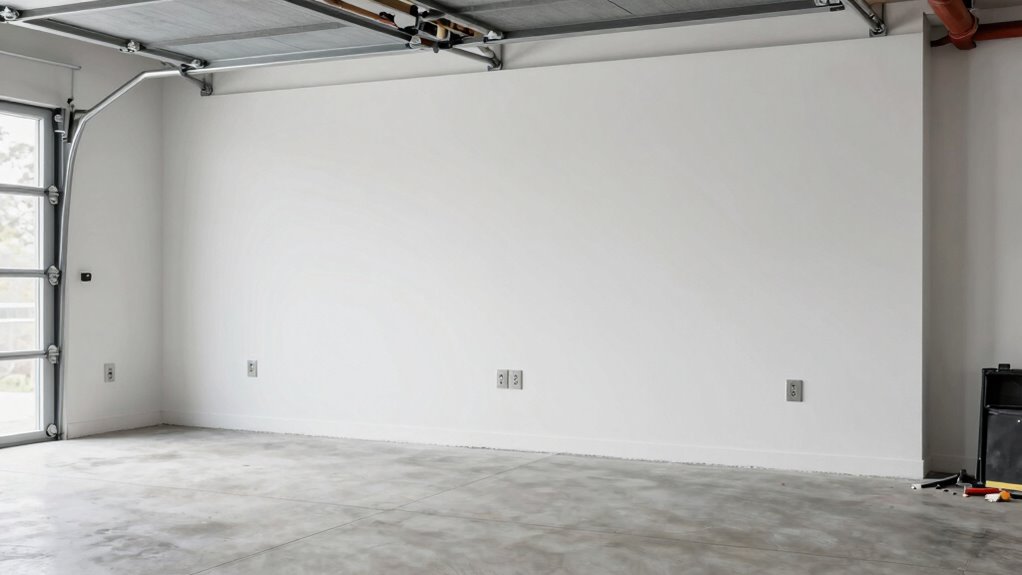
Prepare Walls and Supports for Mounting Cabinets

Before mounting garage cabinets, it’s essential to prepare the walls and supports to guarantee they can handle the weight and stay securely in place. Proper wall reinforcement ensures your cabinets won’t sag or fall. You might need to add extra supports or switch to more durable mounting techniques. Visualize:
- Attaching solid wood or metal studs for extra support
- Securing drywall to existing framing with heavy-duty anchors
- Using wall anchors designed for heavy loads
- Installing a cleat system for even weight distribution
These steps help create a sturdy foundation. Reinforcing your walls ensures the mounting techniques you choose are effective, preventing future issues. Taking the time to prepare now saves you headaches later, ensuring your garage cabinets stay secure and functional for years.
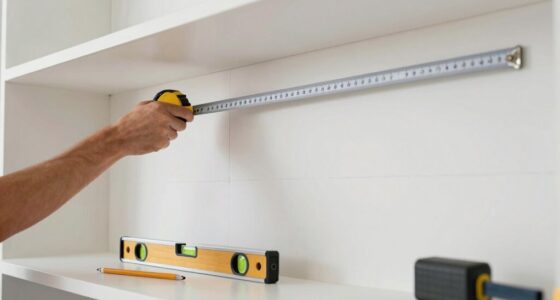
Accurately Measure and Mark for Installation
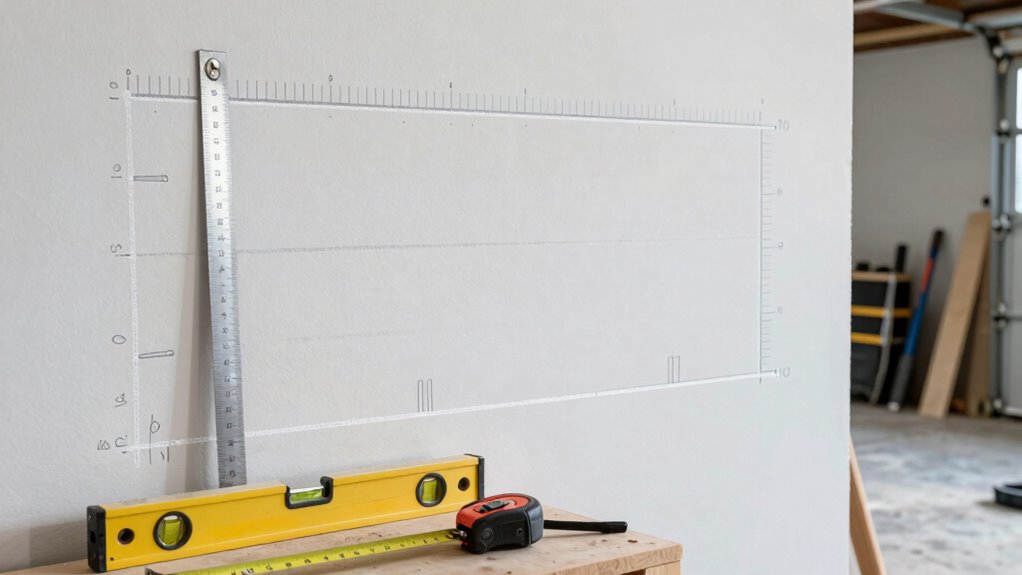
Once your walls are reinforced and ready, the next step is to accurately measure and mark where the cabinets will go. Confirming measuring accuracy is essential to avoid uneven shelves or misaligned cabinets. Use a level, tape measure, and a pencil for precise markings. Double-check your measurements before making marks on the wall. Marking with precision helps guarantee the cabinets hang straight and evenly. Consider using a chalk line for long, straight reference points, especially for multiple cabinets. Take your time to verify each measurement, especially height and spacing, to prevent errors during installation. Accurate measuring and careful marking make the entire mounting process smoother, saving you time and frustration. Proper planning now guarantees a professional, clean look once your garage cabinets are installed.
Verify All Repairs Are Complete Before Mounting

Ensuring all repairs are complete before mounting garage cabinets is essential for a secure and professional installation. You want your garage decor to look polished and your cabinet styles to be sturdy and functional. Double-check that all wall anchors, studs, and supports are solid and properly aligned. Look for any dents, scratches, or loose parts that could compromise the stability of the cabinets. Confirm that electrical wiring or plumbing behind the installation area is secure and out of the way. This step helps prevent future issues like sagging or shifting.
- Inspect wall surfaces for damage or uneven spots
- Tighten or replace loose brackets and supports
- Ensure all electrical and plumbing work is complete and safe
- Confirm the wall is clean and free of debris for a smooth mount
Frequently Asked Questions
How Do I Choose the Right Type of Garage Cabinets?
To choose the right garage cabinets, consider your storage organization needs and material options. Think about what you’ll store—tools, chemicals, or bulky items—and pick cabinets that suit those items. Material selection matters; for durability, go for steel or high-quality wood. Also, match the cabinet style and size to your garage space, ensuring easy access and efficient storage. This way, your garage stays organized and functional.
What Safety Precautions Should I Take During Installation?
During installation, prioritize safety by ensuring ladder safety and using power tool precautions. Always secure ladders on stable surfaces and avoid overreaching. Wear protective gear like goggles and gloves, and double-check that power tools are in good condition before use. Keep your work area clear of clutter to prevent accidents. Taking these steps minimizes risks and keeps you safe throughout the garage cabinet installation process.
Can I Install Cabinets Myself or Hire a Professional?
You can definitely try DIY projects for garage cabinets, but consider professional installation if you want a hassle-free experience. Think of it like assembling a spaceship—precision matters! If you’re comfortable with tools and measurements, installing yourself can save money. However, hiring professionals guarantees a polished look and safety, especially for heavy or complex cabinets. Weigh your skills and needs before deciding between DIY or expert help.
How Long Does It Typically Take to Install Garage Cabinets?
Installing garage cabinets typically takes between a few hours to a full day, depending on your garage size and cabinet complexity. You’ll want to set aside enough time for proper installation, especially if you’re focusing on garage organization and storage solutions. Rushing can lead to mistakes or insecure fixtures. If you’re confident, you can do it yourself; otherwise, hiring a professional guarantees the job’s done efficiently and safely.
What Maintenance Is Required After Installing Garage Cabinets?
Think of your garage cabinets as loyal guardians. To keep them in top shape, follow a regular cleaning schedule, wiping down surfaces to prevent dust buildup. Check for signs of pests, like insects or rodents, and seal any gaps to prevent infestations. Keeping the area organized and inspecting the cabinets periodically guarantees they remain functional and attractive, guarding your tools and belongings for years to come.
Conclusion
Before you begin your garage cabinet installation, make certain every element is expertly examined and effectively addressed. Fix flaws, fill fissures, and flatten floors to foster a flawless foundation. Clear clutter, check for hazards, and confirm structural support to prevent problems later. Proper preparation promotes perfect placement, preventing potential pitfalls. With diligent detail and decisive action, you’ll create a clean, crafted, and clutter-free space that’s both functional and fabulous, finishing your project with confidence and clarity.