To seal air leaks between your garage and house, start by inspecting common areas like garage doors, windows, and wall joints for cracks or gaps. Use weatherstripping, caulk, or foam sealant to close these openings, focusing on door edges and any holes. Make certain seals fit tightly and replace worn or damaged materials. Regularly check and maintain the seals to keep it airtight. For more detailed steps and tips, you’ll find everything you need to improve your home’s comfort and efficiency.
Key Takeaways
- Identify common leak areas like garage door seals, windows, door frames, and drywall junctions through visual inspection and airflow detection tools.
- Use appropriate sealants such as caulk, foam sealant, or weatherstripping to seal small gaps and cracks effectively.
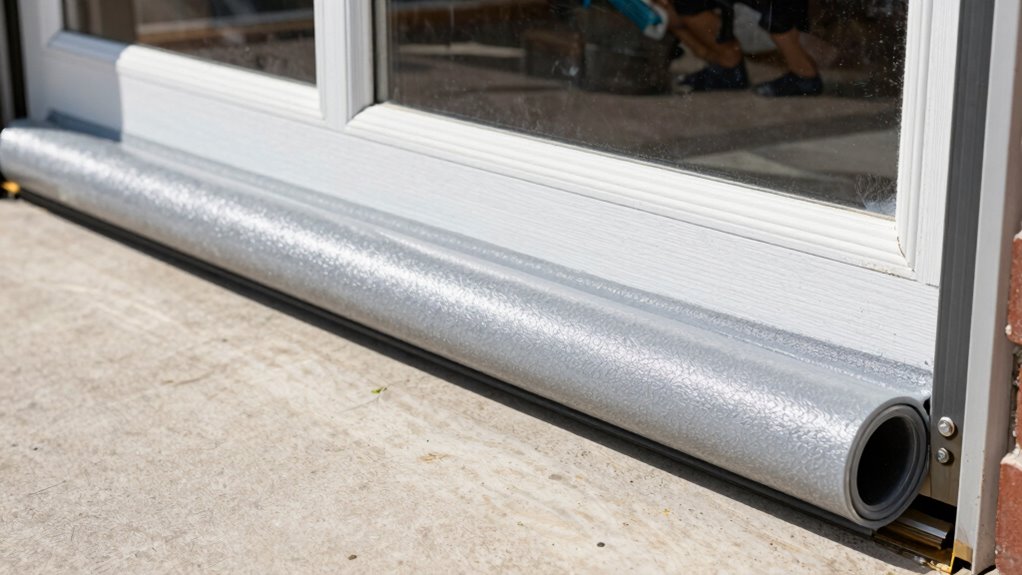
- Install or replace weatherstripping along garage door edges to create a tight, insulating seal.
- Regularly inspect and maintain seals, repairing or replacing damaged materials promptly for optimal efficiency.
- Consider professional assessment for persistent leaks or complex sealing needs beyond DIY capabilities.
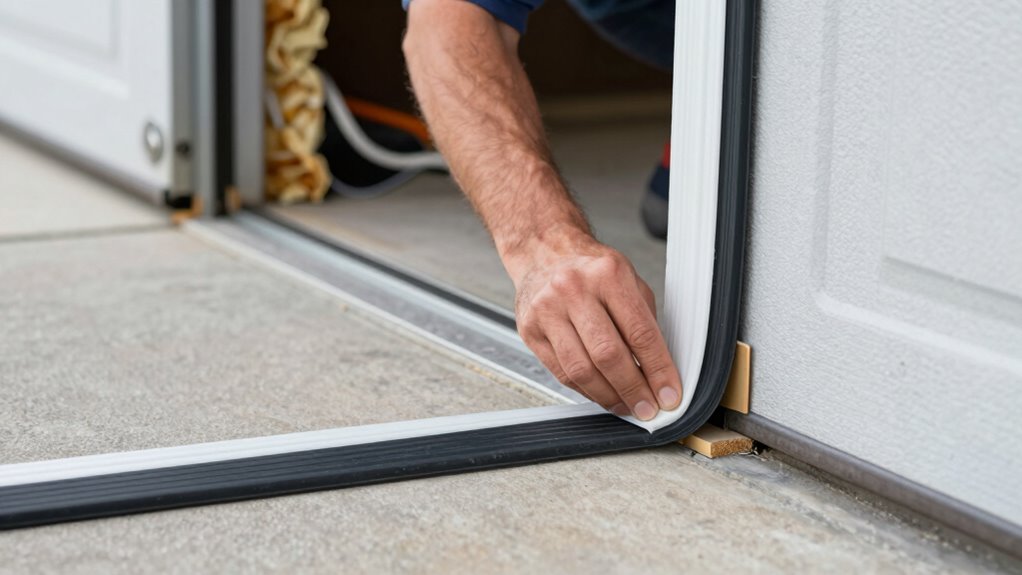
garage door weatherstripping
As an affiliate, we earn on qualifying purchases.
As an affiliate, we earn on qualifying purchases.
Why Sealing Garage-Air Leaks Boosts Home Efficiency
Have you ever wondered how small gaps between your garage and house can impact your energy bills? Sealing these gaps improves your home’s efficiency by preventing heated or cooled air from escaping, which reduces your energy costs. When you seal gaps, you also enhance indoor air quality by limiting drafts that can bring in dust, pollen, or pollutants. Additionally, sealing helps prevent pests from sneaking inside through tiny openings, keeping your home cleaner and safer. A well-sealed garage acts as a barrier, making your HVAC system work less hard and reducing wear and tear. Proper sealing techniques are essential for long-term effectiveness. Understanding the contrast ratio in your home’s sealing can help you identify areas where the black-and-white differences in insulation are most noticeable. Using the right tools and materials, like weatherstripping and caulk, is crucial for achieving a tight seal that lasts over time. Regularly inspecting and maintaining these seals can further improve your home’s overall energy efficiency, saving you money in the long run. Incorporating proper insulation measures around garage openings enhances the effectiveness of your sealing efforts. Overall, sealing garage-air leaks not only saves you money but also creates a healthier, more comfortable living environment.
caulk for sealing gaps
As an affiliate, we earn on qualifying purchases.
As an affiliate, we earn on qualifying purchases.
How to Identify Common Gaps Between Your Garage and House
Wondering where to start when identifying gaps between your garage and house? Begin by inspecting common entry points like the garage door seal, around windows, and door frames. Look for cracks or gaps in the insulation installation, especially near the foundation or corners. Pay attention to areas where the drywall meets the ceiling or floor, as these often let air escape. Check for poorly sealed vents or gaps around ventilation improvements, such as exhaust fans or HVAC openings. Feel for drafts with your hand or use a lit incense stick to spot air movement. Addressing these gaps early helps you target insulation installation needs and guarantees your ventilation improvements are effective, ultimately sealing leaks and boosting your home’s energy efficiency. Recognizing air leaks is a crucial step in improving home soundproofing and reducing noise infiltration. Additionally, using proper inspection techniques can help ensure no leaks are overlooked.
foam sealant for home insulation
As an affiliate, we earn on qualifying purchases.
As an affiliate, we earn on qualifying purchases.
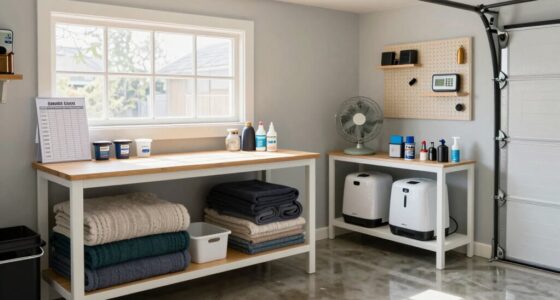
Tools and Supplies Needed to Seal Garage-Air Leaks
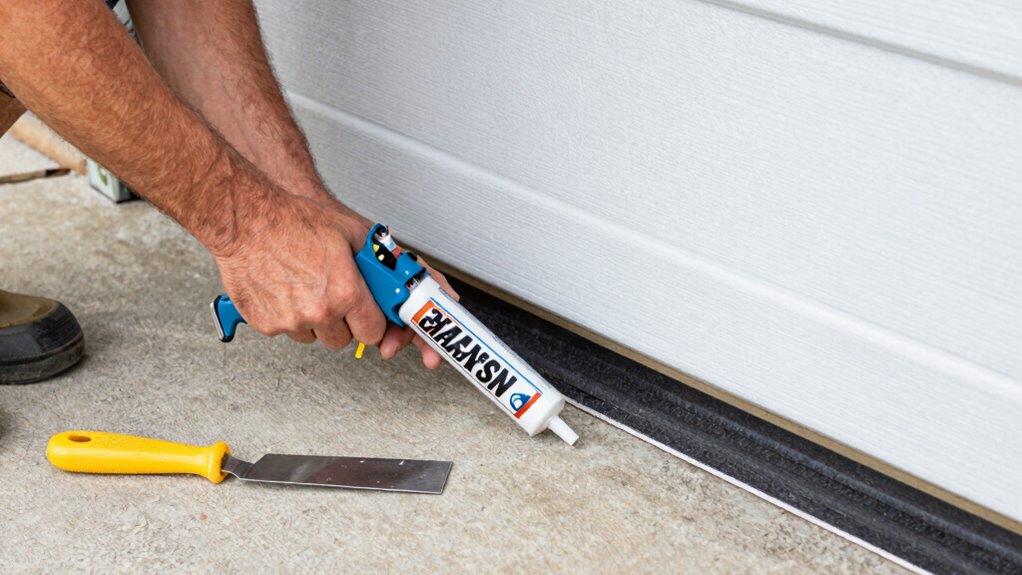
To effectively seal air leaks between your garage and house, you’ll need a selection of tools and supplies designed for sealing gaps and improving insulation. Start with a good air leak detection tool, like a smoke pencil or an infrared camera, to locate hidden leaks accurately. For sealing, gather caulk, foam sealant, and weatherstripping suitable for garage insulation. A utility knife helps trim excess materials, while a putty knife ensures smooth application. You might also need a caulking gun for precise application of sealants. For larger gaps, consider expanding foam or garage insulation panels. Having a ladder or step stool allows access to high or hard-to-reach areas. These tools and supplies make it easier to identify, access, and thoroughly seal gaps, reducing drafts and improving energy efficiency. Incorporating natural insulation methods can further enhance your sealing efforts and promote a more eco-friendly home.
air leak detection tools
As an affiliate, we earn on qualifying purchases.
As an affiliate, we earn on qualifying purchases.
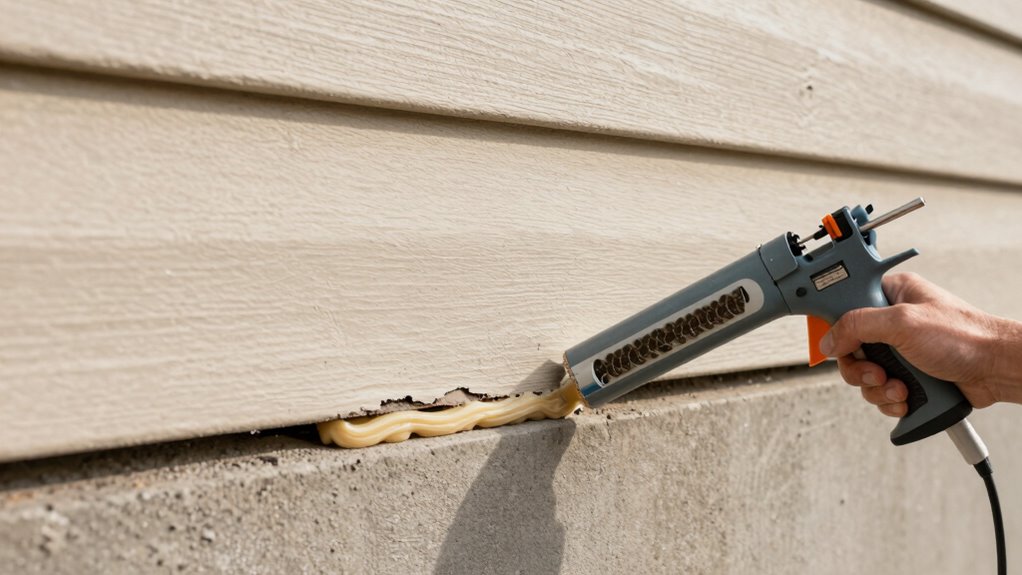
Step-by-Step Guide to Sealing Gaps and Cracks
Sealing gaps and cracks between your garage and house is a straightforward process that can greatly boost energy efficiency. Start by inspecting for obvious holes or cracks around corners, joints, and where different materials meet. Use appropriate insulation materials like foam or caulk to seal small gaps. For larger openings, consider weatherstripping or backer rods. Make sure your ventilation systems are sealed properly to prevent air leaks. Properly sealing these areas not only improves energy conservation but also preserves the history of craftsmanship and design in your home, much like celebrating the rich golf heritage and achievements of women in sports. Utilizing the right filter sizing/flow techniques can further enhance your system’s overall performance by ensuring efficient airflow and reducing strain on heating and cooling components. Additionally, understanding how to identify and detect air leaks can help you target problem areas more effectively. Regular maintenance of waterproofing around your garage can also prevent moisture intrusion that may contribute to air leaks. Use the following table as a quick reference:
| Area | Recommended Material | Notes |
|---|---|---|
| Small Cracks | Caulk or spray foam | Use for narrow gaps |
| Large Gaps | Backer rods & sealant | Fill wider spaces |
| Ventilation Openings | Weatherstripping & gaskets | Keep airflow controlled |
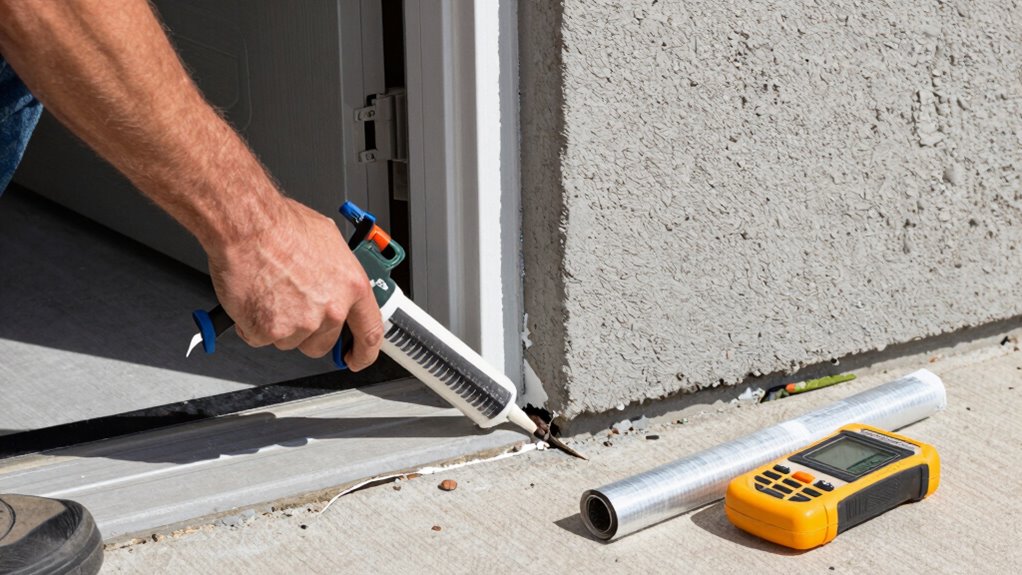
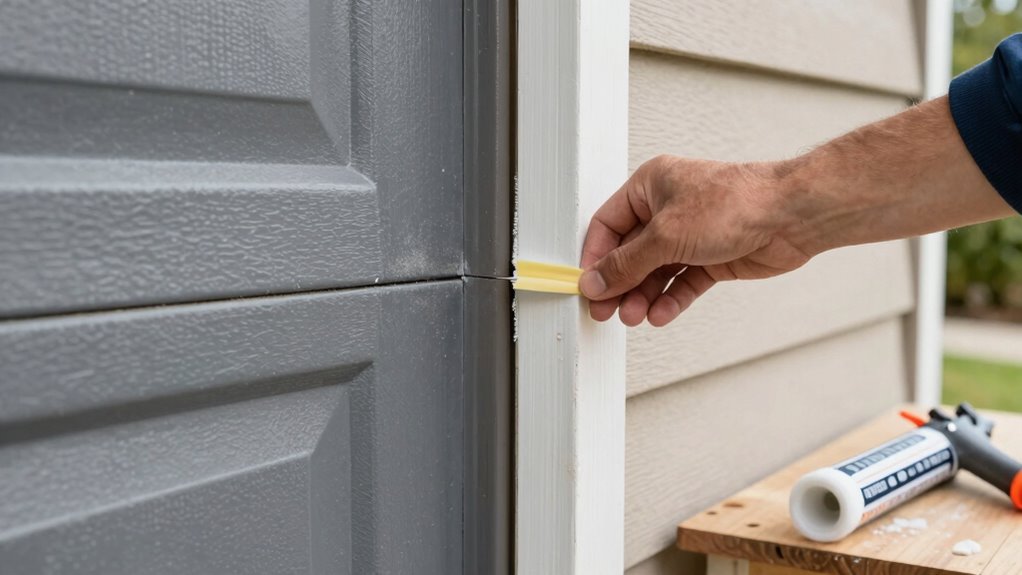
How to Seal Gaps Around Garage Doors and Windows
Gaps around garage doors and windows can let in drafts, increasing energy costs and reducing comfort. To seal these gaps effectively, start with garage door insulation. Installing weatherstripping along the door’s edges creates a tight seal that prevents air leaks. For windows, apply weatherproofing tape or caulk around frames to block drafts. Check for any cracks or gaps and fill them with appropriate sealants. Consider upgrading older weatherstripping or adding foam sealant where needed. Proper window weatherproofing keeps warm air inside during winter and cool air during summer. Regularly inspect these areas to catch new gaps early. Sealing gaps around garage doors and windows is a simple yet essential step to improve energy efficiency and maintain a comfortable indoor environment. Additionally, maintaining the integrity of weatherstripping can significantly enhance the overall effectiveness of your sealing efforts. Ensuring proper sealant application can also prevent moisture intrusion that may lead to mold or damage over time. Using appropriate sealants designed for exterior use can further prolong the longevity of your repairs. Incorporating regular inspections helps identify and address potential issues before they worsen.
Tips for Achieving an Airtight Garage Door Seal
To get a tight seal on your garage door, start with proper weatherstripping installation, ensuring it fits snugly along the edges. Make it a habit to regularly inspect the seal for wear and damage, replacing sections as needed. These simple steps help maintain an airtight barrier and keep your energy bills in check. Additionally, choosing the right environmentally-friendly materials for your weatherstripping can further enhance sustainability and effectiveness. Incorporating Victorian steampunk design elements into your weatherstripping choices can also add a unique aesthetic touch to your garage. Regular maintenance and selecting durable weatherstripping materials will ensure long-lasting performance and a more energy-efficient home. Being mindful of privacy policies and how your data is handled can also contribute to a safer and more transparent home improvement process. Staying aware of safety tips for portable oil radiators can also help prevent hazards when using heating devices during colder months.
Proper Weatherstripping Installation
Achieving a tight seal around your garage door begins with proper weatherstripping installation. First, remove any old or damaged weatherstripping to ensure a clean surface. Measure carefully and cut new weatherstripping to fit the door’s perimeter. Apply the weatherproof paint along the door edges if additional sealing is needed, creating a barrier against drafts. Make certain the weatherstripping compresses slightly when the door is closed for an effective seal. Proper installation not only prevents air leaks but also enhances insulation, reducing energy costs. Consider insulation enhancements around the door frame to further block drafts. Regularly check the weatherstripping for wear and replace it when needed. This simple step is vital in maintaining an airtight garage and improving overall energy efficiency. Incorporating smart thermostats can further optimize your home’s climate control and energy savings. Additionally, integrating connected home technology can help monitor and maintain optimal conditions more effectively. Paying attention to regional climate can also guide you in selecting the most suitable weatherstripping materials for your area, especially since Vetted options are available for different environments.
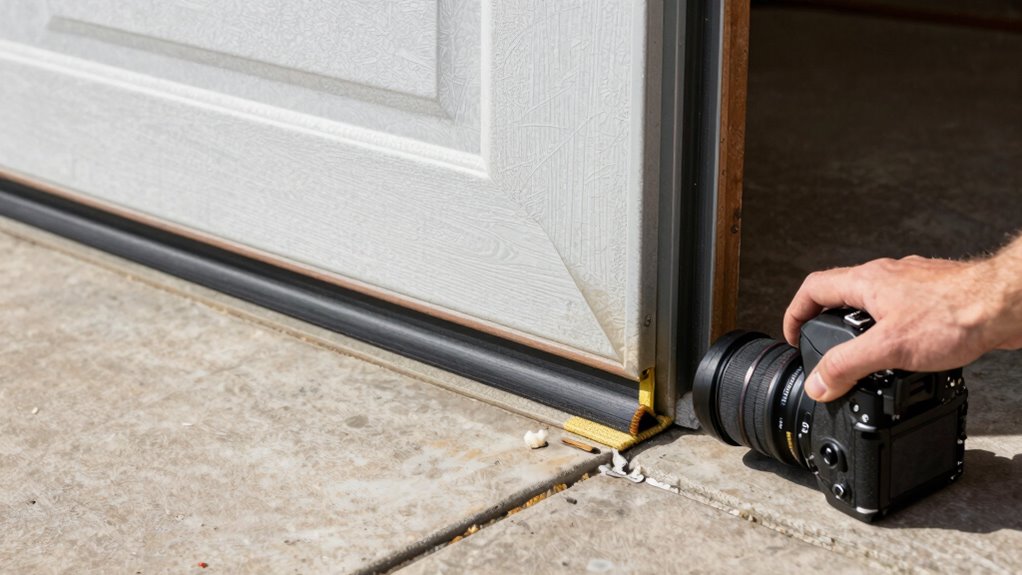
Regular Seal Inspection
Regularly inspecting the seal around your garage door guarantees it stays airtight and prevents drafts from sneaking in. This check helps maintain indoor air quality and keeps pests out. Look for cracks, gaps, or worn areas, especially around the edges. If you notice damage, replace or repair the seal promptly. Use the following table to guide your inspection:
| Inspection Tip | What to Look For |
|---|---|
| Visual Check | Cracks, tears, or loose edges |
| Feel for Drafts | Cold air seeping when door is closed |
| Pest Entry Points | Small holes or gaps around the seal |
Consistent inspections assure your garage remains sealed, improving energy efficiency and pest prevention.
Maintaining Your Garage Seal for Long-Term Energy Savings

To keep your garage seal effective over time, you should regularly inspect it for damage or gaps. Choosing durable, weather-resistant sealants helps maintain a tight seal, especially through seasonal changes. Incorporating seasonal maintenance tips guarantees your seal stays intact and saves energy year-round.
Regular Inspection Practices
Performing regular inspections of your garage seal is essential to guarantee it remains effective over time. Check for cracks, gaps, or deterioration that could compromise the seal’s integrity. Regularly inspect areas near ventilation systems, as leaks here can impact indoor air quality and energy efficiency. To stay proactive, consider these key practices:
- Visual Checks: Look for visible damage or wear around the seal and door frames.
- Use a Smoke Test: Release smoke or a dry brush near potential leaks to see if airflow indicates gaps.
- Monitor Indoor Air Quality: Notice any musty odors or increased dust, which may signal seal deterioration affecting ventilation.
Consistent inspections help maintain a tight seal, improving energy savings and indoor air quality over time.
Effective Sealant Choices
Choosing the right sealant is key to maintaining a tight garage seal that lasts. There are various sealant types available, each suited for different materials and conditions. For instance, silicone sealants work well for flexible, waterproof sealing around doors and windows, while polyurethane offers durability for larger gaps and cracks. When selecting sealants, consider their ability to block air leakage effectively and withstand temperature fluctuations. Properly applied, these sealant types can greatly reduce air leakage, improving your home’s energy efficiency. Remember, the quality of your sealant directly impacts how long your garage stays sealed and energy-efficient. By choosing the appropriate sealant, you ensure a long-lasting barrier against air leaks, saving you money on energy costs over time.
Seasonal Maintenance Tips
Seasonal changes can take a toll on your garage seal, making regular maintenance essential for long-term energy savings. To keep your seal effective, inspect it before each season. Proper maintenance helps improve indoor air quality by preventing drafts and pollutants from entering your home, and it also keeps pests out.
Here are three key tips:
- Check for cracks or gaps and reseal as needed.
- Clean and replace weatherstripping to ensure a tight seal.
- Regularly inspect and maintain seals around doors and windows for consistent pest prevention.
When to Call a Professional for Air Leak Repairs
While small air leaks can often be sealed with DIY troubleshooting, there are times when calling in a professional is the best choice. If you encounter persistent leaks despite your efforts or notice significant drafts, it’s time to seek expert help. Emergency repairs are vital if leaks compromise your home’s energy efficiency or cause safety concerns, such as potential fire hazards near garage appliances. Professionals have the tools and experience to identify hidden leaks that DIY methods might miss. Additionally, if you’re unsure about the cause of the leak or uncomfortable working with insulation or sealants, calling a pro can save you time and prevent costly mistakes. Knowing when to escalate to a professional ensures your repairs are effective and long-lasting.
Frequently Asked Questions
Can Sealing Garage Leaks Reduce Heating and Cooling Costs Significantly?
Sealing garage leaks can considerably boost your home’s energy efficiency and reduce heating and cooling costs. When you seal gaps, you prevent drafts that cause your HVAC system to work harder. This insulation improvement keeps warm or cool air inside, lowering energy bills. By sealing leaks effectively, you’re making your home more comfortable and decreasing your carbon footprint, all while saving money over time.
Are There Eco-Friendly Sealants Suitable for Garage-To-House Gaps?
Yes, there are eco-friendly options available for sealing garage-to-house gaps. You should look for non-toxic sealants made from natural or low-VOC materials, which are safe for your family and the environment. These sealants effectively block drafts while reducing chemical emissions. Using eco-friendly, non-toxic sealants helps you improve energy efficiency without compromising health, making them a smart choice for sealing gaps between your garage and house sustainably.
How Often Should I Inspect and Reseal Garage Air Leaks?
You should inspect and reseal garage air leaks at least once a year, especially before winter and summer. Regular inspections help identify gaps in garage insulation and prevent energy loss. Use various sealant types—caulk, foam, or weatherstripping—based on leak size and location. By maintaining consistent checks and resealing when necessary, you guarantee peak insulation, reduce energy bills, and keep your home more comfortable year-round.
Will Sealing Leaks Prevent Pests From Entering Through Gaps?
Sealing leaks between your garage and house can effectively prevent pests from entering through gaps. When you secure these gaps, you block pest entry points and reduce the chance of insects or rodents sneaking inside. Proper sealing creates a barrier, making it harder for pests to find their way in. Regularly inspecting and maintaining these sealed areas ensures ongoing gap prevention and keeps your home pest-free.
Are There Specific Safety Precautions When Using Sealing Tools and Materials?
Sealing leaks is like tightening a ship’s hull—safety comes first. Always wear safety gear, including gloves and goggles, to protect yourself from sharp tools and fumes. Make certain proper ventilation precautions to avoid inhaling potentially harmful fumes from sealants or adhesives. Keep your workspace organized, and follow manufacturer instructions carefully. By prioritizing safety gear and ventilation, you shield yourself from harm and make your sealing project smooth sailing.
Conclusion
Sealing those garage-air leaks can make your home more comfortable and save you money, much like a trusty old abacus kept calculations in check. Regularly inspect and maintain your seals to guarantee they stay tight, preventing drafts and moisture from sneaking in. Remember, even the most diligent homeowner benefits from calling in a pro when the job’s beyond your reach. With patience and care, you’ll keep your castle cozy and energy-efficient for years to come.